The ULTIMATE Guide To Becoming An Artist In 2024
Disclosure: This article may contain affiliate links. That means if you buy something we get a small commission at no extra cost to you.

Want to learn exactly how to become an artist in 2024 AND how to get started?
You must have seen plenty of Youtubers and Instagrammers creating mind-blowing art. Art that you might want to make as well.
Being inspired, you may have grabbed a pencil to draw…..only to realize that you can’t. You might have beaten yourself up about it, thinking that you need TALENT to make it.
You may be feeling that you can’t make it as an artist and all your hopes and dreams are dashed.
Well, I’m here to tell you that you are wrong.
Yes, you heard me right. You are WRONG.
You definitely CAN do it.
ANYONE with a serious determination to become an artist can do it.
But to become an artist you need to know exactly where to start and how to achieve your dream.
In this detailed guide, I’m going to explain EVERYTHING about becoming an artist and what it really takes to achieve your dream life.
I have experienced a LOT of challenges on my art journey and I’m going to explain everything so that you don’t have to experience the same difficulties.
By going through this complete guide, you’ll know the exact way you can become an artist and will learn about a TON of resources that are going to help you immensely. Click right here if you want to jump down to learn how to become an artist by yourself.
Grab a chair, a piece of paper, and a glass of coffee. You’re going to need them all as we go through this guide together!
The ULTIMATE Guide to Becoming An Artist in 2024
But Who Am I To Tell You About This?
For the past two years, I’ve spent an INSANE amount of time researching on the various different kinds of art resources available.
And this is all because I had the misfortune to go to a REALLY bad art school. Where teachers were scarce as well as inexperienced.
Due to these circumstances I knew I had to find a way to learn art all by myself. Which how I stumbled on many life-changing courses and well as books.
And just so that YOU don’t have to waste a lot of time finding art material for yourself, I created this website. You’ll find everything you need to know about art right here.
But, I’m not going to lie to you. Becoming an artist is MUCH harder than you think.
But it IS possible, and I’ll show you exactly how.
So, without further ado, let’s get started with this guide.
TIP: This guide has a LOT of information that will come in handy for all beginners. Don’t feel the need to finish it in one go. Bookmark this page and come back whenever you have time or whenever you’re ready to move on to the next stage of your art journey.
What Are Artists?
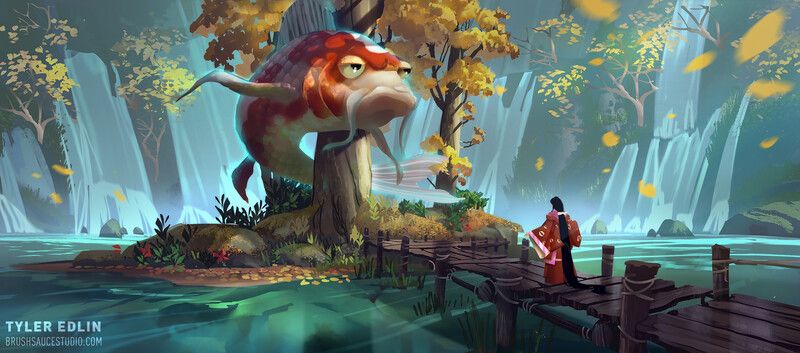
First of all, let’s talk about a bit about artists, because there’s a whole BUNCH of misconceptions about this.
I know you probably know this, but I just want to clarify a few that are still confused.
No, artists do not starve. Yes, art can actually be a career. And a big fat NO to anyone who thinks that art is a mysterious force that only a few can understand.
Now that we’ve got that out of the way, let’s talk about what artists actually do.
You might be thinking that becoming an artist means:
- Getting involved in sculpting
- Painting landscapes
- Drawing portraits in parks around town.
I’m here to tell you that art is more than that.
Yes, several amazing fine artists work and earn money that way. However, the field of art has WAY more opportunities than that.
You can become a character designer, a costume designer, or even a 3d modeler.
You may not have to ever touch a brush and can spend your whole career painting and drawing digitally using a tablet.
The opportunities are truly endless.
Types Of Art Careers
There are plenty of art careers to choose from.
You should experiment around and try everything before finally settling and choosing one. Before that, just let your mind wander and understand all the different options that are available to you.
Below, I’ve listed just a few of the many jobs that are in the art industry. This is just to give you an idea of the variety of options that are available to you.
1. Graphic Design
This field has a lot to do with layout design and creating visual content that conveys strong intent and emotions.
So, think of digital media, layout design, and logo design. Graphic designers specialize in what they like best and are hired to communicate with the public through art.
2. Character Design
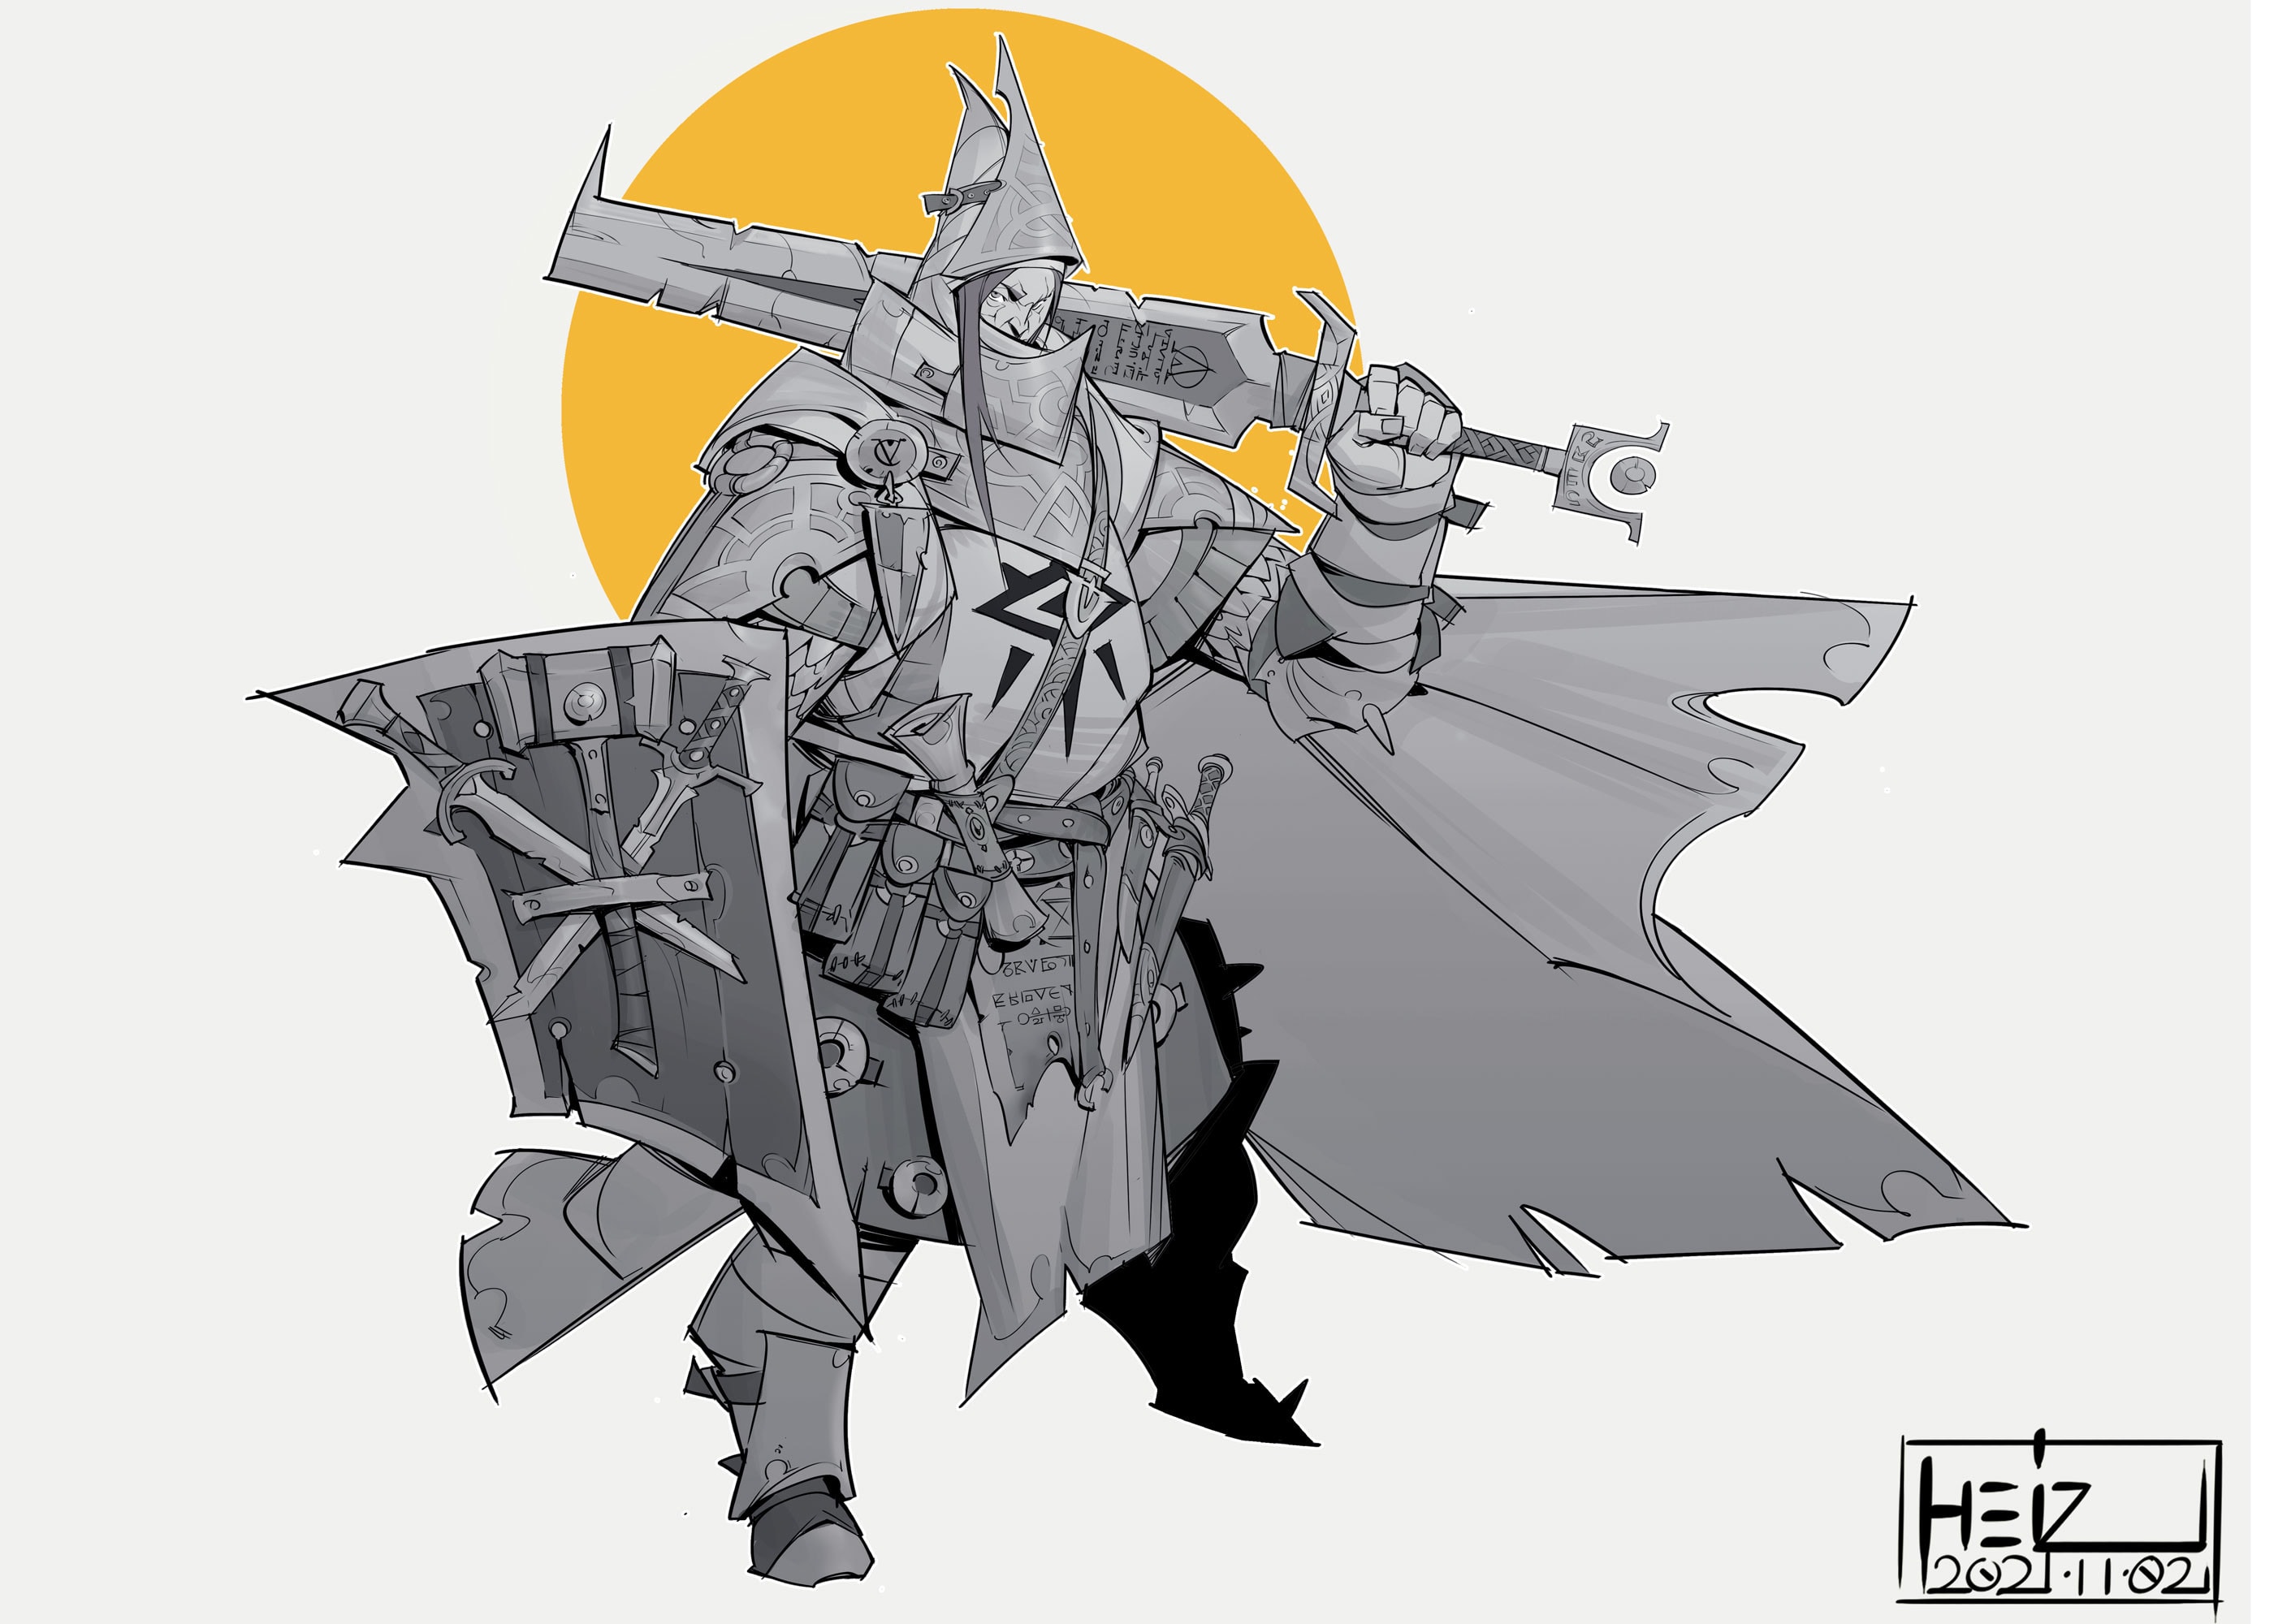
Character designers work in either films or games. They basically design ALL the characters you see in entertainment art.
It’s also a really intense and competitive job with so many artists interested in this field. If you love developing original characters from different worlds and backgrounds then this is a potential career you can consider.
3. Environment Design
Environment designers build the backgrounds and environments you see in games and films.
The environment is normally built using 3d software, so you would need to be proficient in modeling as well.
This field is quite in demand and pays well too. If you enjoy the idea of creating fantasy worlds from scratch and being a part of that process then this job may be the one for you.
4. Concept Design
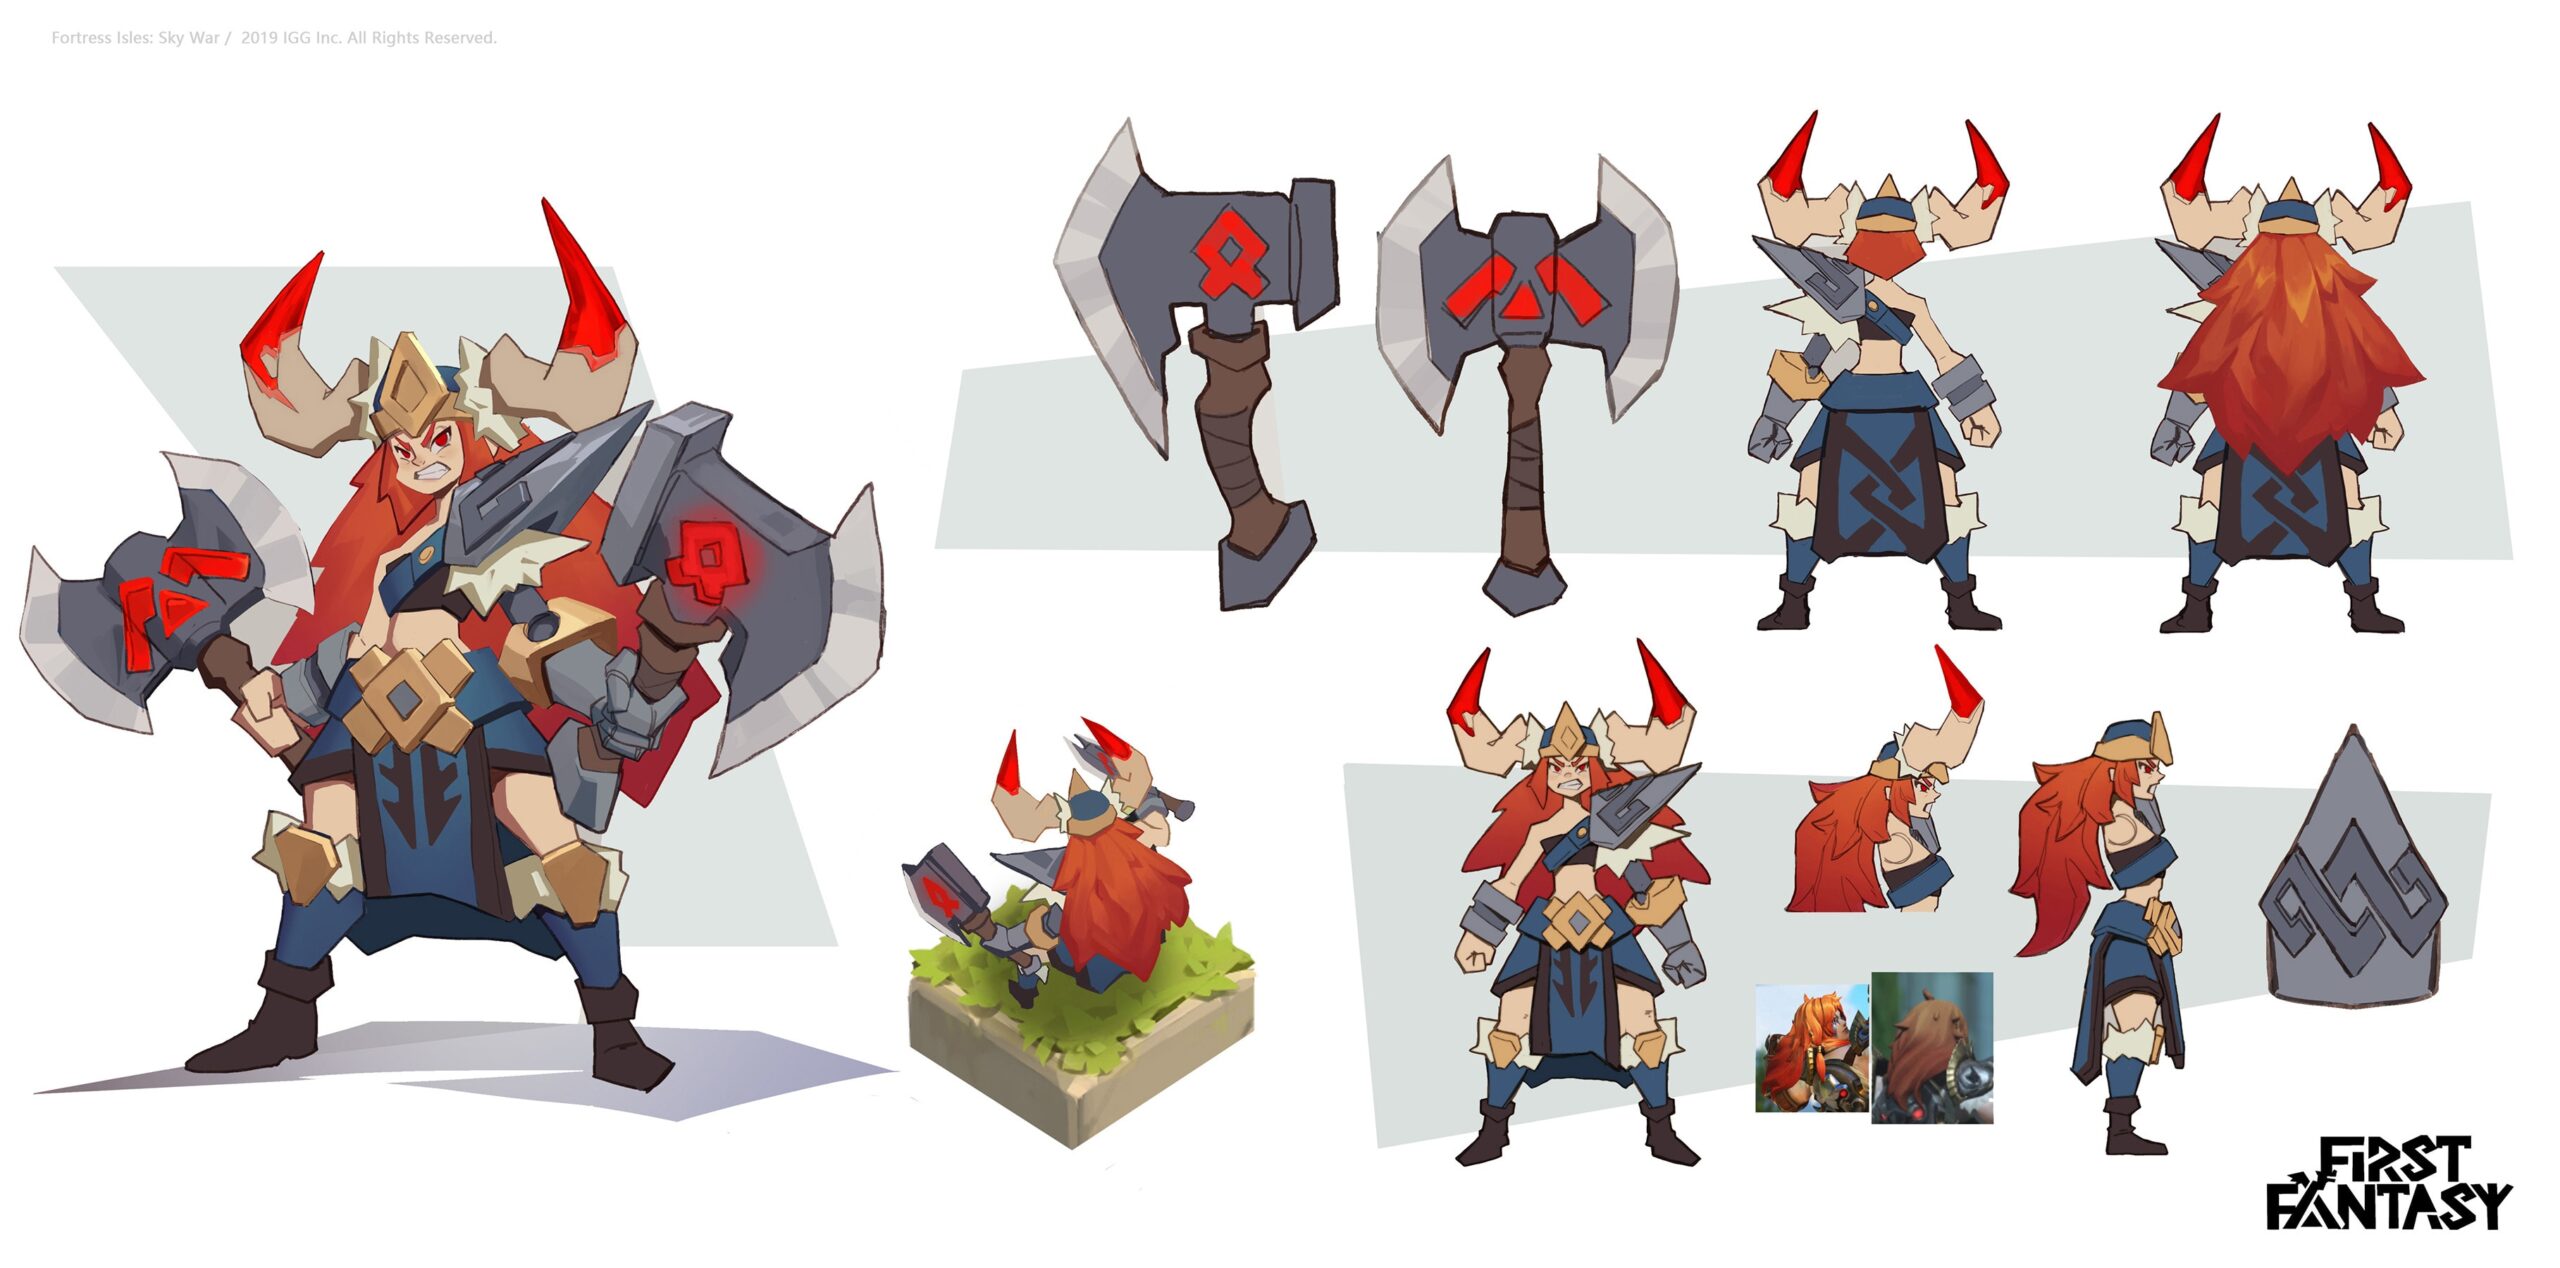
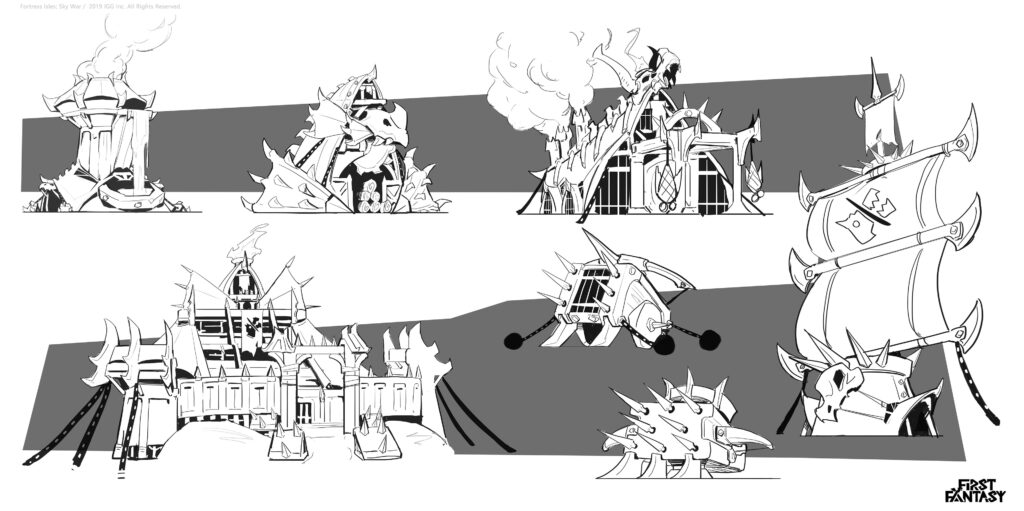
Concept designers are part of the pre-production phase. Unlike common belief, concept artists don’t spend their time making fancy illustrations and splash art.
They are essentially DESIGNERS. Concept designers design all the props, environments, weapons, and vehicles that you see in entertainment art. They literally build it from scratch.
This is a very demanding job, mentally and physically but if you love it, then you’ll find it a joy to work every day.
5. Illustration
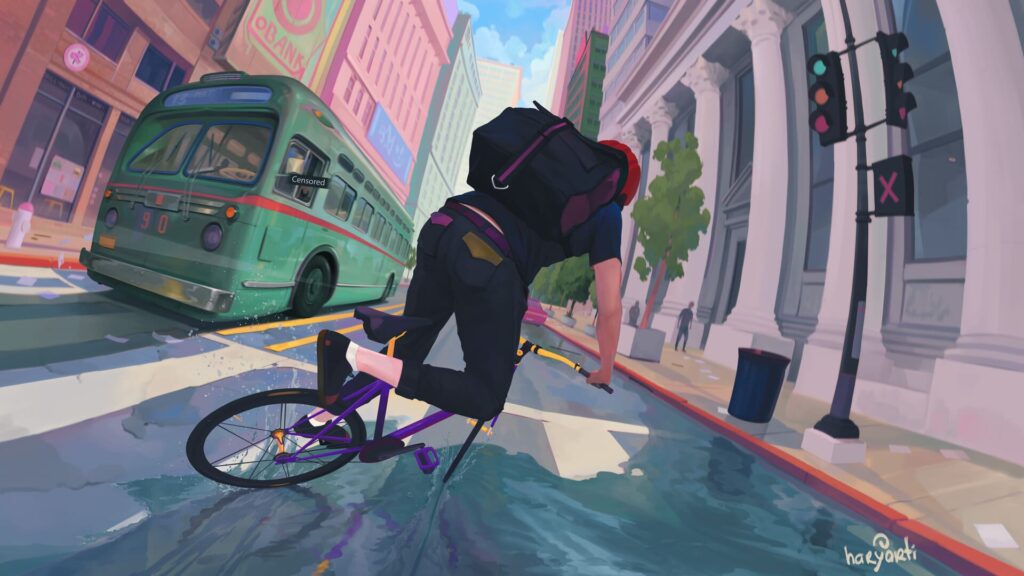
Illustrators are not the same as concept artists. They work in the post-production phase and make all the amazing splash art that you see.
It’s an intense job as you have to be REALLY skilled in rendering, anatomy, lighting, and color. Basically, you need to be well-versed with ALL the art fundamentals to become an illustrator.
6. Visual Development
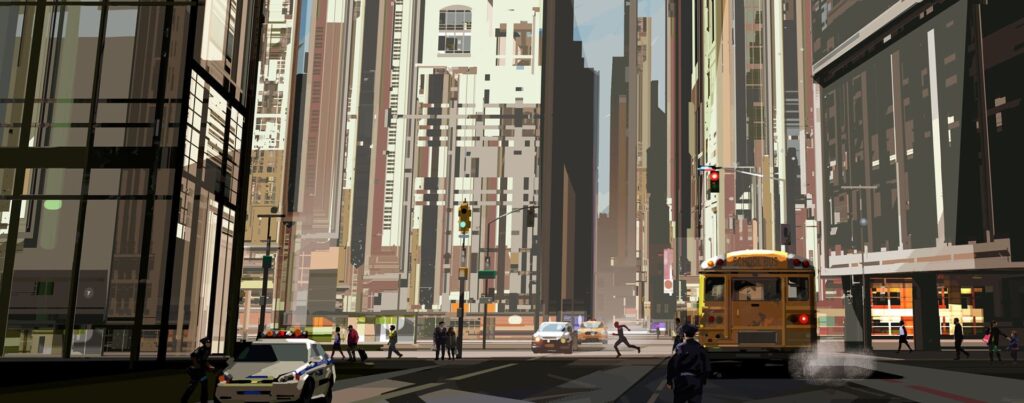
This overlaps a bit with concept art but has a slight difference which I’ll explain straightaway.
Visual development has a lot to do with the look and feel of the film/game. While concept artists actually design all the props and materials you see, the visual development artists give an idea of what the end result of the film/game would look like.
Just remember that concept artists design. Visual development artists display a sneak peek of the end result.
7. 3d Modeling

When you see objects in a video game, you notice that the objects look really life-like. This is because they are 3d objects.
These 3d objects are actually built by 3d modelers using 3d software such as Maya, Blender, Zbrush, etc.
In fact, most of the animated films as well as games today are built using 3d software.
Therefore, the need for 3d artists is quite prevalent and important to the industry. If you particularly like using software and are more interested in the technical aspect of art, you can consider giving 3d modeling a try.
What Are The Art Salaries That You Should Expect?
Well, it depends.
It depends on:
- The job you choose
- The country you live in
- Your skill level
However, any artist in the entertainment industry should expect entry-level jobs to be around 40,000 USD.
Once you’ve got a few years of experience under your belt, the salaries tend to get much higher.
Senior artists’ salaries range from 80,000 USD to 100,000 USD in the USA.
Some skilled artists even earn 100,000+ USD per year. Art directors generally earn more than the normal artist, but that requires years of experience.
DISCLAIMER: These salaries are an estimate based on Glassdoor salaries. They do NOT reflect the salaries in your country and area of expertise. They are just meant as a general estimate of the salaries you can expect in the art industry.
Therefore, artists do earn pretty well and your salary can go higher depending on your skills, work experience as well as country of residence.
Is Becoming An Artist Really Hard?
In a word? Yes.
Of course, it’s hard.
It requires dedication, hard work, LOTS of practice, and struggle. There will be a lot of moments of doubt when you will really question yourself if it’s worth it.
However, every other job is the same. Anywhere you go, you will have to put in the work to see any results.
But, if this is what you love doing then you should go for it.
Nothing should stop you if you genuinely feel that creating art for a living is going to make you happy.
SO REMEMBER: Choose what you love doing. If you have an immense passion for art, then you will definitely make it, no matter how hard it is!
Do You Need To Go To An ART SCHOOL?
The answer would be no.
You don’t have to go to art school to become an artist.
BUT, let me ask you a few questions:
- Do you have the financial means to study at an art school?
- Do you generally procrastinate a lot?
- Do you live in a country where art schools are plenty?
- Does your country give you scholarships or some form of subsidy if you go to an art school?
- Do you avoid connecting with other artists?
- Do you fail to complete your goals regularly?
If ANY of the answers to the questions above is a yes, then I think you NEED to seriously consider attending an art school.
The Benefits Of Art School
For most people, I would really advise you to attend an art school.
This isn’t because you can’t make it without formal education, but because there are other advantages to art school that you haven’t considered yet.
And these are the benefits:
- Art school is going to set a rigorous curriculum for you to gain a taste of life in the industry
- Homework is key. The homework you complete in art school is going to challenge you immensely. You’re definitely going to hate it, but like it or not, it will teach you a LOT about art and you’ll improve faster as a result
- Going to art school will give you the consistency that you NEED to develop your skills faster
- Art school is going to teach you discipline. It will really come in handy in your professional journey
- Meeting with other artists will inspire, motivate, and help you strive to become better. After all, healthy competition will bring out the best in you
- You will gain a lot of industry connections as a result of art school, which will be priceless once you graduate and search for jobs
- You get DIRECT mentoring from teachers and instant critique which will further your progress
If you want to become an artist, then going to art school is a MUST.
However, if it is just not a possibility for you, then don’t worry. I’ve got your back.
Learning Art By Yourself
WARNING: This is going to be really hard to do. You’re going to need an INSANE amount of discipline to make it big as an artist. However, if you pull it off, then you’ll earn SO much respect.
Learning art by yourself is a long and arduous path that will take a few years at the bare minimum. Don’t expect to get better instantly as this will require a great deal of time.
The way to think about this is to think about how professional artists work.
Learning From The Pros
Professional artists have a TON of artwork in their portfolios. And they all look STUNNING.
So how do they do this?
Are they born this way? Or do they have some secrets that allow their hand to magically create those beautiful artworks? What is the exact reason?
The answer is simple.
They worked every SINGLE day.
That’s it. That’s the main secret.
They showed up and practiced every day to reach the level you see right now. This may seem like an oversimplification to you, but it’s ACTUALLY that simple.
You need to work hard to see results.
Professional artists work when they’re tired, bored, and even exhausted with art. But they still work. They have discipline, drive, and an amazing mindset.
That’s what separates them from an amateur artist.
Why Would Drawing Everyday Help You?
There was an article published a while ago that stated that you needed 10,000 hours of practice to achieve mastery in ANY field.
The article was discredited, as there are plenty of other factors involved, such as quality of work, external factors, quality of sleep, exercise, etc.
Only quantity cannot be the driving force behind mastery of a field.
But, you can’t deny that there is some truth to the fact that practicing more will make you:
- More skilled
- Significantly more confident
- Give you TONS of experience
- Will develop your hand-eye coordination
- Improve your visual library
TIP: A visual library is a mental library you have of all the objects, people, places, and experiences you’ve seen. The larger the visual library, the better you will be at drawing from imagination.
After all, the truth of the matter is:
Drawing More = Improving Faster
How Often Should You Draw?
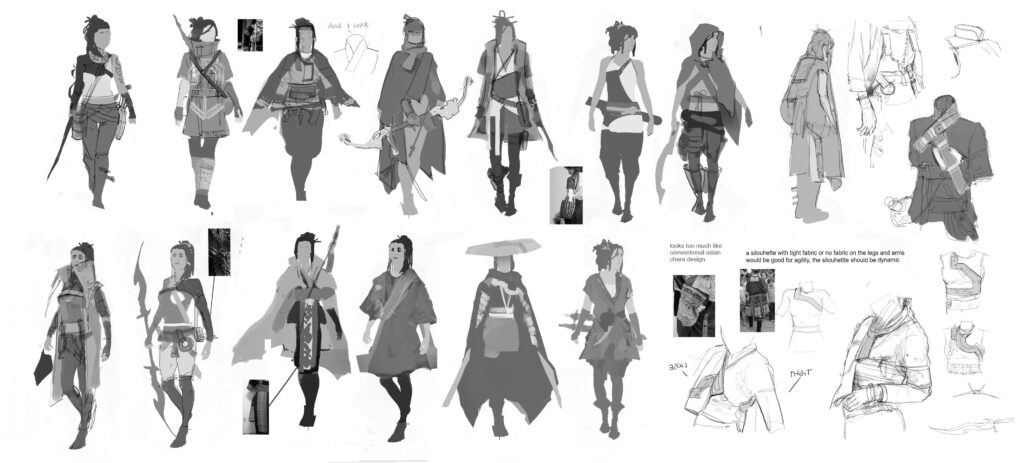
TIP: I give a LOT of advice on how to draw everyday but it doesn’t have to only be drawing. It could be anything from painting to 3d modeling. All the advice is basically for you to work on your craft and get better at it.
So, does that mean that you should draw every day non-stop?
No, you shouldn’t. And you won’t even be able to sustain that level of intensity. If you’re confused, let me put it this way.
Do you think you can draw 25 pages in one day?
Most of you would say yes. It might be hard but you could do it if you really wanted to.
That’s great. But, what if I tell you to draw 25 pages a day for 7 days straight? Would you be able to do it?
Now you may be thinking, “Whoa. That’s a lot. It’s a crazy idea but I could probably do it. I’ll just need a lot of coffee.”
That’s also wonderful.
BUT, what if I tell you to draw 25 pages a day for a year? Could you do it? I’m sure each and every one of you would say no. And rightfully so. You would go a bit crazy trying to complete the quota EVERY single day.
The Smarter Approach To Drawing Every Day
Now, what if I asked you to draw one page every day.
Just ONE page. Every day. For a year.
Could you do it? Of course, you could! It’s quite easy.
Now do the math. If you drew 25 pages a day for a week, that equals 175 pages. But, if you drew one page EVERY day for ONE year, that would equal 365 pages.
You may be thinking that you could easily finish one set of 175 pages in a week and then do it one more time.
But, you won’t be thinking about:
- The toll that would have on your mental health as well as your physical health
- The quality of the drawings
- If you could learn anything from the whole experience
So, it’s SO much better to take it easy and draw every day consistently instead of going crazy for a few days and then giving up altogether.
ALSO, you don’t only have to draw one page. If you draw 3 pages a day instead of one (a totally doable target) you would end up with over 1,000 pages in a year! That’s 4 whole sketchbooks!
How To Draw Every Day?
So now that I’ve convinced you to draw every day, let’s get into how to actually achieve the target.
I know and you know that you probably won’t be able to draw EVERY day no matter how hard you try.
Motivation Is Over-rated
You may have a BOATLOAD of motivation, but it’s going to mean nothing. Why? Because motivation is overrated and runs out pretty quickly.
Don’t rely on motivation as it’s really not going to get you anywhere.
You may have made New Year’s Resolutions this year. Did you complete any of them? Did you even complete ONE of them?
You could have started one resolution but I’m 100% sure that you would have given up by the second week of January.
This is just because your motivation ran out.
So, be smart and choose to rely on discipline instead. Build a habit and you will never have to worry about missing a day.
How To Build A Drawing HABIT?
Building a habit is actually easier than you think.
All you have to do is understand yourself and trick yourself a little bit. Once you do that, you’ll have a habit that will bring you a great deal of positive energy every day.
TIP: You can read a lovely book called ‘Atomic Habits’ by James Clear to understand MORE about habit formation and how to improve yourself every day.
But, I will go over the most important bits that you need to keep in mind.
STEP 1- Analyze Yourself
Bring out that sheet of paper and write down your entire daily schedule.
I want you to write down all the small habits that you repeat EVERY day. These need to be written down and you need to choose one that you will pair with your drawing activity.
STEP 2- Habit Stacking
Choose any one of your daily habits. For example, you drink coffee in the morning. Pair your drawing habit with your coffee time.
Write down:
I WILL draw at _______ (time) EVERY DAY while I have my coffee.
STEP 3- Reward Yourself
Each time you complete the habit, you’re going to reward yourself with some small treat. It could be anything you love like playing with your pet, a small chocolate, gaming for an extra 15 mins, etc.
Choose something that will get you excited and that will make you happy to draw every day.
STEP 4- Change Your Environment
If you tend to get distracted easily while drawing or concentrating, a good idea is to change your surroundings. Try moving out and finding a better place to draw.
You can try going to different places for a change, such as a library, a cafe, a garden, etc.
STEP 5- Surround Yourself With Things That Motivate You
Whether it be your phone wallpaper, a poster, or even a tattoo (I’m just kidding). Surround yourself with things that motivate you.
Put up art posters around your workspace. Decorate your drawing area with things that you love. Showing up to draw every day will get much easier this way and you won’t lose interest easily.
STEP 6- Make It As Easy As Possible
If you’re going to work in the morning, then set everything up the night before.
Sharpen your favorite pencils and keep your sketchbook ready in the perfect place for you to wake up and instantly start drawing. Don’t leave the tedious part of the work in the morning when you just want to start drawing.
TIP: Again, you can replace drawing with anything else. If you’re painting digitally, then you can ready your tablet and place it in the perfect spot.
ART Fundamentals
Now that we’ve gone over how to draw every day consistently, let’s finally get into the most important part. Learning the art fundamentals.
Let me start off by explaining something to you.
Learning the art fundamentals is SUPER important.
Imagine you were a baker. Do you think you could get by without learning how to make cake batter?
It’s the same in art. Without learning the base, all you would be left with is a bunch of icing without any cake. Your art will lack structure and will just look weird.
So learning the fundamentals is not an option. If you want to become a professional artist, then it’s a MUST.
ART Fundamentals
Reasons You NEED To Learn Art Fundamentals
- It is the ONLY thing that will improve your skills
- Mastering the art fundamentals will help you bridge the gap between an amateur and a professional
- The art fundamentals are constant for any type of artist. It doesn’t matter whether you want to be a character artist or a visual development artist
- The ART FUNDAMENTALS are literally like the laws of the art world.
- You can break the rules but you need to master them to be able to break them
- It is CRITICAL to your success as an artist and will help you immensely in your art career
Can You Avoid Learning Them?
If you still have this doubt then let me clear it up for you one last time.
NO. You CANNOT avoid them. They are SO important.
It may take a lot of time to learn them right now but you will forever be grateful you stopped to learn them.
If you skip them right now, you’ll only go so far before coming right back to square one. You will waste even more time trying to skip this part.
So heed my warning. This is NON-NEGOTIABLE.
Once you master the art fundamentals, I promise you, you’ll be able to draw anything under the sky. So take the time to understand them well. You will improve IMMENSELY as an artist.
Now that we’ve got that out of the way, let’s talk about what they are.
So WHAT Really Are The Art Fundamentals?
The generally agreed consensus is that there are 6 art fundamentals.
They are:
- Anatomy
- Perspective
- Form and Structure
- Light and Shadow
- Color
- Composition
These are the main building blocks of your art journey. If you’re going to learn art by yourself, then you NEED to center your art education around these.
After understanding each of these fundamentals in depth, you’re free to experiment around and build on them.
Also, these fundamentals are for everyone.
Whether you plan on becoming a digital or traditional artist, these fundamentals NEED to be learned. Even if you plan to work on the 3d side of things, I would recommend you have a basic understanding of them.
BUT How Do I Study Them?!
Okay, relax.
We’re going to get into that right now. You’ve finally reached the most anticipated part and I hope you’re comfortable as we’re going to take a look at exactly how you should study EACH fundamental in-depth.
TIP: If you can’t understand everything immediately, then don’t worry. Read everything calmly and just focus on understanding the main bits. All the resources I have mentioned will help you gain a LOT of knowledge about the fundamentals.
ANATOMY Is Fun
This is quite a broad topic.
By anatomy as a fundamental, I also mean gesture drawing, figure drawing as well as studying the bones and muscles of the body.
And let’s not even talk about figures interacting with each other or figures in perspective. That stuff is complicated and is not necessary for beginner artists anyway.
So, let’s talk about the basics.
Reasons To Learn Anatomy
- You’ll be able to draw any human you want! How cool is that?
- It’s not just limited to humans. You can also draw any animal or insect you want!
- Your figures won’t look awkward and strange in your drawings
- This is a must for ANY artist
Start Off With Gesture Drawing
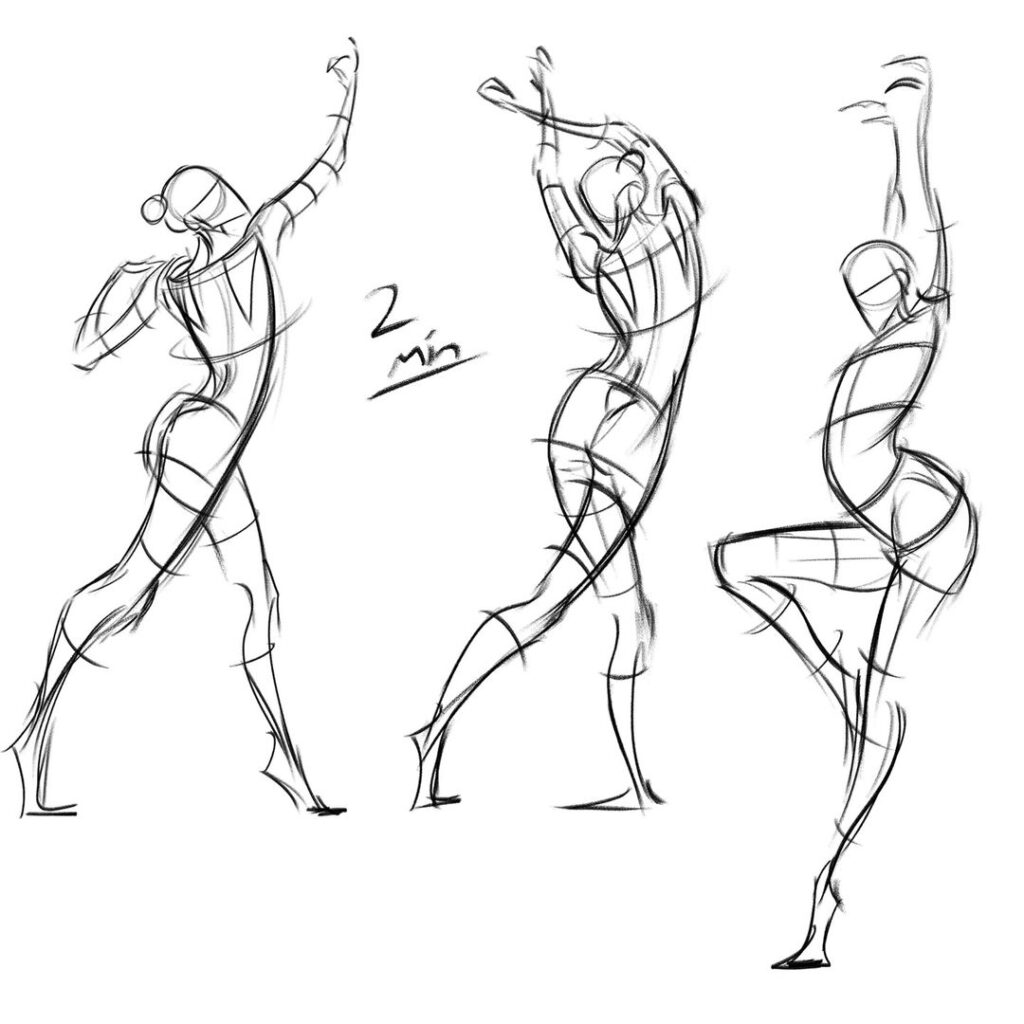
Let’s face it.
Stiff figures in a boring standing position are so overrated. You need dynamic poses to instantly elevate your drawings. Gesture drawing is the thing that’s going to get you there.
Learning anatomy and figure drawing right away will really stiffen up your drawings. That’s why you need to start with gesture drawings.
Gesture drawing is literally the bare bones of the figure.
Once you get the gesture drawing correct, building the figure on it will make it much easier. It’ll also end up looking MUCH more fluid and dynamic.
TIP: When you normally draw figures, do your lines tend to be straight rather than curved? Gesture drawing forces you to draw only C, S and I lines. These will bring the fluidity you need in your drawings and they will instantly look better.
HOW To Learn Gesture Drawing?
There are a great deal of ways to go about this:
- Life drawing classes
- Gesture drawing sites
- Gesture drawing books
- YouTube tutorials
Life Drawing Classes
These classes are held weekly and students tend to frequent these classes really often.
In these classes, you will get to draw a live model for a fixed amount of time. It usually starts with 30 seconds, during which you will be expected to capture the essence of the pose in quick fluid lines.
The duration of the drawing cycle increases with time and you would normally end the session with 1 hour drawings.
TIP: If you’re in your mid-thirties or forties or any age really, this is also PERFECT for you. There is no age limit to art and I firmly believe that you WILL improve no matter the age. As long as you have the passion, your dream is a reality.
There will be an instructor that will guide you when you’re first starting out so don’t be too worried and just go ahead.
Also, the instructor usually gives plenty of constructive criticism, so you know exactly where to improve.
Also, this is a GREAT place to meet other like-minded people. It’s also a great opportunity to interact with other artists and to understand their unique perspectives.
Going to these classes is going to RAPIDLY increase your gesture drawing skills, and you will get a ton of feedback on your drawings so you will know exactly where to improve.
Gesture Drawing Sites
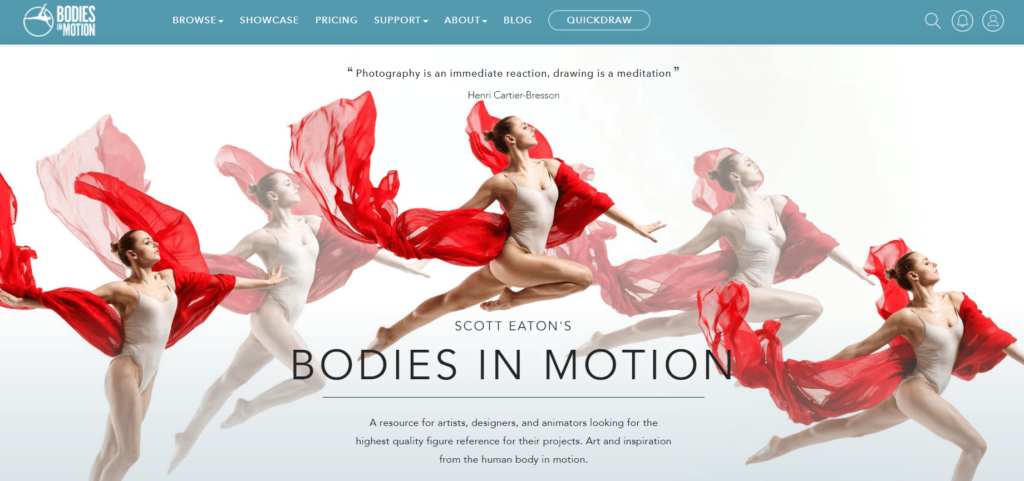
Not everyone can go to life drawing classes for various reasons:
- The classes may not be in your city
- You may live in a remote area
- The classes may be too expensive
If that’s the case, then you really don’t need to worry. You can always use gesture drawing sites.
Gesture drawing sites are websites that offer pose references to artists for free!
They mimic life drawing classes and have a lot of customizable features. You can choose the models you want to draw during your drawing sessions and can personalize the options as well.
You can also use class mode, which enables the drawing cycles to increase in duration with each session. This is basically a replica of life drawing classes.
Some of the best gesture drawing sites are:
Gesture Drawing Books
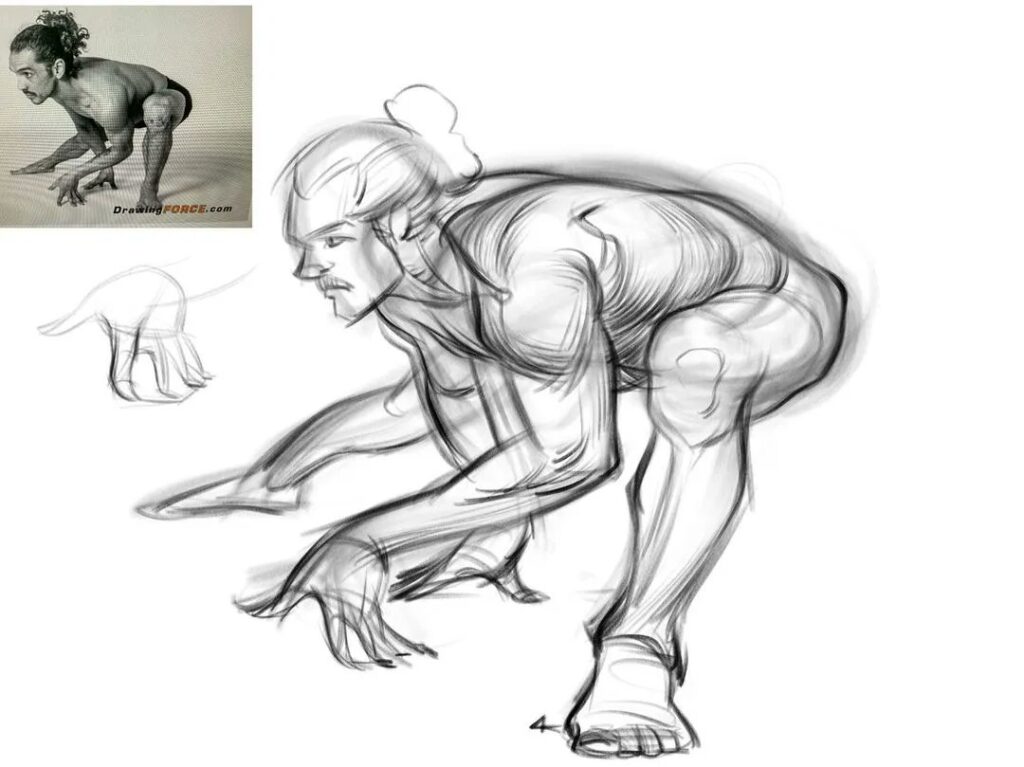
Whether you like books or not, they provide SO much information.
Plus the authors are masters at their craft. They know a LOT about their area of expertise and pour all their valuable advice into their books.
So, you would be crazy to not read any of them.
The best gesture drawing books available are:
- Life Drawing For Artists by Chris Legaspi
- Force: Dynamic Life Drawing For Animators by Michael Mattesi
Life Drawing For Artists is a book completely centered on exactly how you should approach gesture drawing in a life drawing class.
Chris Legaspi will give you complete instructions on everything you need to accomplish depending on the time limit of each drawing session.
FORCE: Dynamic Life Drawing For Animators is going to challenge you and make you a MUCH better artist at the end of it.
Michael Mattesi covers gesture drawing in its entirety and teaches exactly how to think about every single line that you put on paper. It’s an amazing book that’s going to teach you a LOT.
YouTube Tutorials
There is no better channel on figure drawing instruction than Proko and I HIGHLY recommend checking their content for a LOT of tutorials on the entire figure drawing process.
They have some brilliant videos on gesture drawing that will teach you how to hold a pencil to complete the entire figure.
I suggest taking a look at their channel for a lot of inspiring as well as informative content.
Drawing From Life
I cannot STRESS how important this is. You NEED to learn to draw from life.
And the best way to start is by drawing gestures of ALL the people you see around you. Doing this will have a remarkable effect on your drawings and you’ll learn how to incorporate people in an open setting easily.
Also, it will enable you to test your skills in action.
Yes, you’re drawings are going to look HORRIBLE at first. But, over time you will readily understand how to draw from life and will genuinely come to enjoy the process.
Figure Drawing For ARTISTS
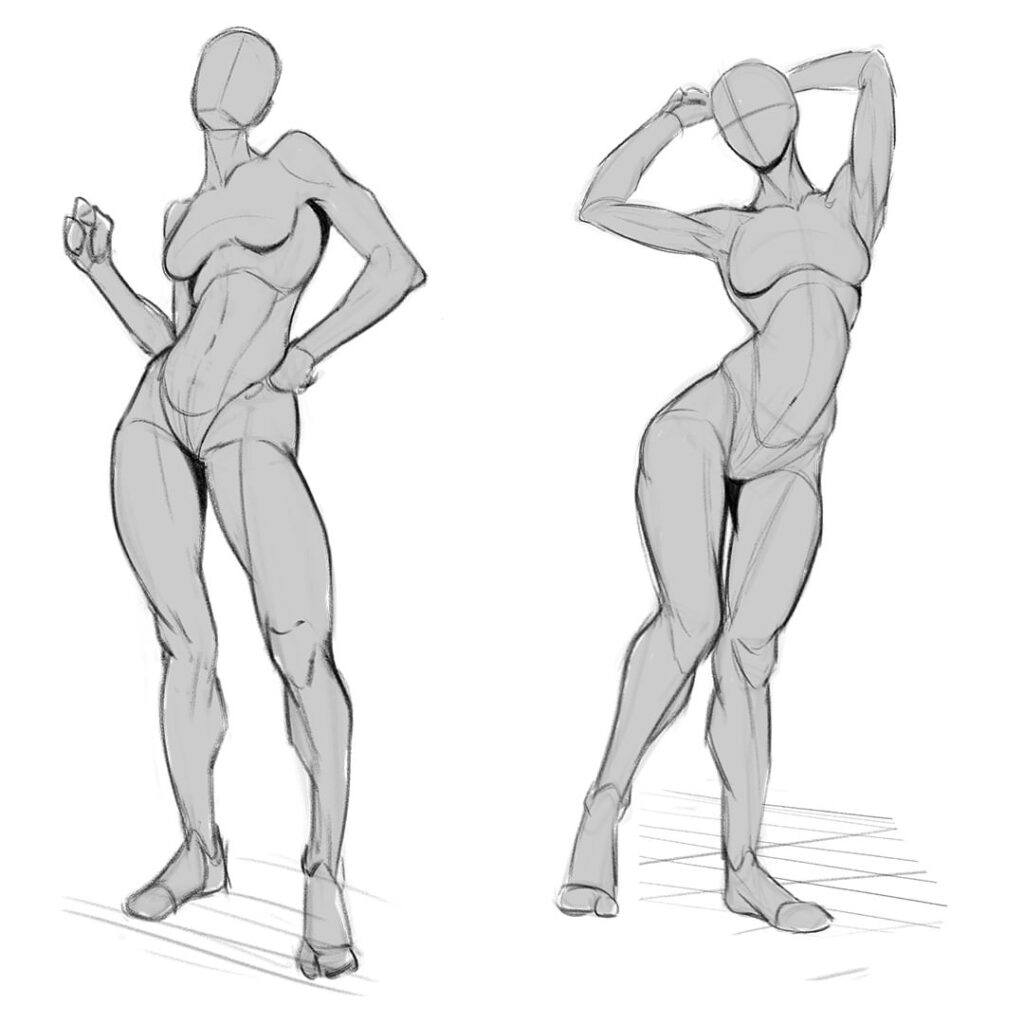
Figure drawing is going to be super challenging.
And yet, it will also be SUPER rewarding. You will love the feeling of being able to draw figures straight out of your imagination.
However, it is a LONG process that will take quite a bit of time and patience.
How Is Figure Drawing Different From Gesture Drawing?
Gesture drawings only capture the main force of the body. That is the main motion of the body.
It uses the minimum amount of lines required to present the essence of the pose. Further lines are just not required.
In gesture drawings, you just need to understand the main action of the pose and depict it as succinctly and accurately as you can. There is no need to think about the form of the body in this stage.
Figure drawing is the next stage.
You will need to think about the form and structure of the body. Basically how it would really look in 3d space. Adding in the twisting and turning actions as well as thinking about balance is critical in this stage.
So, you start with a gesture drawing to get the flow of the pose. After that, you move on to figure drawing, where you establish the form of the body and start giving it more solidity.
Can You Omit Figure Drawing?
You can. But your drawings would really suck without learning figure drawing.
They would look awkward and weird. And I’m going to guarantee you that you would never make it as a professional artist without taking the time to learn this.
So, save yourself the headache later and just learn it right now.
HOW To Learn Figure Drawing?
There are just SO many resources on the internet to learn art that it’s really crazy.
And the amount of figure drawing books, tutorials, and videos is just MASSIVE. How can you really choose which one to follow and how to start?
Well, I’m going to answer that just now.
TIP: These resources are AMAZING and if you just take the time to apply all that you will learn from them, I’m 100% sure your improvement will sky-rocket.
PROKO Is The Best
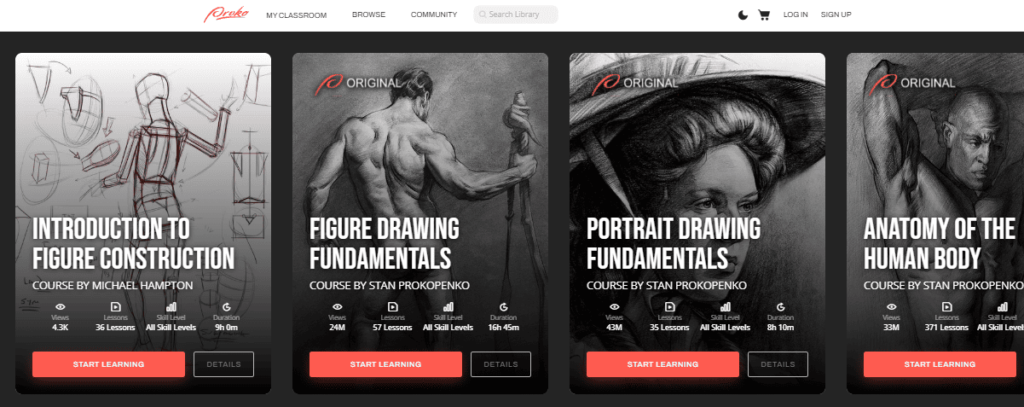
If you don’t know what Proko is, then you’re really missing out.
Proko is an AMAZING resource. It is a website with a LOT of art courses. The site was created by Stan Prokopenko, who also runs a YouTube channel that showcases all the free content from his courses.
And I have to say, Proko is QUALITY content.
It is entertaining yet SO detailed and informative.
They have a whole course on figure drawing which is PERFECT for all beginners reading this. If you haven’t checked it out yet, you NEED to.
I advise you to buy his course if you plan to take art really seriously. However, if you’re doubtful or don’t have the financial means, you can certainly view his YouTube channel, which is brimming with great content.
Figure Drawing BOOKS Are Awesome
There are some fantastic books out there on figure drawing. And these books are written by artists of great expertise, so you can really trust their advice to be worthwhile.
But, it’s challenging to find the book that’s best suited to your level and that will teach you everything that YOU need to know.
So, I have personally reviewed each book and I will tell you exactly which one to pick, based on your level.
1. Figure Drawing: Design And Invention
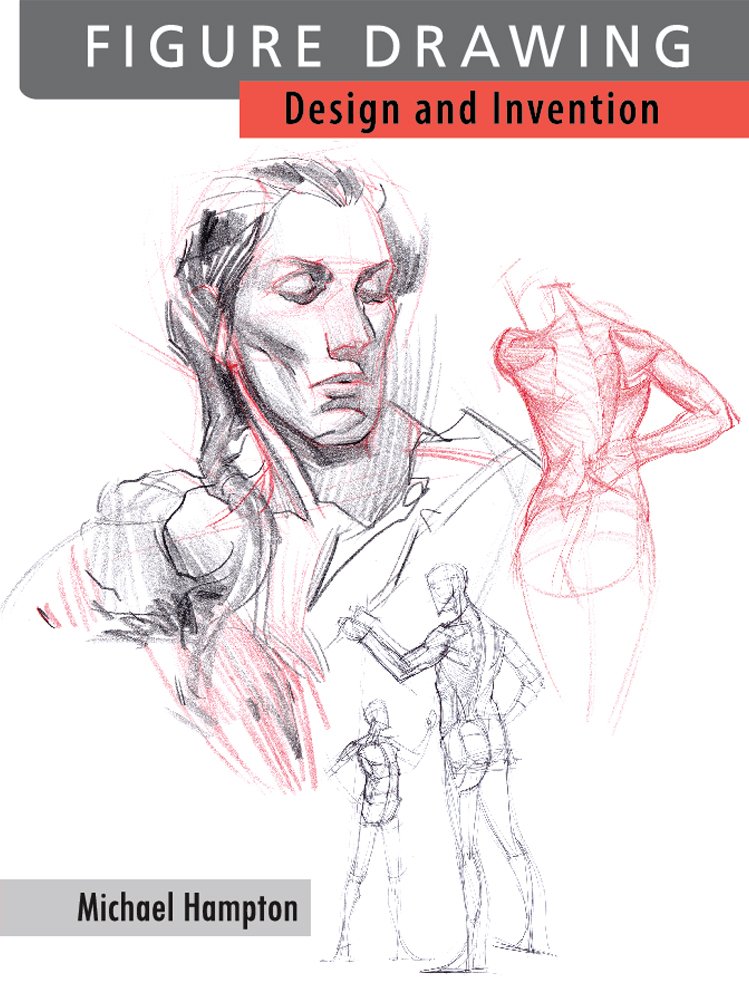
This book is THE book to start with if you’re a complete novice.
The simplicity in Michael Hampton’s explanation is astounding. He manages to explain every step of the process in a manner that’s easy to understand as well as to implement.
He really goes through the entire process of building the figure, starting from the gesture and going through the landmarks, structure, and even anatomy.
This book will teach you all the BASICS you need to know and is a great starting point.
2. Figure Drawing For Artists: Making Every Mark Count
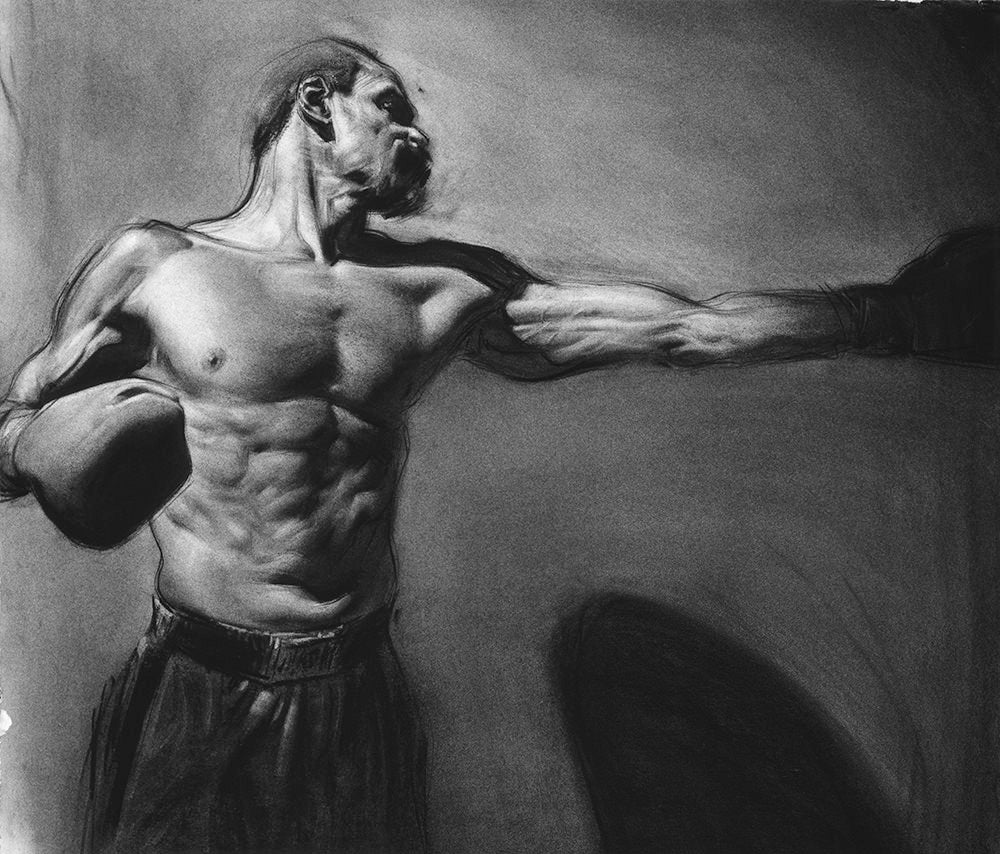
This book would be PERFECT for beginners with some familiarity with this topic.
Written by Steve Huston, this book is packed with a great deal of concepts that beginners NEED to get familiar with. Steve Huston is also a renowned artist and has taught at Art Center College of Pasadena. (So he really knows what he’s talking about)
He also encourages the practice of old master studies. These are going to help you understand line economy and analyze what makes a great drawing.
This book should definitely be on your list if you need an in-depth guide to figure drawing.
3. The Anatomy Of Style
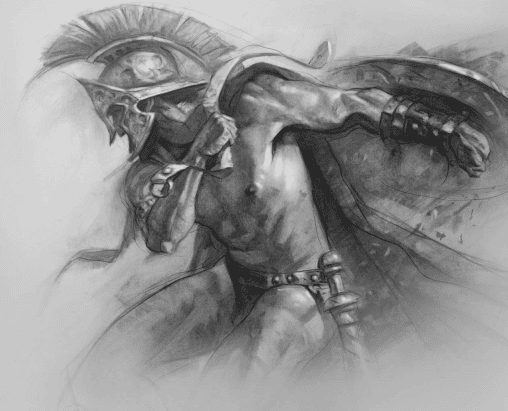
Patrick J Jones has filled this book with his beautiful drawings and illustrations. They are simply stunning and you will receive MANY tips on how he accomplished them.
He has plenty of his style tips scattered throughout the book and has step-by-step examples of his own process of figure drawing.
This book would be great for intermediate artists who want to really up their game. It is NOT for beginners as it has several concepts that would be hard to digest when you’re starting out.
YouTube Art Content Is Underrated
There are TOO many YouTube channels these days that just promote their videos to get views, instead of actually providing valuable content that artists can really LEARN FROM.
However, I have made a list of all the figure drawing tutorials that are truly WORTH it. So, you can just go ahead and watch them to learn the basics of figure drawing:
- Figure Drawing Playlist- Proko
- Figure Drawing For Animators- ModernDayJames
- Drawing With The FORCE Method- Michael Mattesi
I also made a list of some SERIOUSLY inspiring videos that will make you understand just how far you could possibly go if you put in the hard work:
- These Drawings Got This Artist Hired at Riot
- Kim Jung Gi – How to Become a Master
- Karl Kopinski Sketching from Imagination
They are all masters of their field and their skills are just breath-taking. Just hearing about their art journey is quite motivational so I suggest you take a look at them.
How To Practice Figure Drawing DAILY
Learning about the technical details of figure drawing is great. It really is.
However, it’s not going to take you far unless you don’t exercise this skill regularly. That means practicing a bit of figure drawing every day to maintain your skills.
Using Pose Reference Sites
While I had mentioned using gesture drawing sites previously, you can use them for figure drawing as well.
A great way to practice figure drawing is to use 3d pose references.
TIP: 3D pose references allow you to view the figure from ANY angle that you want. You can then practice drawing that figure from whichever angle you want to.
Therefore, using 3d pose references will enable you to learn how to draw the pose from different camera angles.
Practicing this is CRUCIAL for anyone who wants to extensively work in this field, as you will be able to draw from imagination.
Some great 3d pose references are:
- Pose My Art
- Posemaniacs
- Bodies in Motion (has a 3d model section)
How To Use 3d Software?
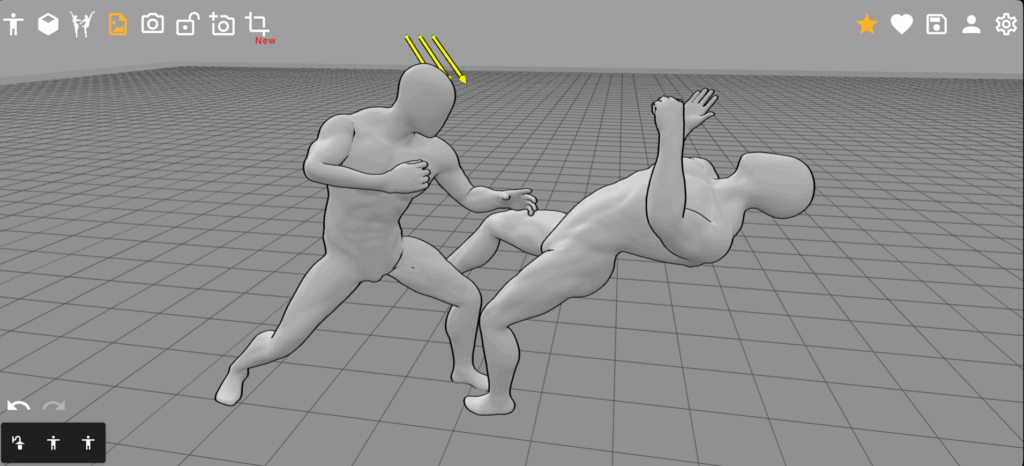
If you’re worried about how to use the software, you can relax. It’s really easy and intuitive.
Commands:
- Left-click and hold to change the angle of viewing
- Scroll to zoom in and zoom out
- Press shift/alt while holding the left click to move vertically and horizontally
You can customize the pose you wish your character to have and can also add props (in Pose My Art) which I think is awesome, especially as it’s free!
TIP: If you ever need a pose reference for anime, this is really useful as it’s intended for that purpose.
Drawing From Life
I know I’m repeating this, but drawing from life is REALLY important.
It will seriously develop your hand-eye coordination. You will see drastic developments in your line quality and confidence as well.
So, don’t ignore this.
Practice drawing any person you see in your day-to-day activities. It could be your neighbor watering the plants, your weird relatives at Thanksgiving, or even yourself.
Yes, you can even draw yourself! You would make the best model as you would hold the position exactly the way you want.
Also, drawing from life is actually MUCH better than using a pose reference site, so if you have a choice, go for THIS ONE.
So, REMEMBER: Draw from life EVERY day. It could just be one drawing, but do it!
Let’s Learn Anatomy
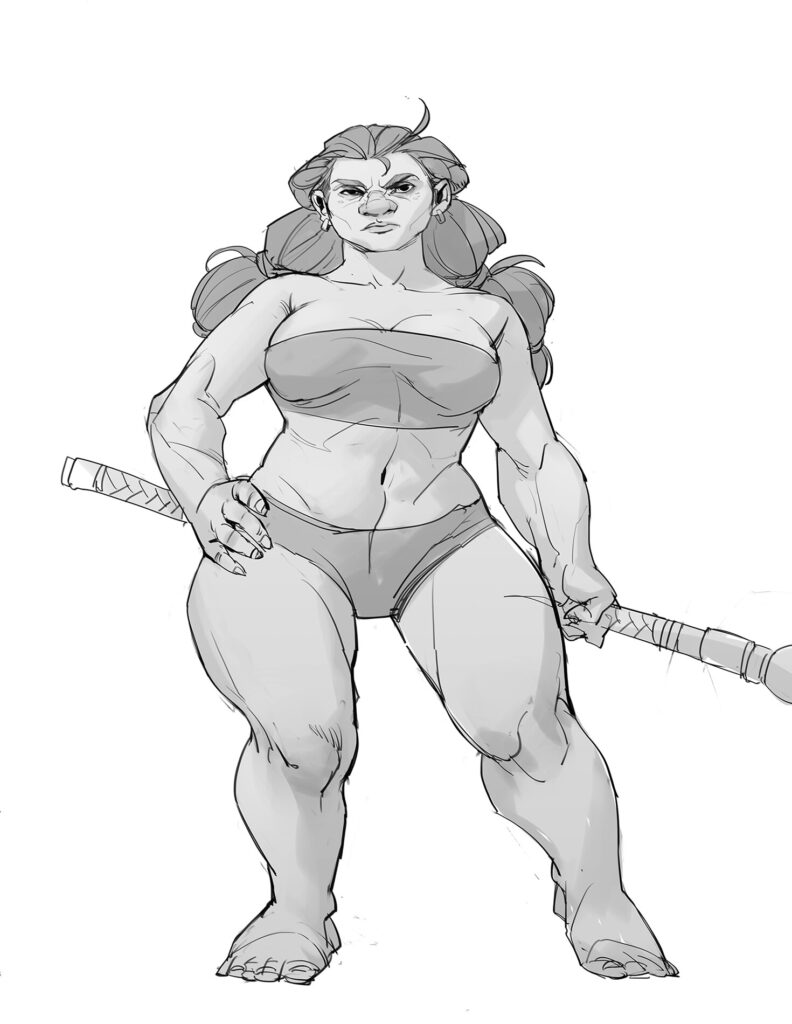
Finally, we’ve reached anatomy.
Whew, that was LONG. That is literally how many things you need to work on, regularly. Crazy, I know.
But, let’s talk about anatomy.
Learning anatomy is completely different from learning figure drawing and gesture drawing.
Figure drawing and gesture drawing are more intuitive subjects and they require less instruction and more application. There are MANY different ways to approach both of the subjects and you can spend your whole life figuring out the best approach.
However, anatomy is much more concrete. You NEED to actually learn all the subcutaneous muscles and prominent bones to be able to accurately place them while constructing the figure.
So, there is a lot of learning required in this topic and then applying it accurately.
However, you don’t need to know EVERY single muscle in the human body. You’re not a medical student.
You just need to know all the important ones that affect the form of the body.
How To Learn ANATOMY?
There are plenty of different ways to learn anatomy.
Obviously, you need a solid understanding of figure drawing and gesture drawing BEFORE attempting anatomy. If you don’t I suggest you start there.
Don’t start with anatomy as it will be really HARD.
Also, you need to know how to construct the basic form of the human figure before applying the anatomical structures in.
So, don’t forget. Learn anatomy last.
Now that I’ve cleared that up, let’s get into how to actually learn anatomy.
Anatomy Is Complex
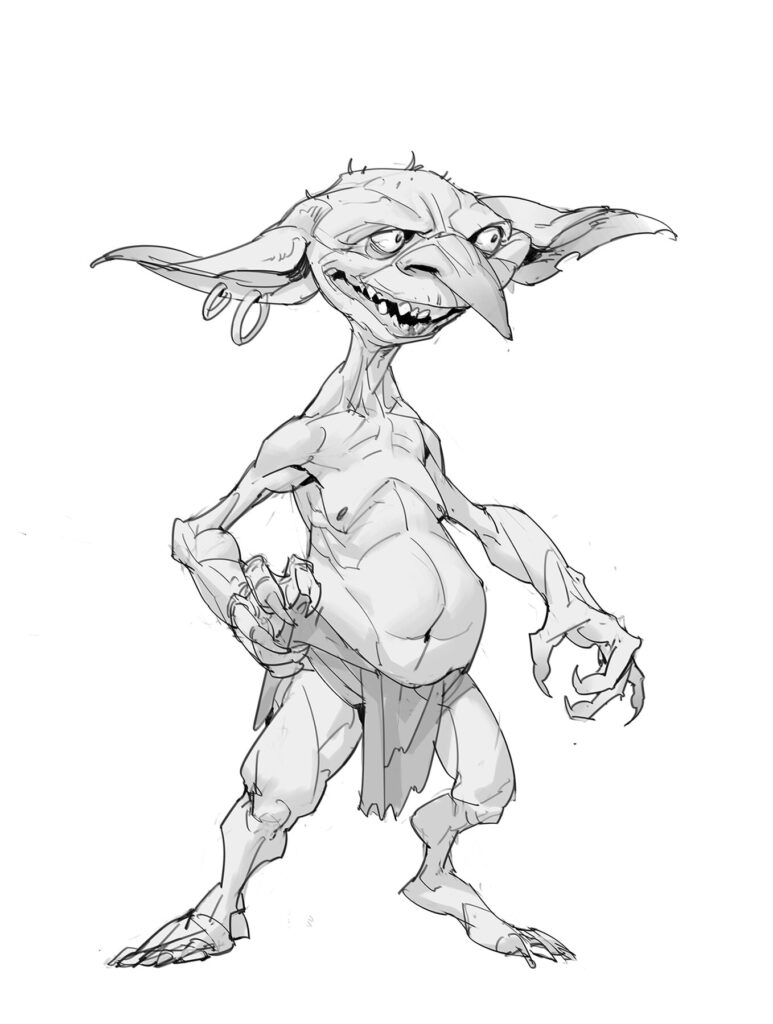
There are a lot of anatomical terms, muscle placements, and locations of bones that you need to know.
Which tends to get really boring if you try to finish it in one go.
Thus, I highly recommend you go through an online course.
One that will keep you mentally stimulated and will help you learn EXACTLY what you need to know as an artist. After all, we don’t want to go TOO extreme by learning all the deep muscle tissues and knowing the difference between the extensor digitorum and extensor digit minimi.
No, we just need to know enough to confidently, as well as accurately, build the human body.
Therefore, Proko is the BEST resource available on the internet to learn anatomy.
Proko For The Win
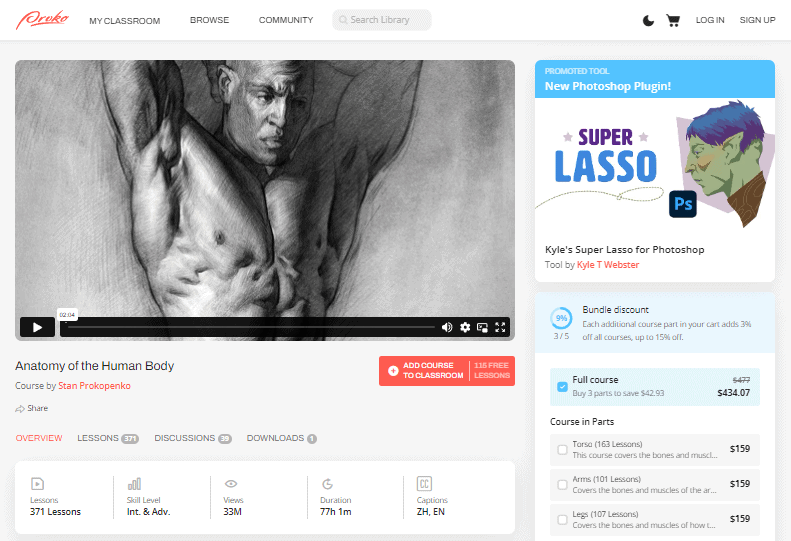
I’ve mentioned Proko throughout this guide quite often.
But, seriously, it really deserves the praise.
Proko is QUALITY and Stan Prokopenko will really not disappoint you.
His insanely cliche jokes sprinkled throughout the anatomy course will totally make you remember every anatomical term you come across.
I’m serious. I learned anatomy almost 7 months ago now, and I learned it through Proko. And I can remember almost EVERYTHING. That’s right. So, trust me when I say that this resource is REALLY worth it.
Also, Stan’s course is HUGE. And by huge, I mean that he has over 370 lessons! With separate sections for arms and legs. That’s an INSANE amount of material for you to go through.
He recommends you practice often and gives a TON of homework for you to complete as well.
Now, don’t panic. The homework is ABSOLUTELY essential for you to understand everything well. Also, Stan completes the homework himself and shows you the best way to complete it.
Which is awesome and quite essential, since it’s an online resource.
So, all in all, I give this resource a HUGE thumbs up.
You need to seriously consider purchasing this course, which is SUPER reasonably priced for the quantity as well as the quality it provides.
YouTube Is Also Pretty Good
Now, if you aren’t convinced, don’t worry.
YouTube’s got your back.
Proko has a free channel (I swear I’m not sponsored by them. I just love them, haha) that you can absolutely use.
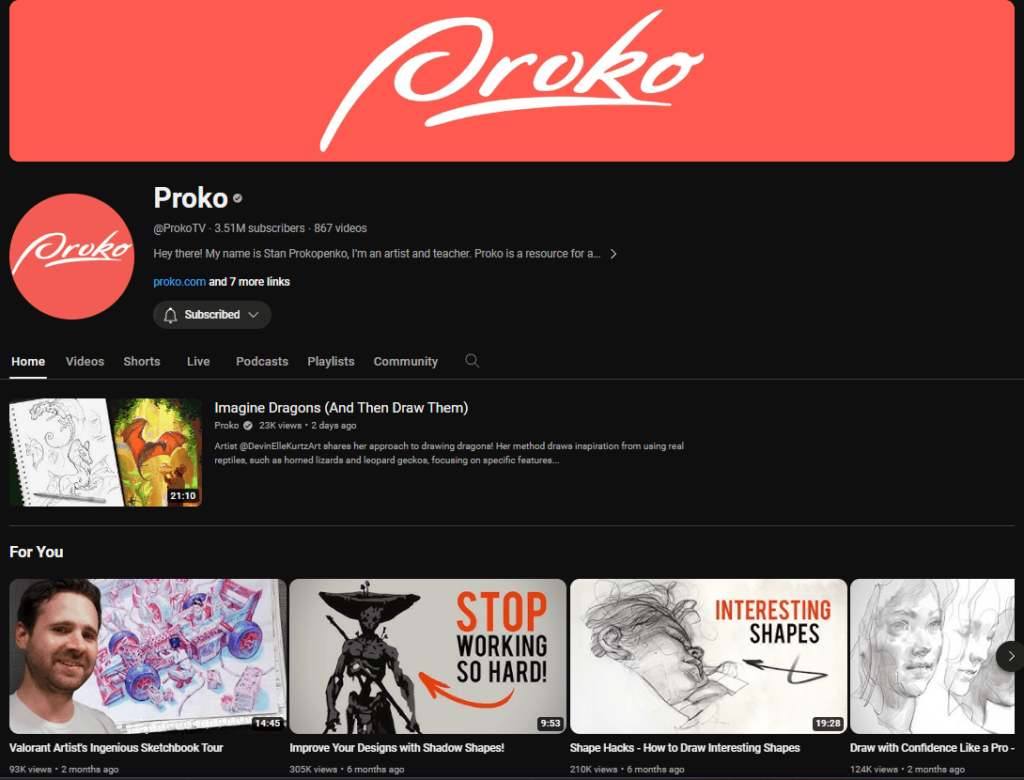
The anatomy course on YouTube is not as detailed as the premium version on his website, but it comes close. And it’s AMAZING if you can’t afford the upgrade.
So, you can definitely check out his YouTube channel to get a really good grasp on anatomy.
Also, if you want to just use his YouTube channel to learn anatomy, you can pair it with one of the anatomy books. The anatomy books will provide the supplementary material that YouTube would not be able to provide.
Anatomy Books
These books are quite dry and you may find it boring at times, but they have SO much information, that you need to consider this resource.
The wealth of information is HUGE and there are accompanying diagrams EVERYWHERE.
It will be overwhelming to see so many anatomical terms together at once, but you should really consider this supplementary material.
A great and in-depth anatomy book is Human Anatomy For Artists by Eliot Goldfinger. It is VAST and has literally everything you would need to study anatomy.
SUGGESTION: You can pair Proko’s YouTube channel with Eliot Goldfinger’s ‘Human Anatomy For Artists’ for a COMPLETE guide to anatomy. You would learn plenty for your art career.
Don’t Omit Hands And Feet
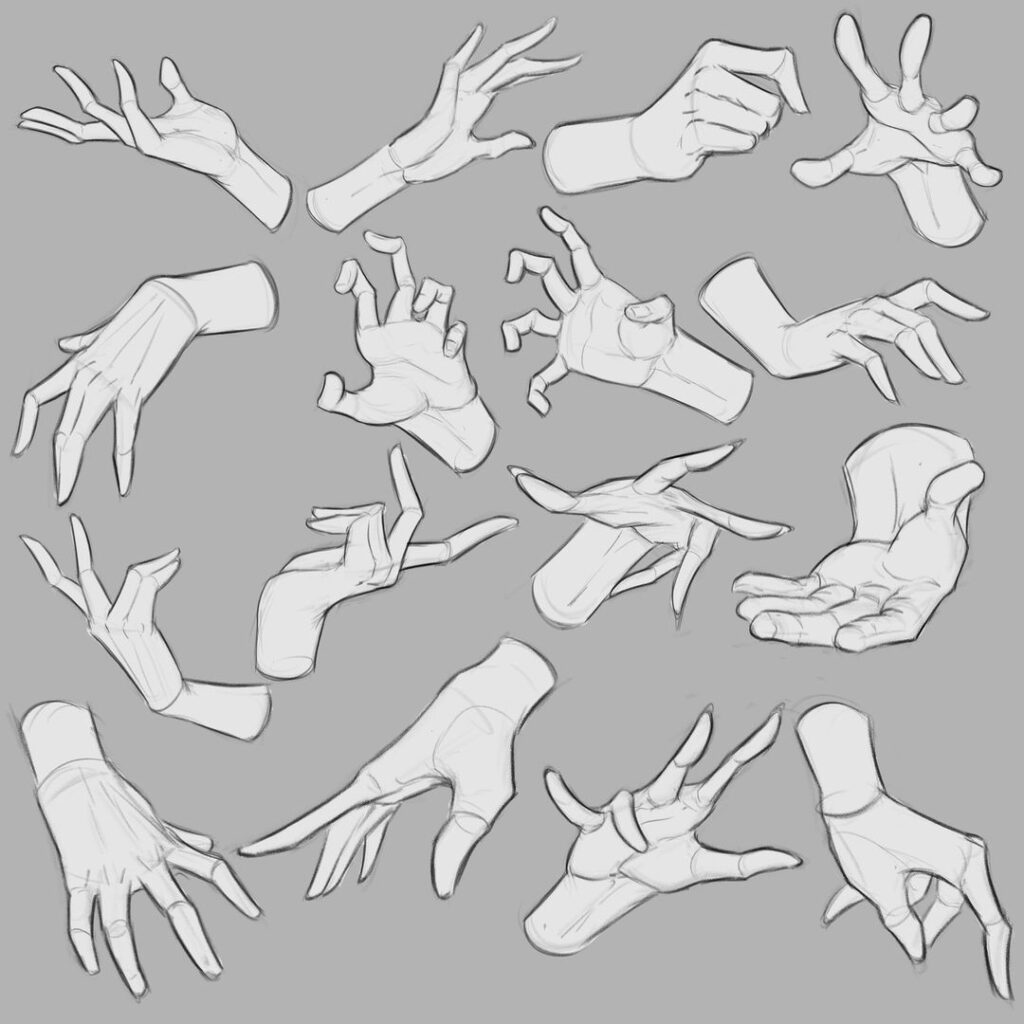
No matter how you choose to learn anatomy, I need to warn you in advance.
Do NOT omit learning about hands and feet.
Yes, I know you hate it. You’re really not alone. Most artists really despise drawing hands and feet. EVERYONE tries to avoid drawing hands by either hiding them behind the body or cutting them out of the picture completely.
But you CANNOT get away with it for long.
Let’s say you avoid learning hands and feet but master drawing the rest of the human body. Once you’ve reached the stage of sending your portfolio to companies, you’re going to get rejected.
Why? Because pros can INSTANTLY tell that you don’t know how to draw hands. You won’t be able to break into the industry. I promise you that.
So LEARN them. They’re actually not that hard.
Once you practice them a few times, your fear is going to evaporate and you’ll be a much better artist in turn for drawing them well.
Wrapping Up With Anatomy
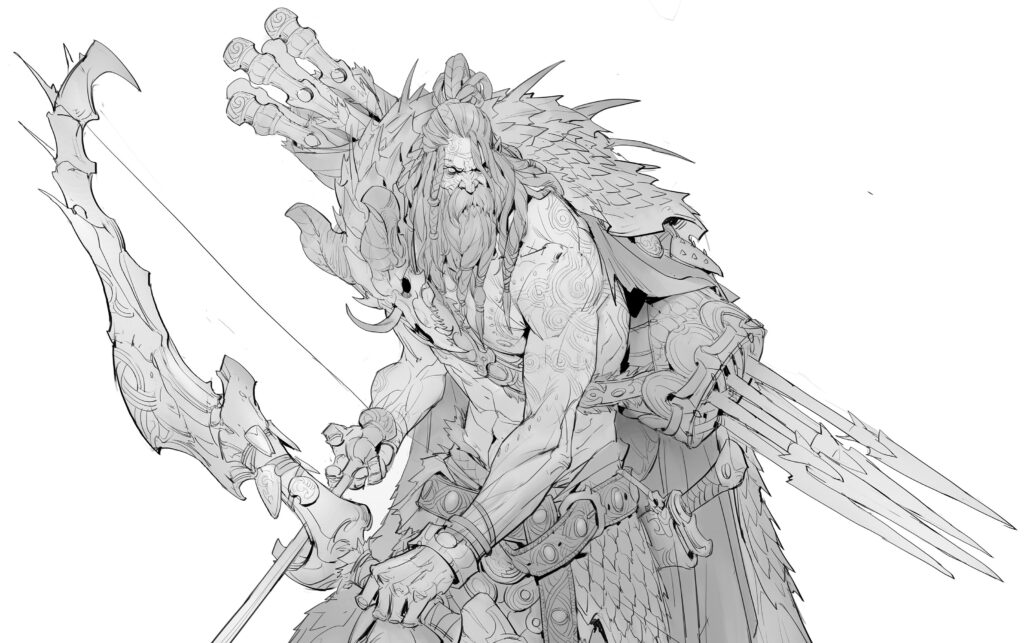
While this might be a lot to take in, I want you to understand that you don’t have to understand everything immediately.
If you’re a beginner, then most of this might be really new to you.
So, don’t worry if you don’t get it immediately. Take it step by step.
Understand that you should start with gesture drawing before anything else. It’s going to set the base for your entire figure-drawing skills.
After that, move on to figure drawing. Learn the next fundamental, ‘form and structure’, along with it. They both supplement each other really well and you will need to know about form to be able to construct a figure efficiently.
Lastly, attempt anatomy ONLY once you’ve completed gesture drawing as well as figure drawing. Aim to complete form and structure as well as it will SERIOUSLY help you understand everything well.
You can also learn the basics of light and shadow before you go for anatomy. It will help you render SO much better.
So, don’t be in a rush to start learning anatomy. There are more important subjects to learn before anatomy. Take the time to understand those concepts first.
It’ll only make your art journey a LOT easier and smoother.
Perspective Is EASY
We’ve finally reached the second of the art fundamentals that you NEED to learn.
It’s time for perspective.
Most artist newbies HATE perspective. They absolutely refuse to even touch it with a 10-foot pole.
Which is quite strange, as perspective is a relatively easy art fundamental to master. Yes, that’s right. It’s actually quite easy.
The rules of perspective are few and once you learn them, you’ll be able to draw any scene accurately.
What Is Perspective Really?
Perspective is how you perceive objects, people, and environments around you.
It is much better explained with an example.
Place a box directly in front of you. It should appear as a square. Now, take two steps to the right. The box will now appear to have two sides. Bend down and the box will appear to have 3 sides.
How is this possible?
It’s all because of perspective.
While this was a highly simplified answer, you can see examples of perspective ALL around you. Everywhere you look.
If you’re in a room, just walking to the other end of the room will change the appearance of all the objects present in the room drastically. This is because you’re changing your position.
But, perspective can even vary depending on the tilting of your head. If you tilt your head upwards, you will no longer be able to see the ground. And vice versa.
The Classic Perspective Example

Have you ever stood on a road and just looked at it? Have you ever tried to find the end of the road?
If not, then do it.
You’ll find that the two edges of the road get closer to each other until they actually converge at one point.
This point is the vanishing point. All lines heading back into the distance, converge at this point.
Even if you’ve viewed a railway track, you would notice that the track eventually meets at one point. That is also the vanishing point.
The horizon on which the vanishing point is located is known as the eye line. This is because the horizon line really depends on where your eyes are located.
If you bend down, the horizon line will drop down, and vice versa.
Thus, YOU dictate where the horizon line and therefore where the vanishing point would be.
Types Of Perspective
I hope you’ve understood the above concepts, as I’m going to take it up a notch now. If you’re a little lost then please don’t worry.
Just go back and read it through one more time with a little patience. You will get it. And if you still have some difficulty, you can watch this video for a better idea of how perspective works.
Now, let’s get started with the types of perspectives.
Yes, there are actually different types of perspectives. There are five in total. Let’s start off with the simplest. One-point perspective.
The railway example, as well as the road example, were both in fact, one point perspective.
One-Point Perspective
The name itself explains it. One point perspective has one vanishing point. You can place the vanishing point anywhere you would like, but it’s generally kept close to the center of the page.
REMEMBER: The vanishing point will ALWAYS be on the horizon line, which is the eye line.
Let’s take a cube.
If you want to draw it as it appears directly in front of you, then you would draw a square with the vanishing point in the center, or within the square. The cube will appear as a square as none of its sides will be visible if it’s directly in front of you.
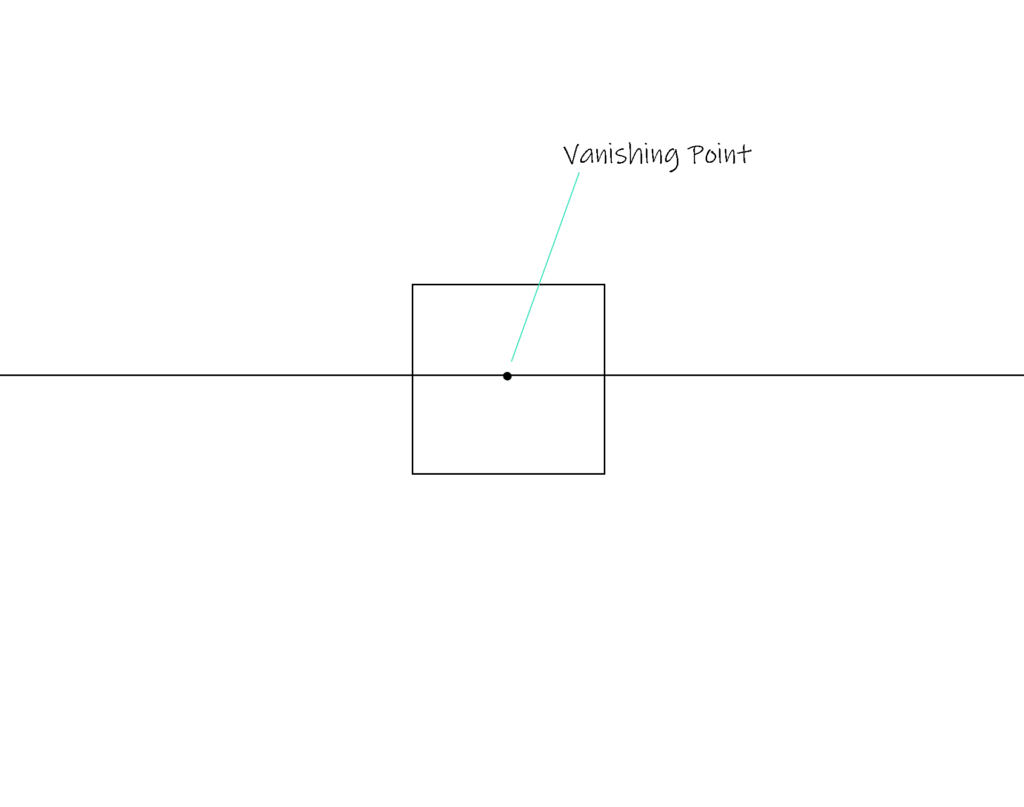
Now, let’s say you want to draw the cube above you.
You would draw the cube above the horizon line. This is because the horizon line is an imaginary representation of your eyeline.
Since you want to draw the cube as it would appear when it is above you, you would draw it ABOVE the horizon line.
Start by drawing a square. Then take all the edges of the square and connect them with the vanishing point. This is because the edges of the cube will be going back into the distance. And all lines going back into the distance will meet at the vanishing point.
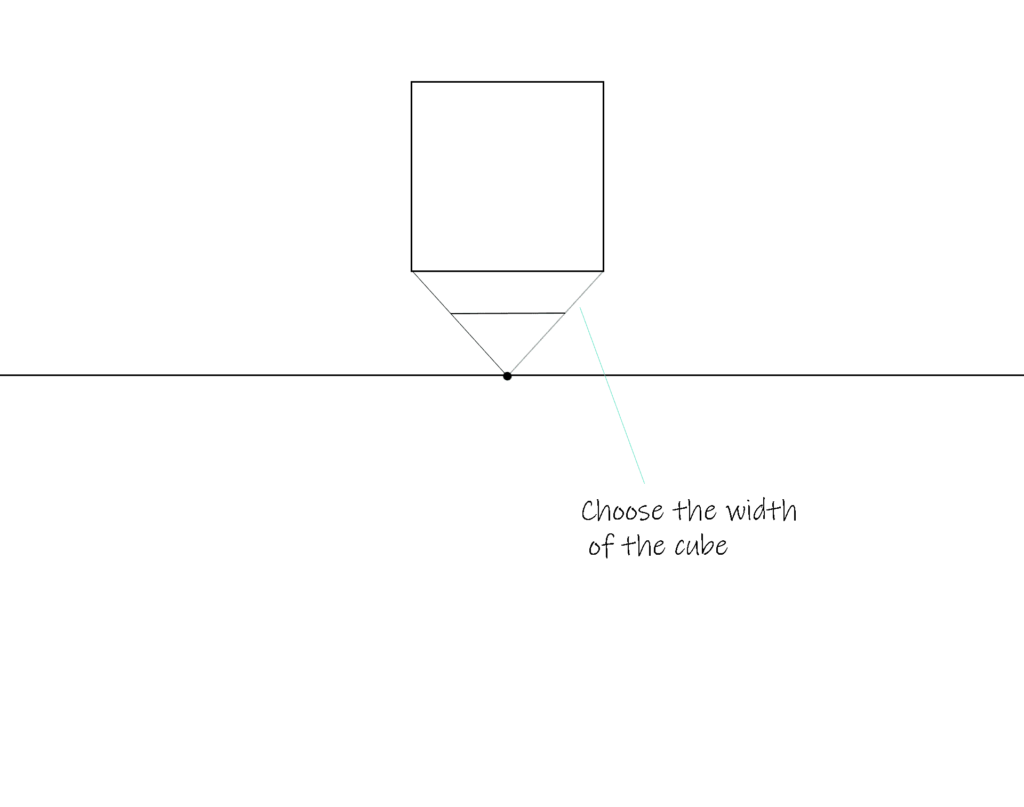
Now choose the width of the cube. Draw the point on the line going back to the vanishing point.
Since all horizontal and vertical lines will be parallel in one point perspective, just connect the point with the other sides to form a cube.
To draw a cube that appears below you, you need to do the exact same process, but the cube should now be BELOW the horizon line.
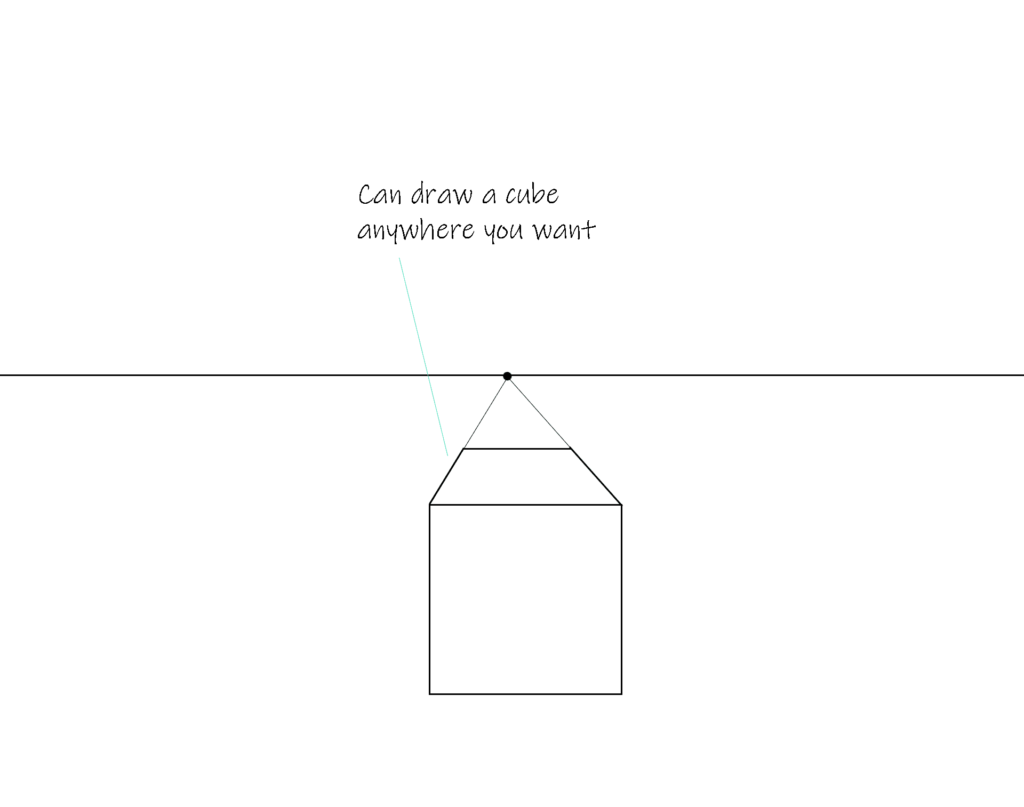
Following this method, you can draw a cube at ANY angle you want. All you have to do is judge where you want to place the cube with respect to your eyeline and then draw it on the page.
However, this is NOT only for boxes. You can actually draw ANYTHING you want. You just need to follow the same process and the results will be the same.
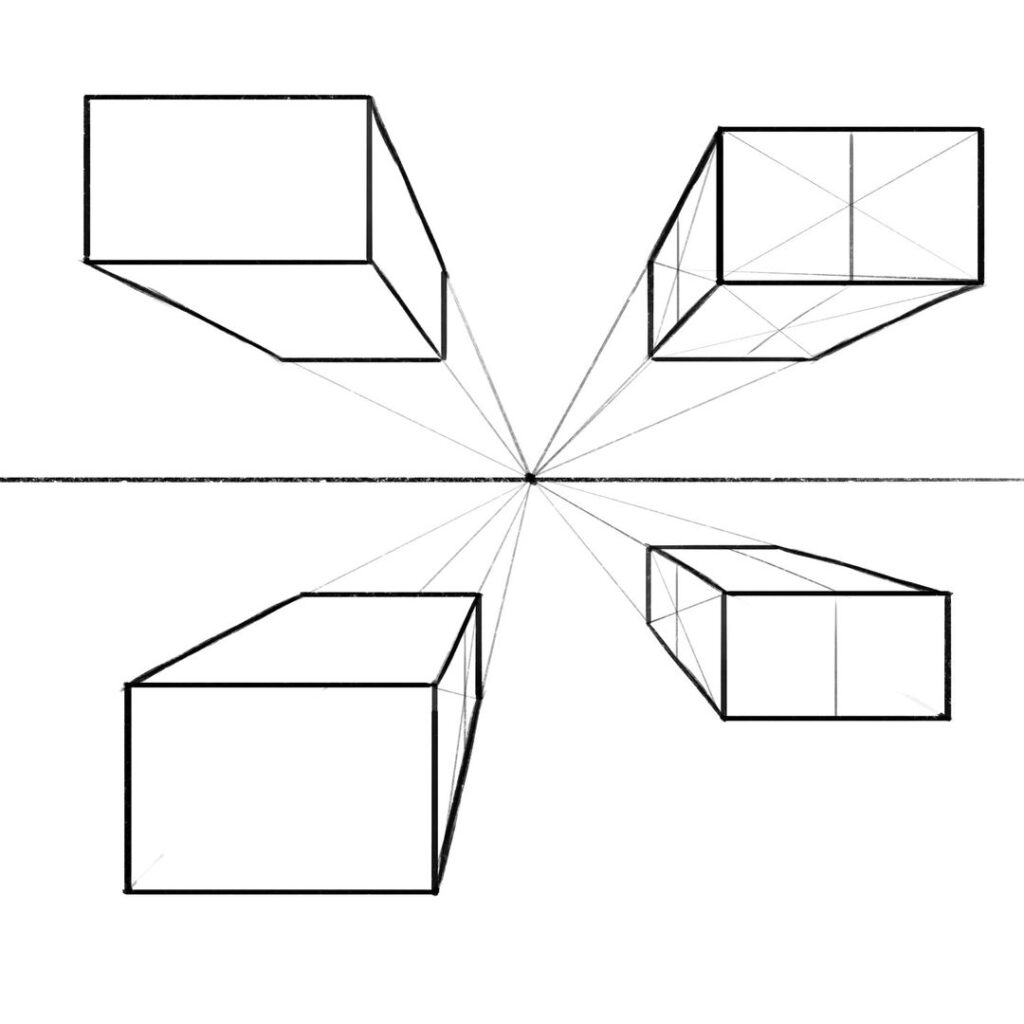
However, you do need to start with a cube. Drawing a cube is the easiest, and EVERYTHING man-made can be constructed from a cube.
However, we will address this in the structure and form section, so you don’t need to stress if you don’t get it immediately.
For now, just try to understand the basics of perspective.
Two-Point Perspective
The next type of perspective is two-point perspective.
Again, the name itself gives it away. Two-point perspective has TWO vanishing points. Simple right?
But how is that possible?
Let’s use the cube to explain this one as well. (I’m telling you cubes are the best!)
Find a cube. It can be a box or a Rubik’s cube or you can just quickly make one out of paper right now to follow along with this example.
Hold it up in your hand and stop when it’s directly in front of you.
The cube should appear as a square and none of the other sides should be visible. Note that the horizontal as well as vertical edges of the cube are perfectly parallel.
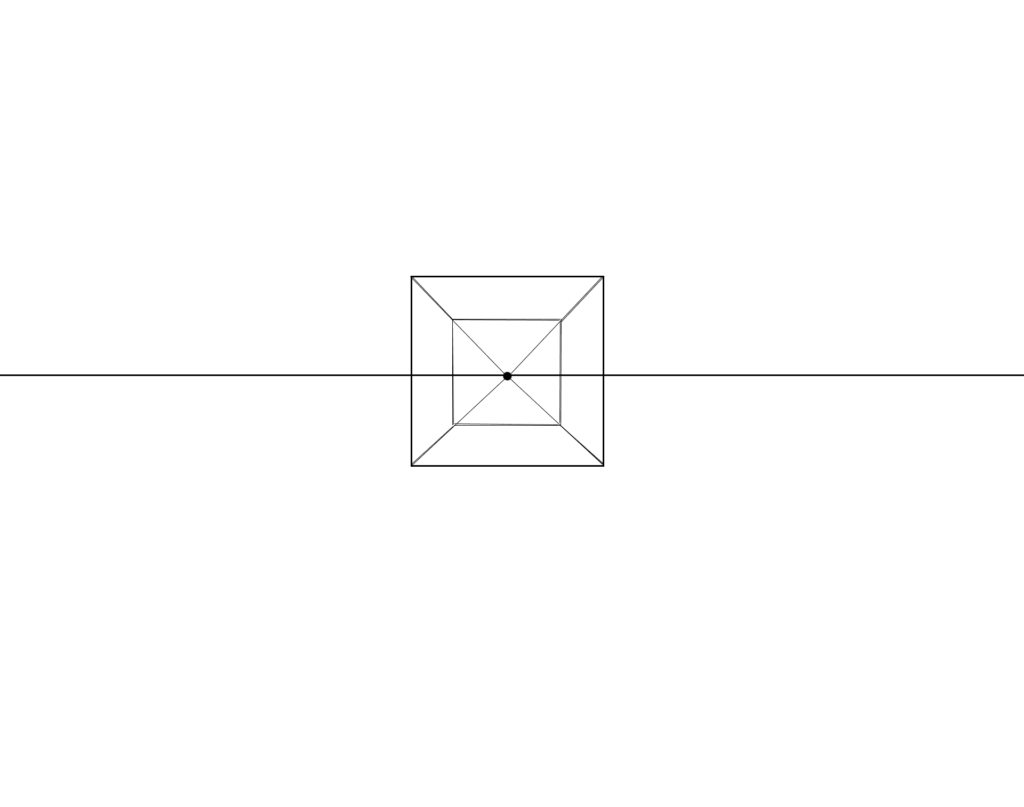
This is because the cube is currently following the one-point perspective rules.
Now, turn the cube in your hands until only two sides are seen.
Do you notice that the horizontal edges are not parallel? All of the horizontal edges seem to be slanted. One side has its edges slanted to the left and the other to the right.
If you extend the edges, you will notice that those edges would actually meet at a point. Since there are two sides, two points would be formed. Those will be the two vanishing points.
And, we now know that vanishing points meet on the horizon line. So, if you join the two points, you will find your horizon line as well.
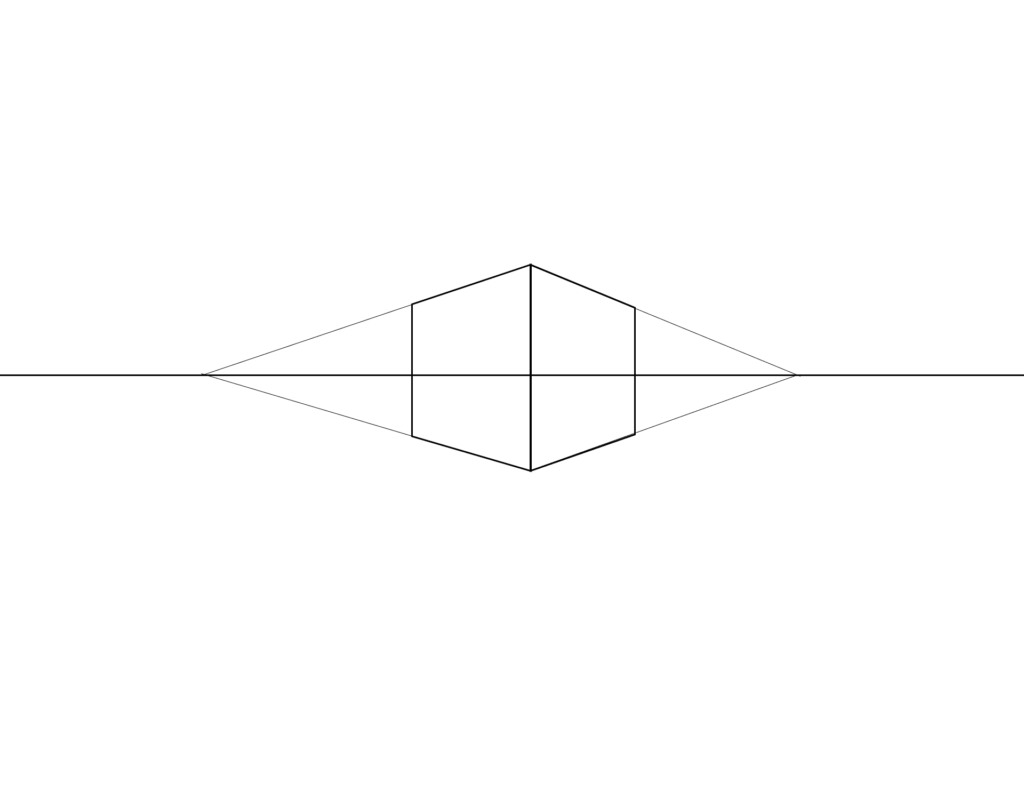
This is the basics of 2 point perspective. But how to actually apply it to draw objects?
You have to do the exact reverse.
First, draw the horizon line. Choose the two vanishing points on the horizon line.
Remember to place the two vanishing points away from each other.
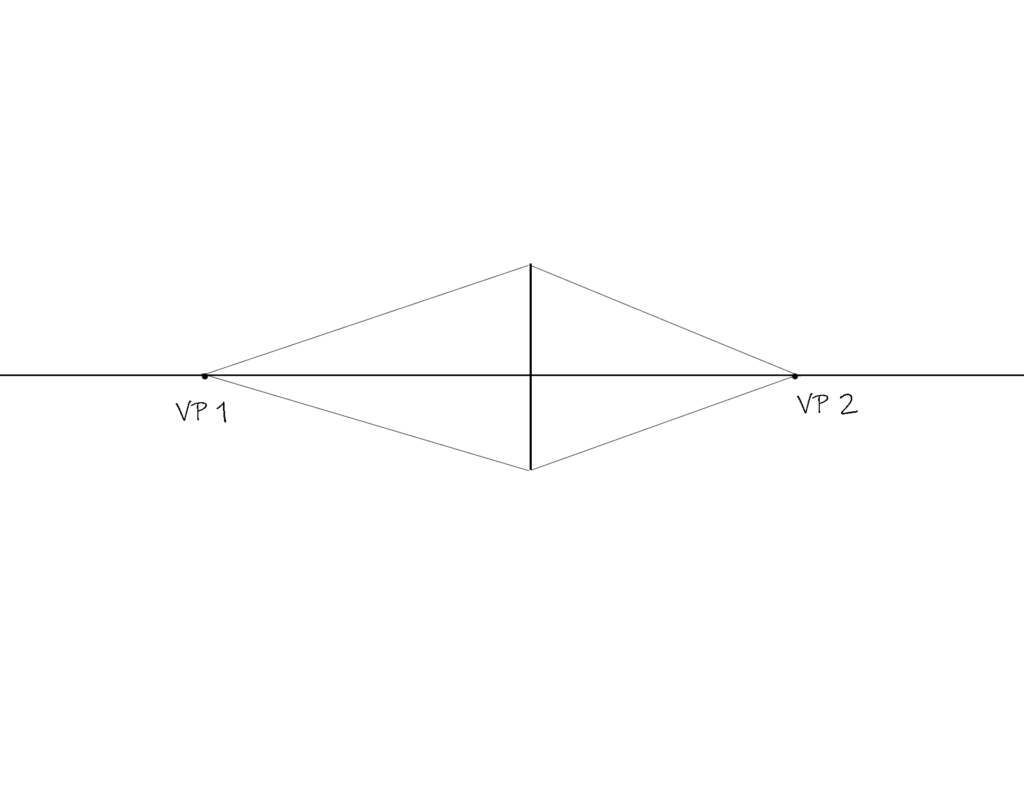
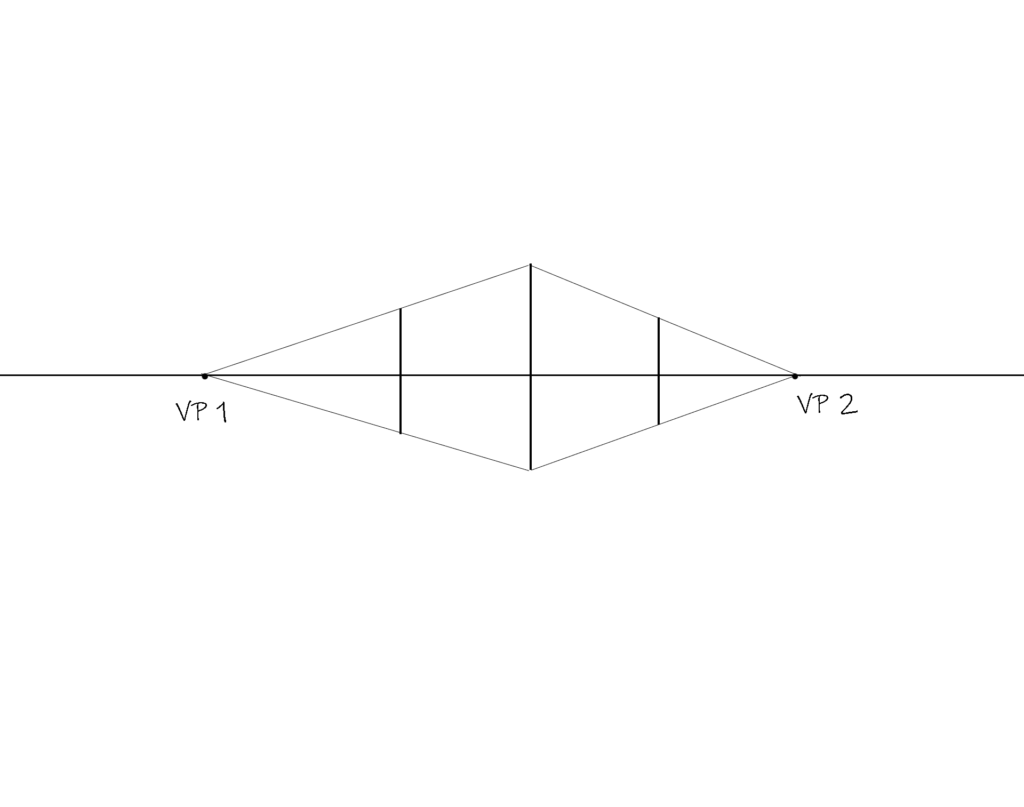
TIP: Having them too close to each other will make the objects placed between them WAY too distorted. And that’s not how we actually view objects in real life.
Draw a vertical line between the two points. This will be the vertical edge separating the two sides of the cube.
On the line, there will be two points at the ends of the edge. Join the edges of each of the vanishing points.
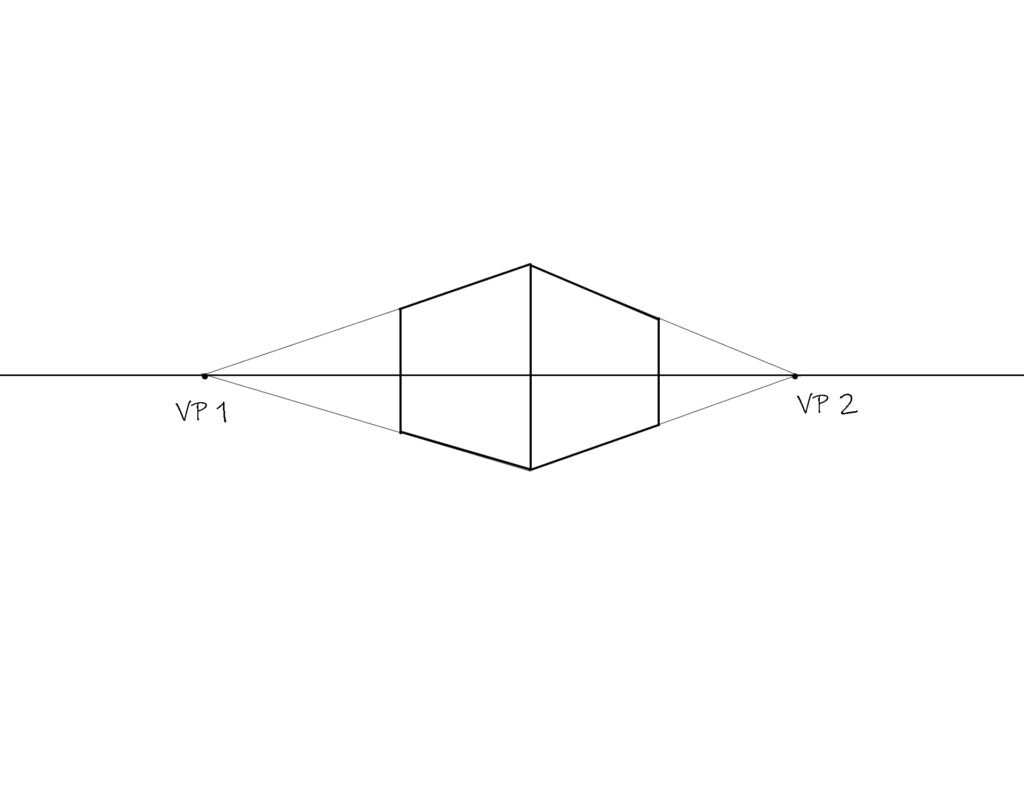
Then, choosing the width of the cube, draw a vertical line. Now you have a cube in a two-point perspective. Using this method you can draw a cube anywhere on the page.
However if you want to draw the cube below, you will find that a third side will be visible as well. Now, don’t panic. This is normal.
When you see a cube below you, you tend to see the top side, as well as the two sides.
All you have to do is join the edges you found using the two vanishing points. For forming the top side, you need to connect the top points to the opposing vanishing points. You will get the top surface of the cube.
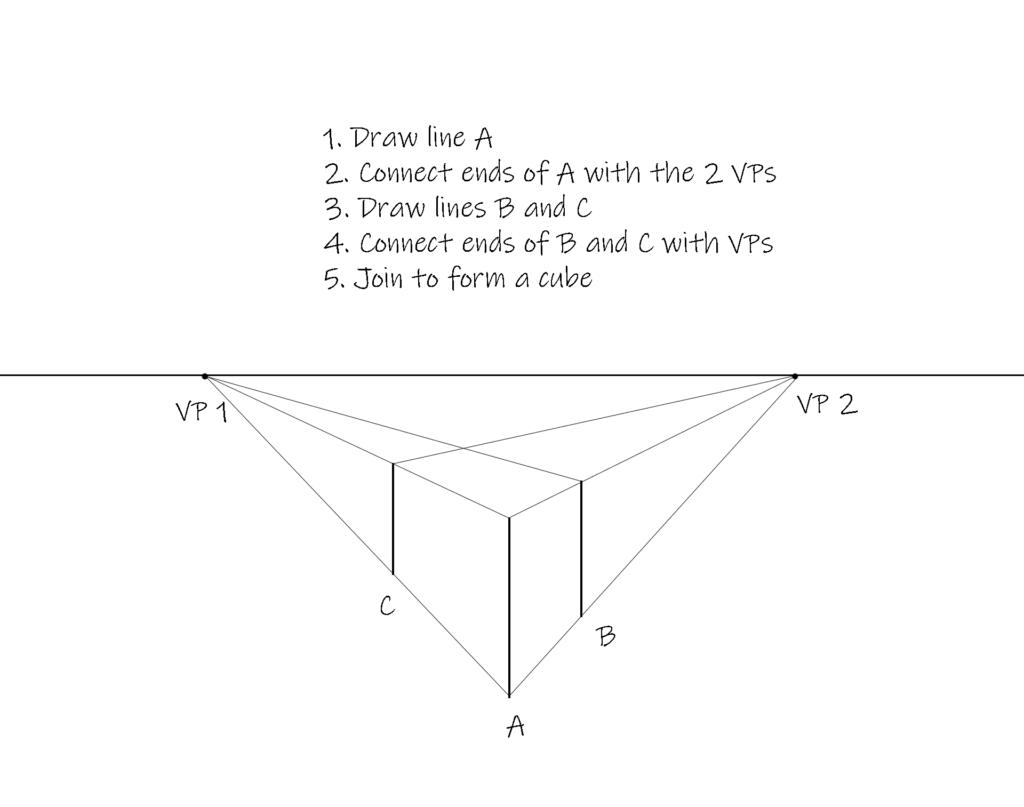
You can apply the exact same principle to a cube that is above you as well. The cube you draw on the page will be above the horizon line.
Using this method, you can draw entire sceneries, buildings, rooms, etc. Anything really. It’s all up to you and your imagination.
Of course, perspective has WAY more rules than this but this is the most basic concept.
If you haven’t understood, don’t worry.
I will cover all the resources that you will need to become a pro at perspective. But for now, let’s discuss what we can actually do with perspective.
Three-Point Perspective
Using these rules of perspective, you can manipulate any drawing to get the result you wish.
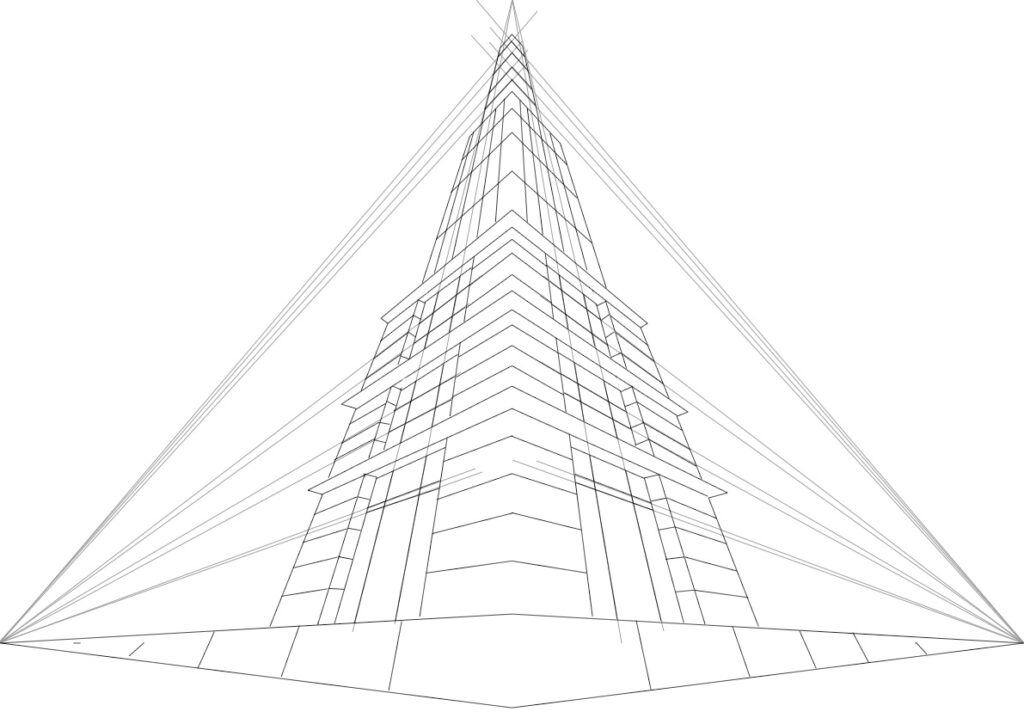
For example, if you want to draw the Empire State Building from an ant’s point of view, you can use these rules to get the desired effect.
First, you would need to know where to draw the horizon line. Since it’s from an ant’s perspective, obviously the horizon line would be VERY close to the ground.
You will need to draw two vanishing points on the horizon line.
Now, since this is an extreme perspective, there will also be a third vanishing point. The third vanishing point is where all vertical lines will meet.
There’s no need to panic. Just as the horizontal lines head to a vanishing point, the vertical lines will also head to one vanishing point.
However, the third vanishing point is different. It will not be located on the horizon line.
Remember I said that all the vanishing points are only located on the horizon line? Well, that rule is only applicable when there are 2 or fewer vanishing points.
Once 3 vanishing points enter the scene, things change.
The third vanishing point will actually be either above or below the horizontal line. It depends on which perspective you’re trying to draw.
If you’re drawing an ant’s POV, the horizon line will be close to the ground. This means that the third vanishing point will be ABOVE the horizon line.
If you’re drawing a bird’s POV, the horizon line would be the bird’s eyeline. Which is high up in the sky. Thus, the third vanishing point would be BELOW the horizon line.
Basically, the horizon line will always be far away from the third vanishing point.
You could potentially bring them closer, but doing that would cause the perspective to get REALLY warped and it will start looking REALLY unnatural.
Most artists stick to 1, 2, and 3-point perspectives.
However, there is also the 4-point perspective and 5-point perspective. I’m not going to get into those right now as this post would be MUCH longer if I explained all the concepts of perspective.
Also, you can go through your entire art career without using a 4 and 5-point perspective. It’s still great to have a general idea of what they are, so you can definitely learn more about them using the resources I’ve provided.
Although this was quite a basic rundown of perspective, I’m sure you get the point.
Perspective will enable you to draw ANYTHING you want.
Do You NEED TO Learn Perspective?
Yes. Of course, you NEED to!
Perspective may seem REALLY hard in the beginning but that’s not the case. In fact, it’s super easy and once you learn all the rules, it will become intuitive and you will no longer have to stress about it.
It may seem like a gigantic hurdle to overcome, but definitely go for it! You will end up a MUCH better artist.
MOTIVATION TIP: Whenever you see an obstacle in your art journey, don’t go out of your way to avoid it. The problem will just get bigger and scarier. Bravely confront it head-on.
REASONS To Learn Perspective
- You will be able to draw ANY environment with enough practice and application
- Your art will look MUCH more accurate and believable
- It will help you become more versatile with your craft
- It is literally an art FUNDAMENTAL. Unless you don’t intend to become an artist, you can’t go without learning it
- Even if you want to go for a career that doesn’t involve a LOT of perspective, for example, character design, you will still NEED it. You would need to draw backgrounds for your amazing characters right?
So, don’t run away. Sit down and take the time to learn perspective. You will forever be grateful.
ART Careers That Need You To Be Proficient In Perspective
And in case you have any ideas of ignoring this section, I’d like to remind you that these careers will NEED you to be awesome at perspective.
- Environment Design (obviously)
- Concept Design (this is not even an option, you will use perspective ALL the time)
- Comic Book Artist (sooo important)
- Illustration (yes, even illustration)
- 3d Modeling (yes, you too!)
- Character Design (just a friendly reminder)
- Storyboard Artist (duh)
- Animator (if you don’t study perspective then you’re stupid)
So, basically ALL of them.
How To LEARN Perspective?
Okay, now that I’ve finally bored you to death with my not-so-friendly reminders to learn perspective, let’s get into how to actually learn it.
There are obviously a lot of ways to learn perspective. However, you only need to know exactly what’s crucial for your art journey.
Thus, I’ve shortlisted a bunch of exciting resources that are going to explain EVERYTHING you would need to know about perspective.
REMEMBER: Be patient. Learning takes time, as you know. It’s not something you can process and start applying in a day. Take time and understand the concepts being explained. You will see improvements in your art fairly quickly.
Perspective Books
Books tend to be the leading authority on this subject as there are SO many insightful perspective books available that you can learn from.
For Beginners
You NEED to start learning perspective with Perspective Made Easy by Ernest Norling.
It is a fabulous book that’s intended for beginners who have never even heard of perspective before. The book will teach you ALL the basics and will get you started immediately.
A LOT about perspective will be cleared up instantly as this book is perfect for any artist starting with perspective.
For Beginners With More Experience
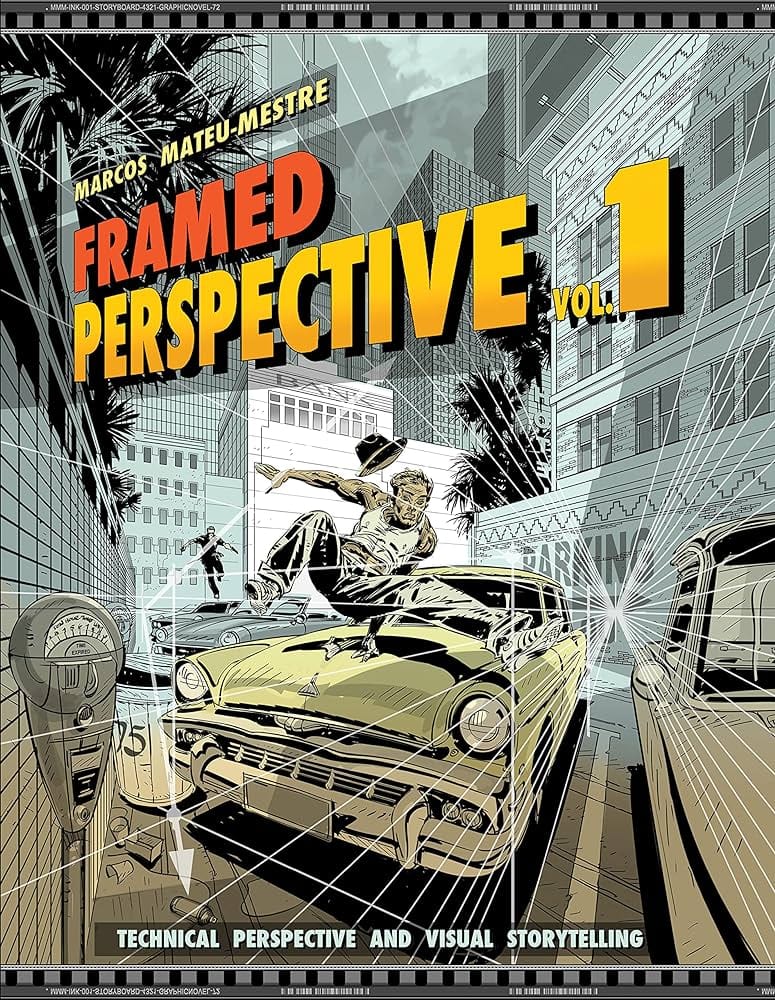
Framed Perspective by Marcos Mateu-Mestre is a MUST-read for beginners with a little more experience.
This book will give you ALL the practical advice you would need to start applying the concepts immediately.
It also has plenty of beautiful illustrations to demonstrate all the concepts mentioned. I think this is a book every artist must read at least once in their life.
For Intermediate Artists
If you already have plenty of experience with perspective and want to take it up a notch and challenge yourself, you can definitely use these two books:
- Perspective For Comic Book Artists by David Chelsea
- How to Draw by Scott Robertson
Although the book is named Perspective for Comic Book Artists, don’t let that fool you. This book is filled to the brim with insanely practical advice you will use time and time again. Also, the teaching approach in this book is slightly unique and quite intriguing.
How to Draw by Scott Robertson is a book that you HAVE to buy. It’s non-negotiable. I wouldn’t say it unless it was that IMPORTANT to your art education.
I’m serious. This book will change your life.
If you’re an aspiring concept artist, or environment artist or have any interest in drawing vehicles, machines, airplanes, spaceships, and more, then this is the book for you. Trust me, it’s amazing.
YouTube
There are several YouTube channels you can refer to while learning perspective.
However, I highly recommend you streamline your approach and don’t solely rely on YouTube to learn this art fundamental.
Some notable art channels for learning perspective are:
- Proko (really can’t go wrong with this one)
- Circle Line Art School (shows you the process of drawing basic buildings and how to construct them)
- David Finch (has some really good tutorials and exercises)
Online Courses For Perspective
Drawabox will teach you the basics of perspective really well, however, their focus is more on form and structure, so keep that in mind.
New Masters Academy has several masters that teach perspective. Their perspective course is long as well as SUPER in-depth. You can attempt this one if you would like to know about the technical aspect of perspective.
Gary Meyer has a course on perspective at Gnomon Workshop which covers all the perspective fundamentals you would need to know.
If you’re more interested in learning about how entertainment artists use perspective in their workflow, you can check out Foundation Patreon. They have individual lectures that you can purchase at a very cheap price.
How To Practice Perspective
Once you’ve learned all the theory and technical jargon, you’ll want to start actually applying it.
If you’ve reached this point in your art journey, I want you to make sure that you’ve actually tried doing the exercises recommended in the books as well as tutorials you may have viewed.
Doing these exercises is crucial, as it is a direct way of learning, that will help you retain the information much better.
Now let’s get into how to practice perspective.
Observe, Observe And Observe
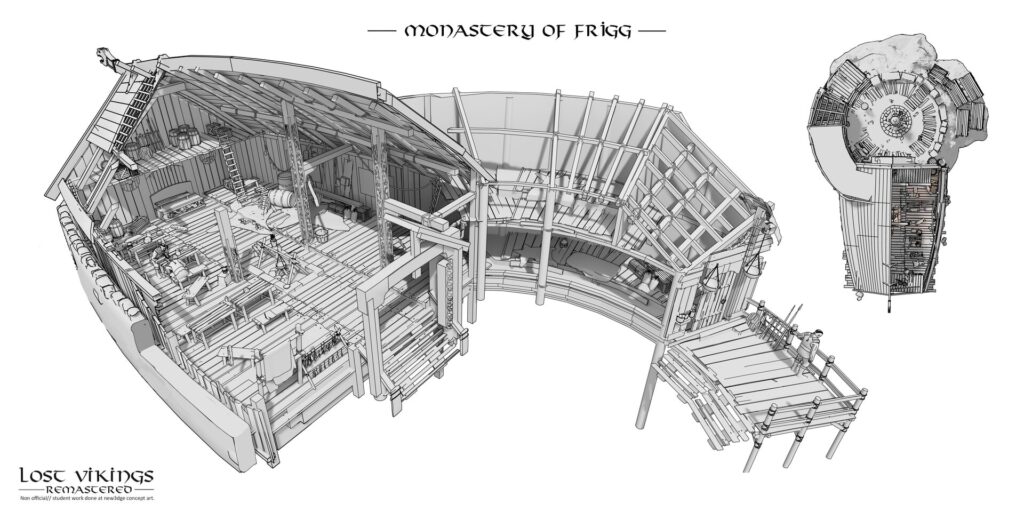
Observing is SUPER important in the art field. And it’s only when you observe, that can you really understand how objects look from different angles.
Observe the room you’re in.
How would the appearance of the room change if you moved a few steps ahead? What about if you looked at the room from above? What if you lay down on the floor and observed the room?
Thinking about these questions and taking the time to observe these details will improve the believability of your drawings tenfold.
But, remember to observe every moment of your life. When you shop at a supermarket. When you take the bus. Whenever you go out of the house. You need to look at everything with fresh eyes and just understand how perspective works.
Drawing From Observation
Drawing and practicing your skills will help you understand perspective much more.
So, whenever you’re waiting at that doctor’s appointment, grab a piece of paper and a pen and just start sketching the room. Make sure you’re eye-balling the proportions correctly.
Practice will increase your accuracy, so don’t worry if it’s not too pretty in the beginning. Just keep at it.
Inventing Perspective

Try drawing small thumbnails in your sketchbook by inventing new scenes.
Draw an intense confrontation using the cowboy angle or a top angle view with an agent spying on a secret meeting. Draw loads of ideations and keep playing with perspective.
The more you do it, the better you’ll get at it. So, don’t give up.
Also, drawing from life will aid you in inventing your own environments. Therefore, it’s best to have a healthy mix of both and to regularly practice them.
Wrapping Up With Perspective
Although you might find this pointless and tiring at times, just stick with it. The results you can get by learning perspective are nothing short of amazing.
Let me give you the example of one such artist that extensively focuses on perspective.
His name is Kim Jung Gi.
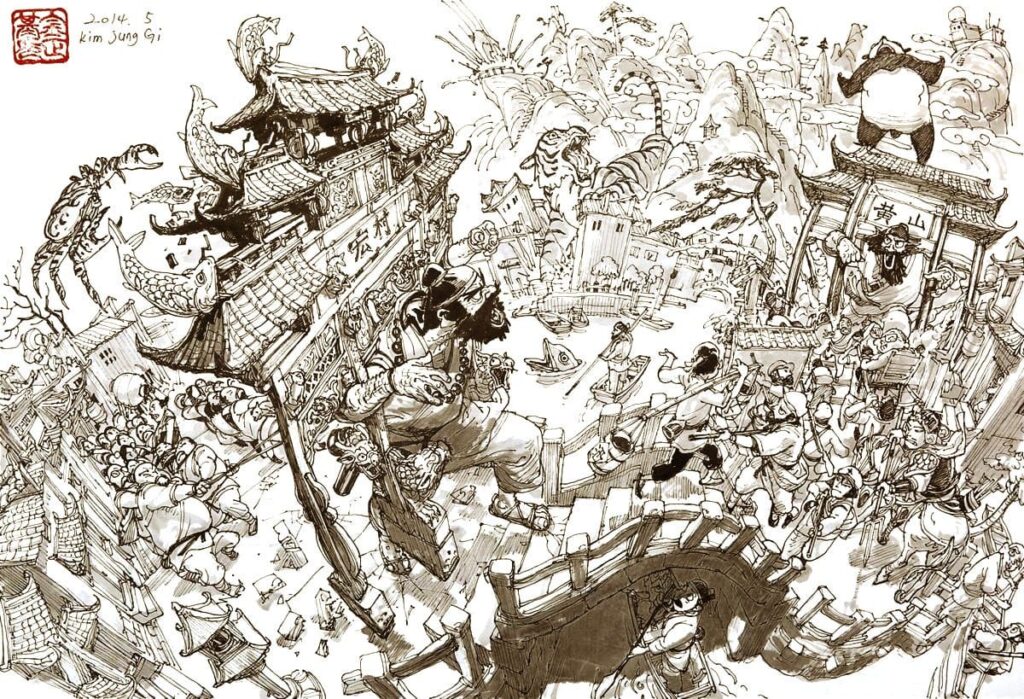
If you’ve not heard his name before, just pause and check out his work. He is simply one of the greatest artists ever and his imagination power is fueled largely by his IMMENSE visual library.
And his perspective skills are simply glorious. In fact, his unique and incredible perspective skills are a HUGE reason behind his success.
So, take a page out of his book and take the time to learn this fundamental. You won’t regret it.
Form And Structure
As you’ve just finished reading about perspective, it’s only right that we learn about form and structure next.
What Exactly Is Form And Structure?
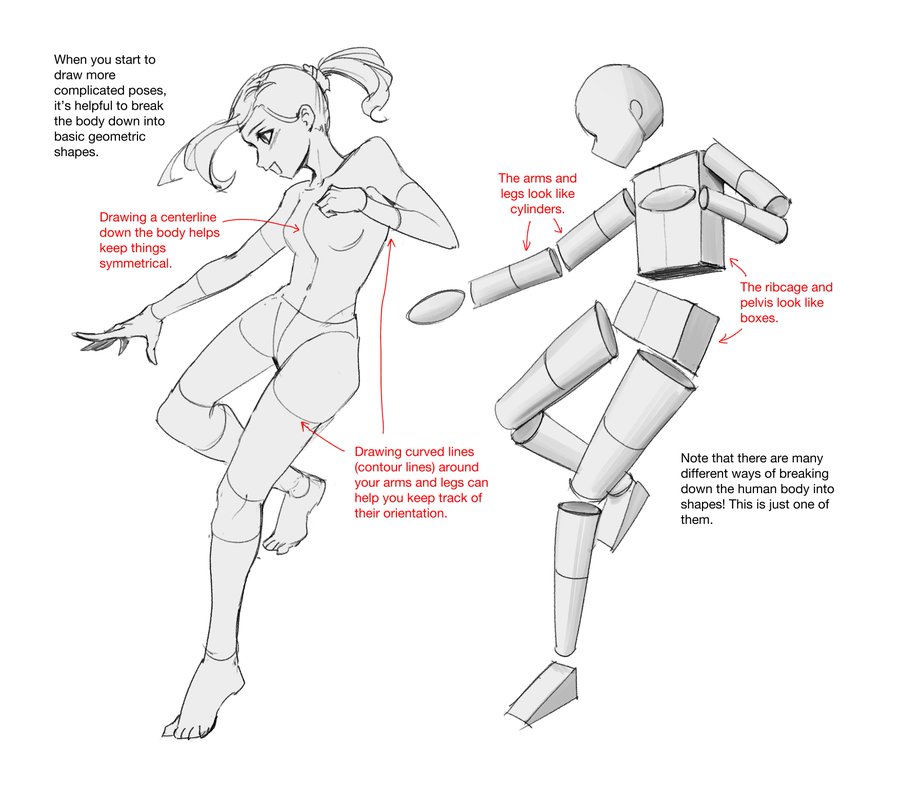
Any object you see in real life, be it a book, a Rubik’s cube, an ant, a bird, anything really, has form and mass.
They aren’t just 2d shapes. They are actually three-dimensional and have weight to them.
Thus, it only makes sense to actually depict that mass when we’re drawing as well. After all, we’re here to get better at drawing.
The way to do it is to learn about form and structure.
Learning form and structure will teach you how to indicate the 3-dimensionality of an object and actually make it look life-like.
How Is It Different From Perspective?
You must be plenty confused. After all, we just talked about 3 dimensionality in perspective as well. Learning perspective should solve all our problems. So where did form and structure come into this?
Well, they’re really interconnected. You would need to learn about one to learn the other. You can’t just learn one of them.
Perspective will teach you about proportions. Form and structure will teach you to actually make all your drawings look three-dimensional.
Also, learning form will really teach you to think about the actual mass of the body. You can manipulate it to build any object you want.
If you’re still slightly confused, then don’t worry. You’ll understand as I explain the topic.
Also, just keep in mind that you will need to learn about BOTH of them to become a successful artist.
Why Is It Important?
Well, because you would want your spheres to look like spheres instead of circles right?
You’d want to draw hands that resemble hands and not weird spaghetti, right? You would like to draw arm muscles well right? Instead of them looking like some kind of mountain range.
You get my point. If you want to elevate your drawings to actually resemble objects in real life, then this is VERY important.
But, that’s not the only thing that you can do. Learning about form can help you manipulate it as well. And once you can manipulate a cylinder to look like a leg, you’ll be legendary. If you want to know more about manipulating form, here is an awesome video all about it.
I’d like to remind you that this is an art FUNDAMENTAL. Which means that it’s one of the main building blocks of your whole art career.
It may seem unimportant and boring, but it’s such a crucial aspect of drawing. You NEED to learn this. There’s no going around it.
ALSO: This is the key to drawing from imagination. Once you can break down complex objects into simple forms, you’ll be able to draw literally anything.
Basics Of Form
5 main simple forms form the foundation of virtually anything in the world. That is spheres, cubes, cylinders, cones, and pyramids.
Out of these, the sphere, cube, and cylinder are THE most important. And mastering just them will enable you to create any form.
Contour Lines
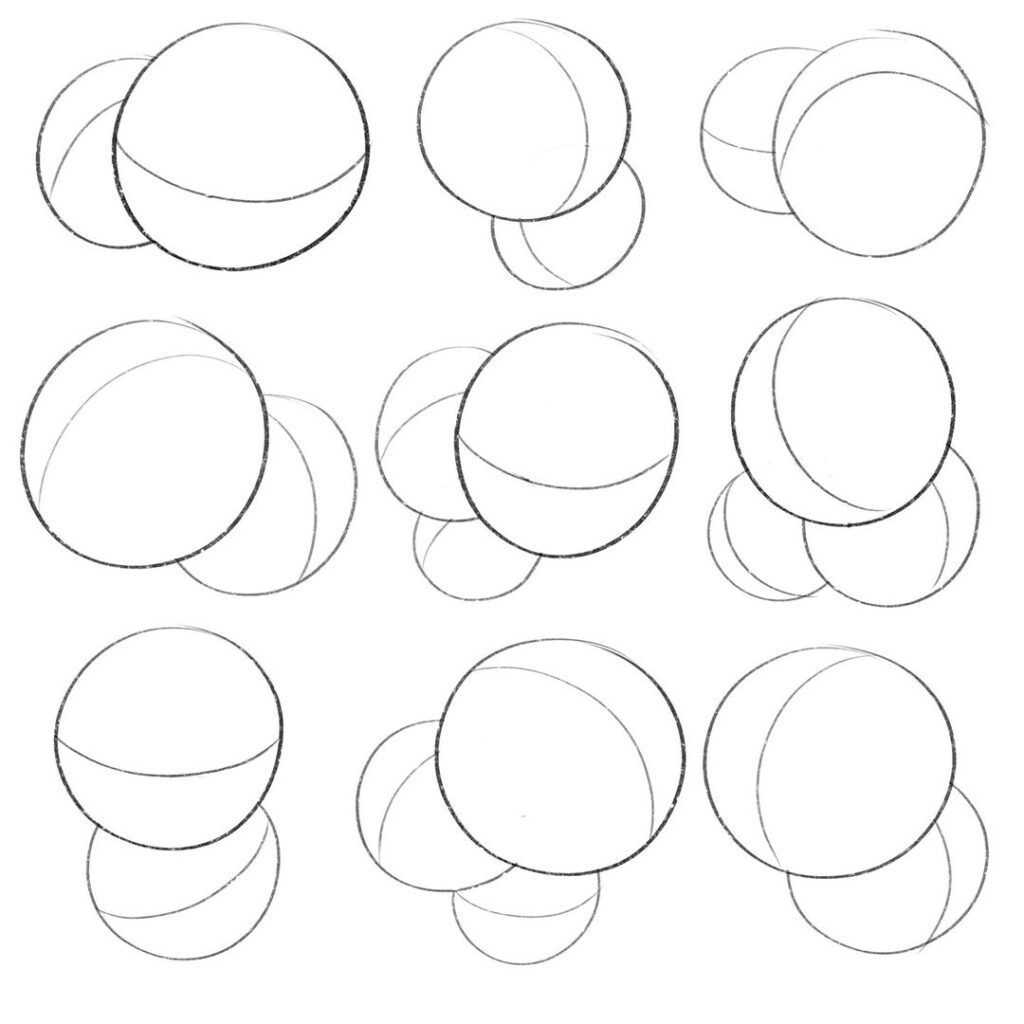
The easiest way to depict form is to understand how contour lines work.
Contour lines are basically lines that go around the surface of a form. For example, a contour line of a sphere would wrap around its body. Doesn’t the sphere look much more realistic now than leaving it as a simple circle?
Similarly, you can draw contour lines of any form. A good exercise to practice is to draw any random organic shape. After drawing the shape, imagine contour lines for the shape. Draw them on the shape and check if they look accurate.
Do this exercise several times to get familiar with contour lines.
Contour lines will help you understand the form.
Also, this will really come in handy when you place the object under a lighting scenario. You’ll be able to find the terminator line quickly and it will help you render the object well.
Furthermore, contour lines will also help you to manipulate the form.
Manipulating Form
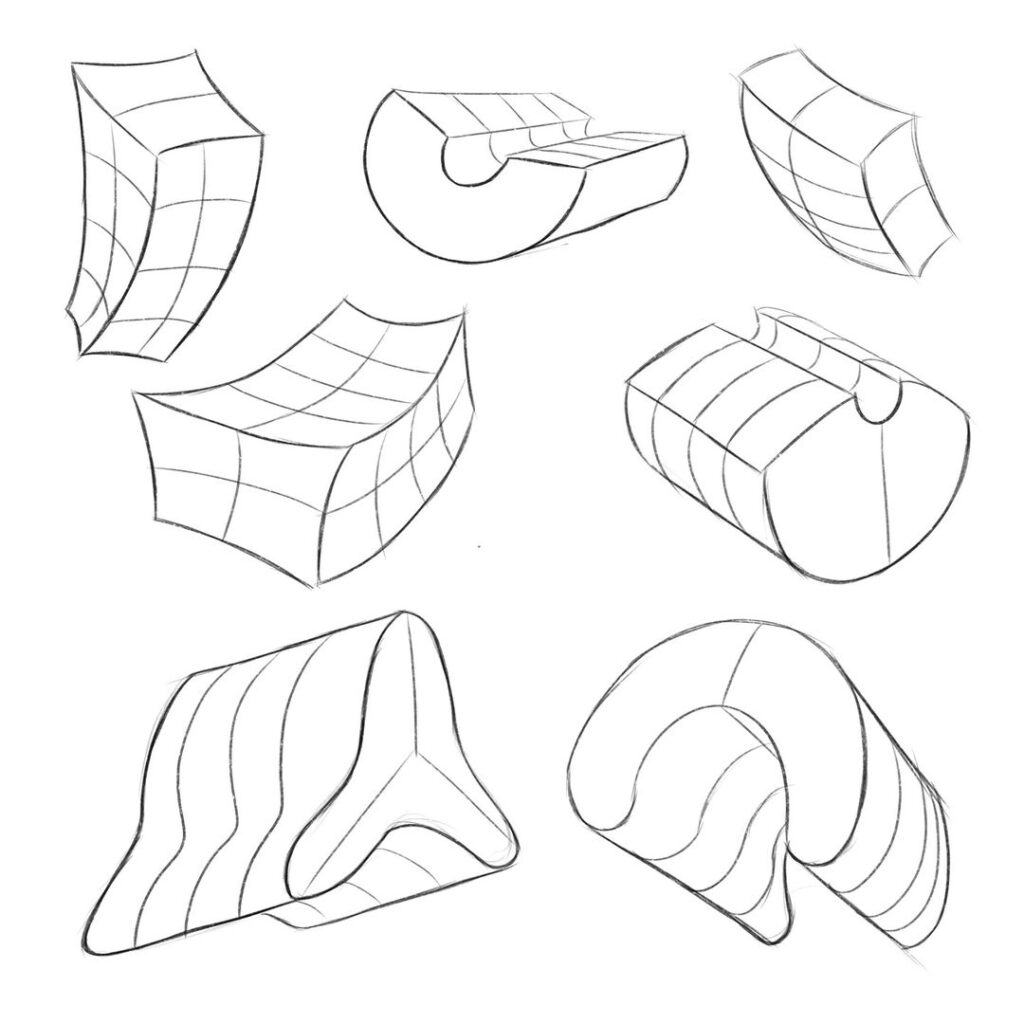
This is the key to drawing from imagination. It basically involves taking a simple form, like a cylinder, and modifying it to turn it into something new.
Let’s take the example of drawing an arm.
Instead of jumping in straightaway and drawing random bumps where you think the muscles are located, you need to simplify first.
An arm is basically a modified cylinder.
Draw a cylinder first. Then, using your knowledge of anatomy, indicate where the muscles should be placed. After that, you’ll need to use your understanding of form to depict the muscles well.
This is basically the step-by-step method of manipulating a cylinder to become an arm. By practicing this over and over, you’ll soon be able to directly construct the arm effortlessly.
It’ll no longer require you to think as much as everything would become fairly intuitive at that point.
However, to reach that point, you need to invest time and effort into learning about form and structure.
How To Learn Form?
Now that you’ve hopefully been impressed by the possibilities of what you can achieve by learning form, let’s get into how to actually learn it.
Learning form is more complex than it appears and there are just so many methods of working with it.
Thus, I really recommend you pair up a few resources together to get an overall perspective of how to work with form.
Drawabox
If you’re a COMPLETE beginner, don’t even think about it. Just start here right away.
Drawabox is a free learning website that will teach you a LOT of art basics. Especially form and perspective. Their 250 Box Challenge is going to teach you a lot about structure as well.
Overall, this is the best resource to get a solid intro to form and I think is the best place for beginners to start learning art.
You can complete Drawabox till at least Lesson 3 (including the 250 Box Challenge and the 250 Cylinder Challenge). It will teach you exactly what it takes to be an artist as well.
How To Draw By Scott Robertson
This book, How to Draw by Scott Robertson, is just AMAZING. It won’t teach you everything about form but it’ll teach you a heck of a lot about structure and how to draw objects in perspective.
The first few chapters are most introductory and will go through all the basics you would need to know. The latter chapters are more advanced.
Scott Robertson will demonstrate exactly how to apply those fundamentals to build airplanes, vehicles, weapons, and more. Which is insanely cool.
So, this book will be great for late beginners to more intermediate students.
Although it may seem confusing in the beginning, go through it slowly and absorb all the wealth of information that Scott Robertson provides in this book.
ArtWOD
ArtWod is a brilliant premium resource that focuses a lot on the application of art. They have an AMAZING beginner’s drawing course that goes in so much depth about form, structure, and perspective.
The subscription is really affordable and worth the information provided as well.
Antonio Stappaerts will take you through his entire 6-step process. This is SUPER important to understanding.
I especially loved his form manipulation videos. They REALLY were a game-changer. Antonio also explains everything in great detail. Thus, beginners will pick up all the concepts really quickly.
If you can, I highly recommend getting a subscription and watching his videos. It’s worth it.
YouTube Videos
And it’s YouTube to the rescue again! I’m just kidding, but YouTube has plenty of incredible videos on learning about form and structure.
ModernDayJames is a YouTube channel run by animator James Douglas. His videos on Drawing Fundamentals and Understanding Perspective are a must-watch as they will teach you plenty of the basics for free.
Although his videos are a bit fast-paced to draw alongside, you can certainly reduce the speed and watch at a pace that you’re comfortable with.
The main point is to understand all the important concepts well.
How To Practice Form And Structure?

The way to do this is to draw objects from life.
Draw objects by simplifying them to their basic form. Try to analyze its contour lines. Using those contour lines, try manipulating the form. Stretch it, squash it, and rotate it.
Try to imagine how it would look from different angles. How would it look with an edge cut off?
Start simple by doing these exercises with cubes, cuboids, and cylinders. After you get the hang of it, you can start experimenting with day-to-day objects.
Doing this will build up your confidence and your muscle memory. Later on, you’ll be able to draw complex forms effortlessly.
Wrapping Up With Form
Form and structure may seem useless and too basic to sit and learn. After all, everyone knows how to draw a cube. But, it’s not actually that easy.
There are a lot of facets to this fundamental that you will only discover once you attempt the exercises.
Using any of the resources mentioned above will give you a fairly good idea of the work required to get good at this fundamental.
And remember, mastering form and structure will increase your drawing potential exponentially. You’ll get one step closer to drawing from imagination.
Light AND Shadow
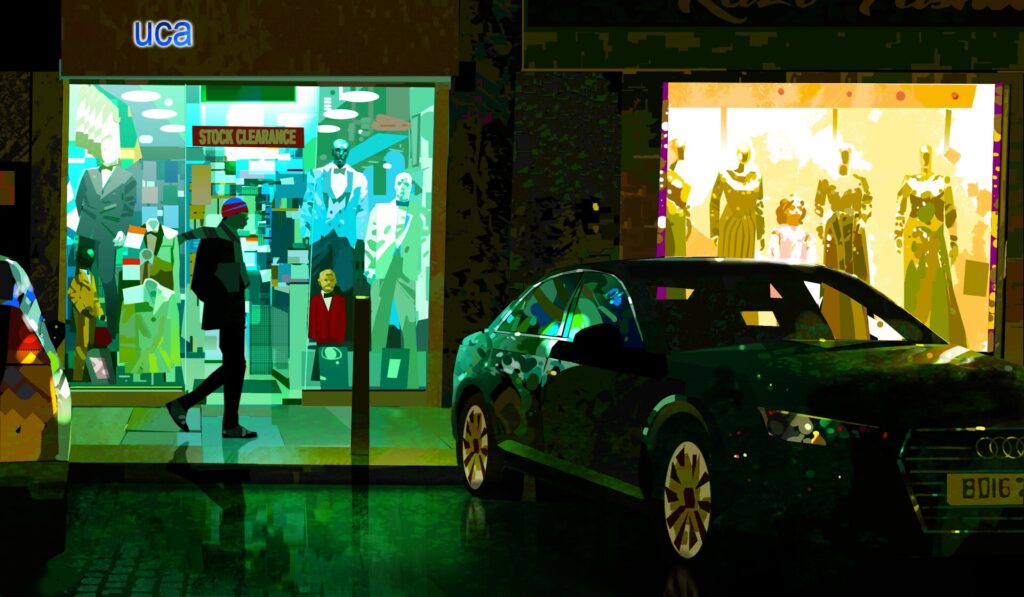
We’re finally halfway through with the list of fundamentals you need to learn. It’s a lot, isn’t it? I bet you didn’t know the amount of effort that actually goes into becoming an artist.
But, no matter, we’ve only got three more fundamentals to go. So hang in there, and let’s get started with light and shadow.
What Is Light And Shadow?
In any drawing or artwork that you see, there’s always rendering involved. Rendering makes a drawing really come to life.
The first step to rendering is learning the principles of light and shadow.
Everything we see in real life is the result of light. We need light to be able to view objects. And of course, where there’s light, there’s also shadow.
Thus, to be able to depict a scene, character, or object accurately, we need to know exactly how to light it.
Why Do I Need To Learn Light And Shadow?
Well, I don’t know about you, but I can’t actually see any lines outlining objects in real life. All objects have different local values, and that is how we can make out the difference between them.
Learning about the properties of light will enable us to make sound decisions while assigning values to our drawings.
This is also the first step in deciding the color of each object. Value is THE most important component of color. Thus, it becomes even more important that we master light and shadow to get proficient in color as well.
After all, I’m sure you won’t be able to go your entire art career without attempting to use colors in your art.
Thus, you NEED to learn all the principles of light and shadow.
Basics Of Light And Shadow
Now that you know the importance of learning light and shadow let’s talk about the basics of light and shadow.
In this section, I will take the example of a sphere to demonstrate the basics of light and shadow.
However, you should keep in mind that they apply to everything. Once you know the essentials, it will be the same for other simple forms such as a cube, cuboid, cone, cylinder, etc.
And you also know that learning simple forms will enable you to construct much more complex forms as well. Thus, knowing the light principles of the basic forms will give you the ability to transfer those principles to virtually any other object.
So, keeping that in mind, let’s start with a sphere.
Components Of Light And Shadow
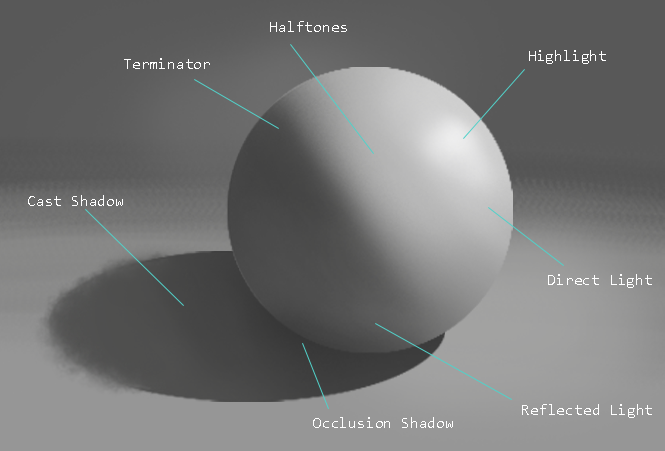
As you all know, there is a light side and a shadow side. This can be seen VERY clearly on a sphere.
The light side is separated from the shadow side by the terminator.
The terminator is also going to be the darkest region of the sphere. This is mutual for any lighting scenario.
The terminator will ALWAYS be the darkest region unless there is no bounce light. Which is virtually impossible on Earth.
Bounce light is basically the light reflected off of other surfaces. While the sun or any other light source will be the primary source, other objects such as the floor, the wall, a book, etc are capable of reflecting a small amount of light received. Which is the reflected light.
Thus, any object will have some reflected light. This reflected light is most visible on the shadow side of an object.
On the light side, you will find all the halftones, which are the shades of grey. You will also find the highlight and the direct light area (which directly faces the light source).
When the sphere meets the ground, their proximity to each other also causes an intense shadow called the occlusion shadow. This is the darkest part of the shadow as light cannot reach it at all.
Lighting On Other Basic Forms
The components of light and shadow are common to ANY object. They will always be present. Thus, a cube, cuboid, cylinder, and cone all share the same components.
Unlike a sphere which has a smooth surface, a cube has hard edges. Thus, you will see the separation between the light family and shadow family much more easily.
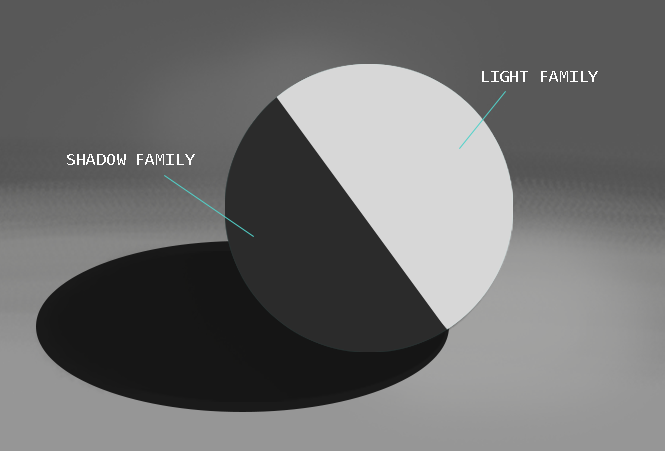
The light family contains the halftones, the highlight, and the direct light.
The shadow family contains the terminator, cast shadow, occlusion shadow, and the reflected light.
The two families are separate and do not intersect. The shadow family will ALWAYS be darker in value than the light family. No component of the light family can be darker in value than a component of the shadow family.
ALSO: The darkest of the light family will still be lighter in value than the lightest of the shadow family. Keeping that in mind will help your art journey go much smoother.
Light Direction
The position of the light side as well as the dark side will sorely depend on where the primary source of light is located.
The source of light will also influence the size as well as the positioning of the shadow of the object.
To determine exactly how the shadow would appear, you would need a light direction as well as the angle at which the light rays intersect with the object.
Let’s take a cube as an example.
If the primary source of light is to the left, then obviously the light family will face the light source. The shadow will be present opposing the light source.
The direction of light will determine the position of the shadow AND the angle of the light rays will determine the length of the shadow.
This is why you tend to see shadows shorter in length during noon. The sun is directly overhead and thus most shadows are eliminated. During the afternoon, the sun journeys to the west, and thus the shadows start to lengthen.
Shadow Mapping
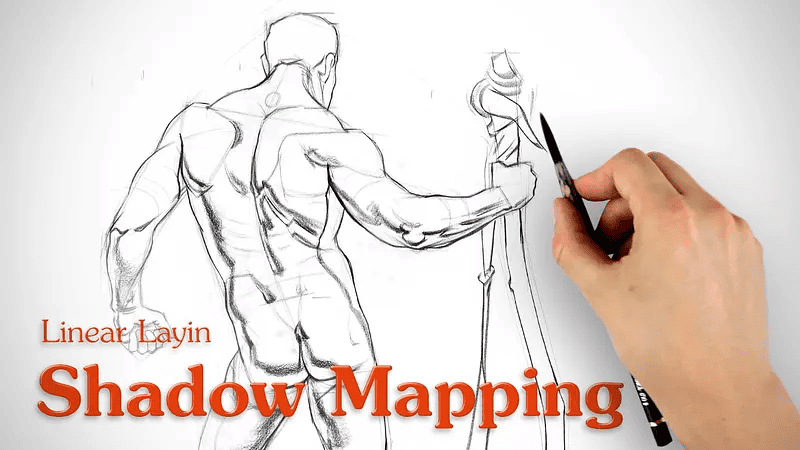
While we’ve discussed how to identify the shadow side of primary objects, we still haven’t broached the subject of organic forms.
Organic forms don’t have a defined structure and are thus much more random. However, there is a technique that most artists use to define the shadow side of organic forms.
Shadow mapping.
Shadow mapping is mostly used for the human body as the human body is completely organic.
Artists identify where the shadow direction comes from and thus mark the terminator on the organic form. Doing this requires a certain level of understanding of the form.
This will also require practice to get good at, to eventually make it intuitive. You would need a good idea of the planes of the form you’re working with.
Here is a great video on shadow mapping which will help you understand more about it.
How To Learn Light And Shadow
Now that I’ve given you a VERY basic idea of light and shadow, you must be curious to know exactly where to learn it in great detail.
Learning from these resources will give you enough confidence to tackle light and shadow regularly.
Without further ado, let’s get into it.
Books On Light And Shadow
Some fantastic books on light and shadow will teach you a LOT of the concepts you would need to know as an artist.
The top books on this topic are:
- Light For Visual Artists by Richard Yot
- Color and Light By James Gurney
- How to Render By Scott Robertson
Now, each of these books explains a great deal on the subject of light. However, these also have plenty of information on color theory as well.
So, you’ll be purchasing a book on both these topics simultaneously as they are intrinsically linked.
YouTube Channels On Light And Shadow
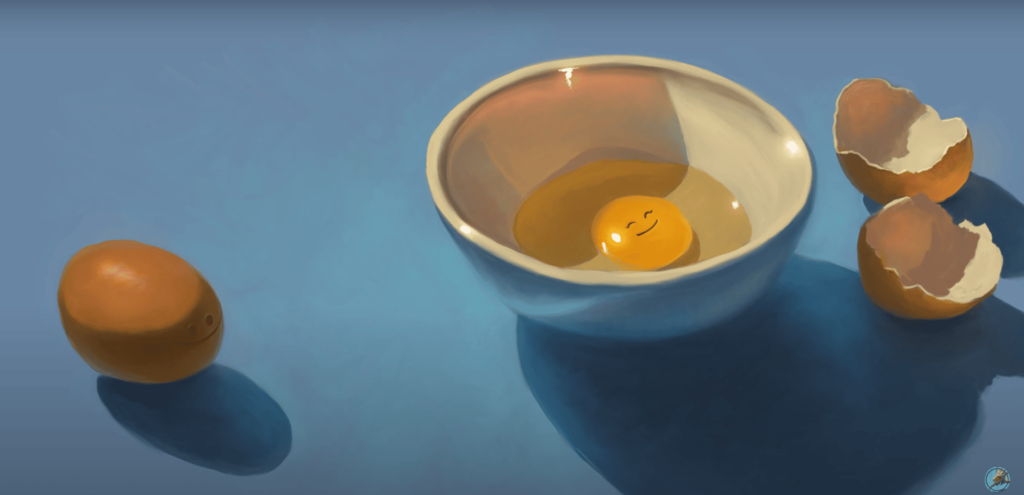
There are a lot of tutorials on light and shadow available on YouTube. However, few are truly in-depth enough. I’ve found some brilliant ones that will give you plenty of information on the subject.
But, to ensure that you are well-informed, I suggest you pair them with any of the books mentioned above.
The best channels that provide a lot of instruction on light and shadow are:
Marco Bucci teaches in quite an entertaining manner, providing information as well as humor in his videos. He has a great deal of experience so I’d say his channel is a great resource to check out.
Lighting Mentor is an amazing channel that has SO much information on color and light. The exercises he provides are incredible and following them is vital to get amazing at light and shadow.
Online Courses
The best way to improve faster is by following structured content. And online courses are the perfect option for that.
Some really great online courses that have tutorials on light are:
Each of them is subscription-based and has courses on a multitude of topics. To access them you would just need to pay a monthly fee.
Wrapping Up With Light And Shadow
It’s important to practice light and shadow frequently as well.
You can refer to the exercises suggested by Lighting Mentor. They will help you become much more proficient and you’ll gain a better understanding of the principles by working them out yourself.
You’ll find that light and shadow are closely interrelated with color. So, now let’s talk about color theory next.
Everyone Loves Color Theory

So we’ve finally reached the fun part. Let’s talk about color theory!
Most artists especially love this fundamental. Learning it will help you out a LOT in your color decisions which are much more complex than you would assume.
Relation Between Light And Color
You can’t have one without the other. Light and color are well and truly linked and you need both.
Knowledge about light and shadow will help you in your value decisions while designing a character, prop, scene, or anything really.
Color will just bring it to life. It will bring emotions and storytelling.
You can have emotion and a story without color as well. However, color just enhances it.
ALSO: Remember that getting the value right is MUCH more important than getting the colors right. If you have the values correct, then the image will read well no matter which colors you choose.
Why Is It Important To Learn Color Theory?
You tell me.
Do you plan on going your entire art journey without painting? Do you wish to only draw and render in grayscale?
If yes, then sure. You don’t need to learn color theory.
If not, then you HAVE to learn color theory.
Color is a VAST topic. It’s not as simple as choosing colors because they look pretty. No, you have to make solid color decisions to level up your artwork. And they are hard decisions.
Have you ever tried using color? Ever wonder why they look so muddy or supersaturated? It’s because you haven’t studied color theory yet.
So, you better learn color theory as it’s going to make your artwork AMAZING. You’ll forever be thankful. Seriously.
Color Terminology
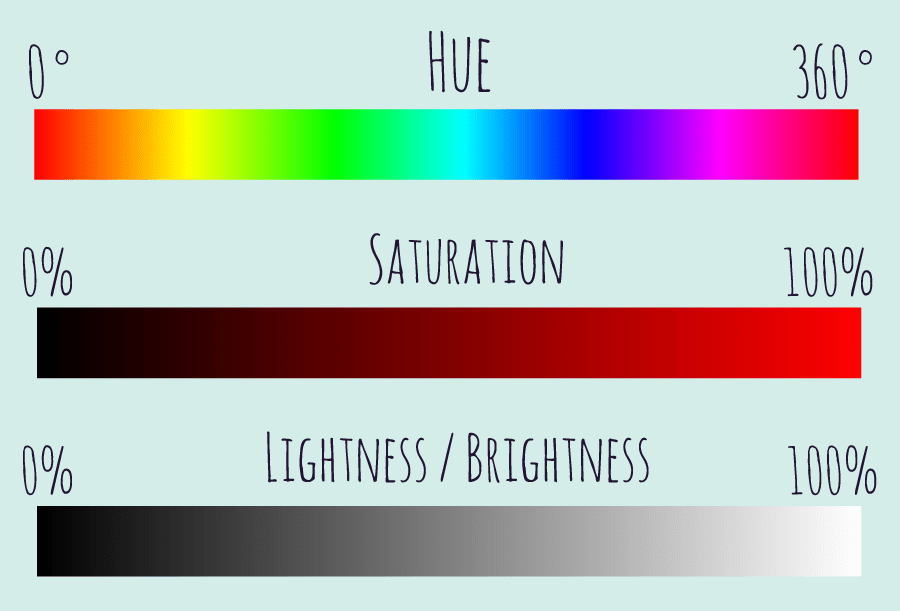
Color has three components that you need to think about. Saturation, hue, and brightness.
Saturation is basically the level of purity of the color. It depends on how much gray you mix with the hue.
Hue is what you think of when I say the word ‘color’. Examples of hues are green, yellow, orange, etc. So, remember to say hue instead of color.
Brightness refers to the value of the hue. Tints refer to hues mixed with white and shades refer to hues mixed with black.
I know, the terminology is confusing, right? Don’t worry, you’ll get used to it soon enough.
Color Basics
So, I want to give you an example of how little you really know about color. If you’re thinking it’s as simple as just color-picking and filling an object with it, you’re totally wrong.
The thing is that there’s a small component that plays a major factor as well. It’s called light.
Yes, color actually changes a LOT when light comes into factor.
Let’s take the example of a sphere with the local color of red.
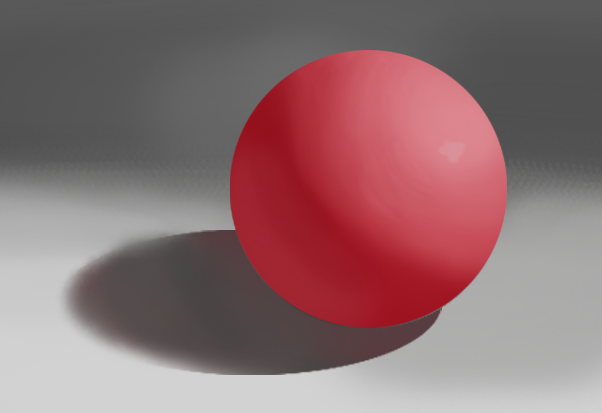
At the terminator (if you don’t know what this means then read the light chapter first) the hue will be at its most saturated as well as at its darkest.
Yes, the terminator has the most saturated hue.
Once you reach the reflected light area of the sphere, the saturation decreases. The brightness is more than at the terminator.
In the half-tone area, the hue is actually less saturated than the terminator. The least saturated area is at the direct light portion of the sphere.
TIP: This is mainly because light tends to overpower the local color of the sphere.
Thus, after placing the sphere under a direct light source, the terminator is the area that most resembles the local color.
However I didn’t even consider the influence of the floor and the environment in the example. Both of which affect the hue of the sphere.
So, I hope you’ve realized that color theory is REALLY important to making good color decisions. This will directly affect your rendering skills a lot so you must spend a good amount of time studying the principles of color.
How To Learn Color
Now, that you’ve understood the importance of learning color theory, let’s get into how to actually study it and which resources are readily available to us on the internet.
Color And Light By James Gurney
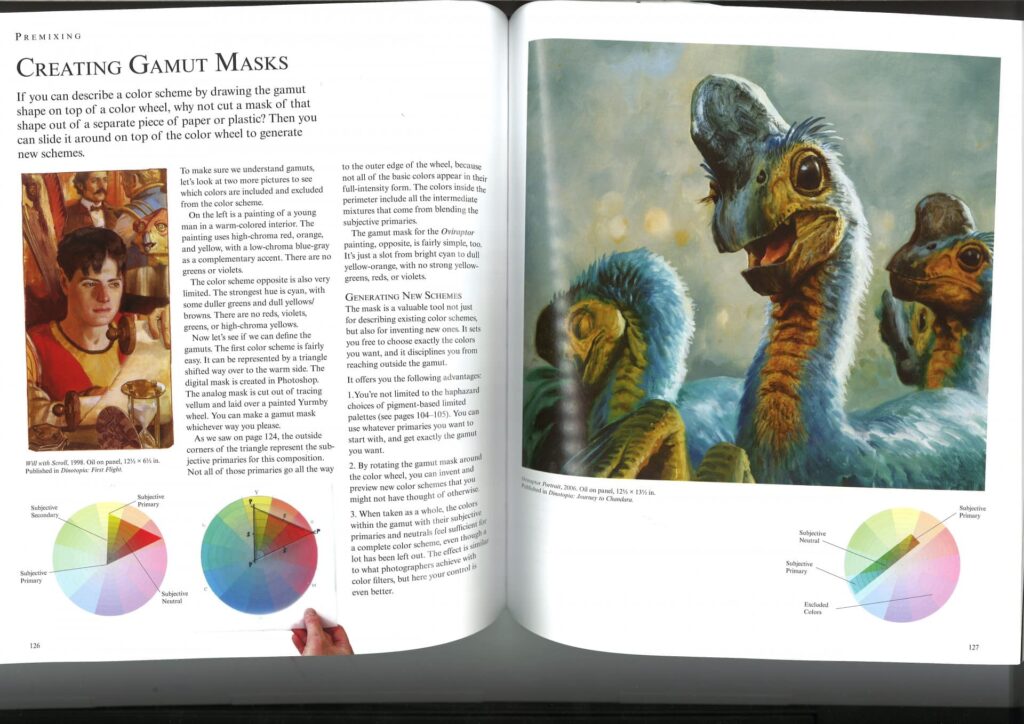
This book is an INCREDIBLE resource on color.
It’s going to explain a TON of concepts so get ready as you’re really going to be welcomed into the world of color and light.
James Gurney goes through everything, from choosing a suitable color scheme to explaining what a color gamut is. You’re going to be overloaded with the amount of information in this book.
This is why I recommend you go through this wealth of info slowly and just understand everything well.
This book is definitely a must-have and will be insanely helpful on your art journey. It’s quite worth the investment.
Online Courses
Since light and color are interconnected, most of the resources I’ve mentioned in the light section apply here as well.
Schoolism is a brilliant website that offers a variety of courses on light, color, digital painting, and more. There are some very well-known artists teaching at Schoolism and you’ll be in good hands if you opt for this one.
ArtWOD has an amazing classroom section where they have a lot of tutorials on using color. Also, their beginner’s painting course has several sections where color theory is more exclusively looked at so you can certainly check it out.
YouTube
Marco Bucci is a phenomenal artist who has built his career on his knowledge of color. Learning from him is a blessing and you will learn a great number of concepts in a fun and light-hearted manner.
Lighting Mentor is another fantastic resource that I think you really need to check out. The exercises he recommends will really improve your painting skills. I think this is a resource that is really worth it.
How To Practice Color
There’s only one thing that’s going to really make a difference in your color application.
And that’s practice.
A lot of it.
You need to do a lot of color studies to really understand color. Doing these studies from movie stills or from artists’ works will help you analyze their decisions.
You’ll start to intuitively understand a lot about color theory.
So, don’t skip out on this and practice a lot. You will get much better in no time.
Wrapping Up With Color

Color is a subject that you can constantly refine for your whole life. As much work as you put into it, the better you will get.
But, remember to learn from other artists. Analyze their work to understand why they’ve made the decisions they have. Try to replicate it a few times as well.
ALSO, the color theory you will learn from these resources will apply to traditional as well as digital painting.
So, nothing should stop you from getting better at color. Just learn the theory and start practicing. You’ll become amazing in no time.
Composition
Now, we’ve finally reached the last art fundamental that’s necessary to learn. Composition.
Composition is basically how you arrange and compose your artwork. This can mean working with proportion, the camera angle used, the types of contrast used, and more.
Many newbie artists feel that this is more or less an abstract topic that will have minimal influence on their art but it’s actually the opposite.
Composition has PLENTY of guidelines that help enhance the artwork. It plays a huge role in storytelling and is vital for everyone.
You can certainly break the composition rules but again, you need to be very familiar with the rules to do so.
What Can You Do With Composition?
Storytelling.
That’s basically what you can do with composition.
Which is an important part of:
- Character design
- Concept design
- Illustration
- Visual development
- Environment design
- Comic art
- Storyboarding
- Animation
Using composition guidelines, you’ll be able to guide the viewer’s eye exactly where you want them to go. This way you can convey the exact message that you sought to send.
ALSO, a good composition will pull the artwork together and create a solid impact. And learning composition will clearly separate you from an amateur to a professional.
So, you can clearly do quite a lot with composition.
Basics Of Composition
Now, let’s get into some basics of composition so that you can get a feel of how to use composition principles in your artwork.
Rule Of Thirds
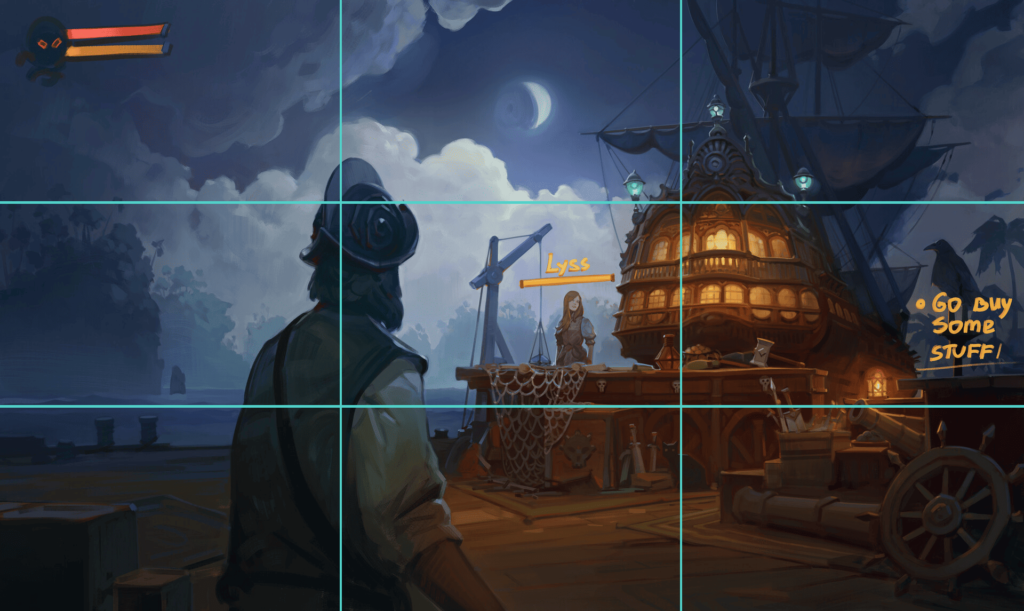
I’m 100% sure you must have heard of this rule before.
The rule of thirds is not something artists actively aim to achieve in their drawings, but rather an intuition that’s built from years of experience.
The rule states that your main points of interest in the artwork should lie near the intersecting points of the grid. Doing so will remove the redundancy of simply placing the focal point in the center of the artwork.
If you view any famous artwork, you’ll instantly notice that more often than not, they tend to use this rule.
Golden Ratio
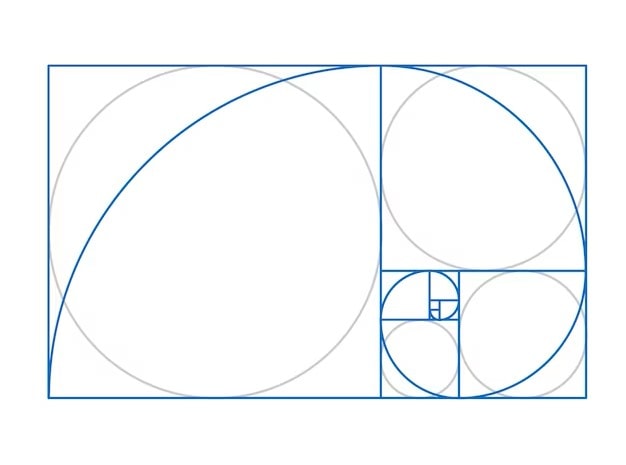
The golden ratio is also a rule of composition that is frequently heard of but one that people seem most mystified by.
It’s similar to the rule of thirds in the sense that it advises you where to place the main focal point of the artwork. It’s said to be especially pleasing to the eye and most organic forms tend to follow this rule in nature.
You can find the golden ratio in geometry, architecture, and even plants.
For the improvement of an artwork, you can follow either of the two rules, both of which tend to a fairly pleasing composition to the eye.
Contrast

Contrast plays a huge role in composition. By placing contrast strategically in your artwork, you can easily dictate the path the viewer’s eyes would follow while admiring your artwork.
Which is a major advantage. Thus, it’s important to know all the different types of contrast that you can apply for a better composition.
- Contrast by shape includes making the focal point different in shape from the surrounding shapes. For example, you can place an adorable girl drawn with mostly circular shapes, surrounded by a jagged forest, full of triangles.
- Contrasting colors will serve you well while composing an image. It’s a good idea to use complementary colors to achieve this effect better. For example, you can keep a fire full of warm colors opposite a cold and harsh environment full of blues.
- Contrast by value is one of the most effective ways to draw the viewer’s eyes immediately. Place a bright object against a dark background and it’ll instantly alert the eye.
Therefore, you can utilize any of these principles to make your artwork stand out much better in clarity as well as story.
How To Learn Composition
While I gave an extremely basic overview of composition principles that you can follow, you would need an extensive guide to actually gain bigger results.
The best resources that will enable you to understand composition better are given below. Learning from them patiently will take your artwork to new heights and you’ll never look back.
YouTube
There are some incredible videos available on YouTube that aim to explain composition in a way that’s easy for beginners to understand.
Here are some of the best ones:
- Design Theory
- My Top 10 Composition Tips for artists
- 3 Rules for Better Composition in Your Art
- COMPOSITION 1 – Understanding Shapes
Along with these, you’ll also need to know about framing, which is a huge part of composition. The camera lens is one subject that you’ll need to know about.
Here is a video that’ll get you started on thinking about camera lenses.
Online Courses
ArtWOD has some brilliant tutorials and webinars on composition that I think you NEED to see. The simplicity with which the subject is taught is really priceless.
This resource will teach you a lot of in-depth information on composition that you’ll be hard-pressed to find elsewhere.
Thus, I HIGHLY recommend giving ArtWOD a try. You won’t be disappointed.
However, Schoolism also has some great lectures on composition that I think are really worth viewing. If you wish to try this one out, then you can go for their monthly subscription.
It’s super affordable for the education they’re offering.
How To Practice Composition
The best way to practice composition is by studying movie stills.
ACTION PLAN: The way to do it is to grab movie stills and convert them to grayscale. After doing so, I recommend you recreate those scenes in Photoshop using ONLY black and white.
Yes, that’s right. Only use two values.
This will get you to make some hard decisions and with enough practice, you’ll understand how to make scenes read better instantly.
After practicing with 2 values, you can increase to 3 values and even 4 values. However, you HAVE to start with only black and white first. That is non-negotiable.
Importance Of Thumbnails
I also highly recommend you start using thumbnails to practice composition.
INFO: Thumbnails are really small (thumb-sized) frames in which you draw how the final version of your artwork would look like.
This will enable you to first focus on the big picture before getting absorbed into the tiny details.
ALL artists use thumbnails very regularly while composing a piece of art, thus I suggest you get used to doing the same.
Here’s an in-depth video on this topic.
Practice, Practice And Practice
Composition is something that will require constant practice to get better at (I feel like I’ve said this for everything, lol).
Theory can only get you so far so keep practicing until it becomes more intuitive.
Composition will take you at least a few months to get a hang of, so don’t quit until then. Just hang on and you’ll eventually get good enough to move on to more advanced topics.
Common Questions On Art
Well, congratulations for making it this far. You’ve successfully completed the first step to becoming an artist, which is taking time to research how to study.
You’ve done great and I’m sure you must have a few questions as well.
Is Learning Art This Complicated?
Yes. It definitely is. It has WAYY more to it, which I’m sure you’ll find out once you begin learning.
All the other articles you might have read saying that you can get good at art in only a few months are totally wrong.
The thing is that art has a lot of information and if you intend on becoming a professional artist, then you’re going to have to dedicate time figuring it all out.
BUT, every field is the same. You would need to spend a lot of time studying no matter which field you go to. So, if this is what you want to do, then it shouldn’t matter.
How Long Will It Take To Learn?
It depends on you.
I know that’s a very generic answer, but it ACTUALLY depends on you.
- How much time are you willing to spend each day learning art?
- Are you a person who completes all the goals you set out to do?
- Are you really passionate about art? Enough that you wouldn’t give up mid-way?
- Will you take the time to finish all the homework and exercises you may have to do?
- Do you want to be really skilled at art or are you just okay with getting by?
So, it really depends on the time and effort you’re willing to put into this.
However, if you’re really dedicated, and spend at least 4 hours a day learning art without taking too many breaks, you can expect to achieve professional quality artwork in around 1-2 years.
Yes, that is actually how long it really takes. And that is if you’re taking art really seriously as well.
After Learning The Art Fundamentals
After completing the basics, you can start to narrow down what you really like.
For example, if you want to become a character artist, you can spend some more time refining your anatomy, color theory, and digital painting skills.
So, you should basically aim to specialize further in your realm of interests.
Spend time viewing other artists in a similar field and analyze their work. Do you think you’re anywhere close to the same quality?
If not, then take time to study more and refine your art.
If yes, then congratulations! You can immediately start building your portfolio and start putting yourself out there.
This could mean applying to internships, building your audience on social media, and more!
If you’re wondering how to go about all of this, then there’s no need to worry. We’re going to get into it right away!
Building Your Portfolio
Now that you’ve reached the next leg of your journey, you’ll eventually want to start making a living off of your art. And that means you’ll need a portfolio to showcase.
Building a portfolio is going to be hard. You’ll need to showcase your technical ability very well. Assuming you’re applying for concept art, character design, environment design, etc, you’ll need to have some solid designs as well.
So, how do you start making your art portfolio?
Be Focused
You’ll probably be tempted to through in a bunch of your studies that you may have done over the past year. It’s the easiest way and you can immediately start applying to companies.
But that’s not the best way to do this.
You need to PLAN. Yes, you need to be focused in your approach and only include pieces that actually matter.
Let me give you an example.
If you intend on applying for character design jobs, you can’t include your 3-year-old watercolor painting in it. No, you need to ONLY include exactly what is relevant to your dream job.
You need to include character sketches, some explorations, a few character designs as well as some great gesture drawings and studies you may have done. Make sure that EVERYTHING should actually relate to your desired field.
So, don’t just dump a bunch of your artwork into your portfolio. Only include what’s really relevant. That’ll be the best way to actually get a shot at your dream job.
Quality Over Quantity
Most people tend to include a TON of their artwork in their portfolio. The general consensus is that throwing a bunch of spaghetti at the wall will guarantee the best results.
That may be true, but not for this case.
The thing to keep in mind is that your weakest piece in your portfolio will be regarded as your average skill level.
Furthermore, the people hiring you will probably not have enough time to go through 50+ pieces in your portfolio. They receive more than a thousand portfolios per posting. How will they have enough time to view everything?
Thus, it’s really better to limit your portfolio to the number they may have provided you on their job posting site.
If they haven’t specified a number, then you should aim to show 15-20 of your BEST artwork.
Show Your Process

No matter which internship/job you may be applying to, it’s best to show your design process.
The people hiring you will need to see that you know all the art fundamentals and can actually apply them in your work.
They will also NEED to know about your thought process and why you came up with the end result as you did.
Thus, you need to show the sketches, mock-ups, and behind-the-scenes work you may have done to get your final result. That may include iterations for concept art, or rough thumbnails for environment design, etc.
Aim to include at least 2-3 pages of them in your portfolio.
TIP: To get an idea of how to present your work with the rough design sketches, you can take a look at these portfolio guides from Atomhawk.
Get Feedback On Your Portfolio
This step is SUPER important. You may think it’s not but getting feedback is crucial. It’s actually non-negotiable.
This is because having fresh eyes view your portfolio will give you new insights you may have never thought of. Also, when we spend a long time on our artwork, we tend to get emotionally invested and become blind to our mistakes.
Having other people review our work will therefore eliminate that problem as they can just give it to us straight.
TIP: Show your work to brutally honest people. The goal is to get better so constructive feedback will help you much more than false courtesy praises ever will.
If possible, I actually recommend you show your portfolio to an artist currently in the industry in your particular field.
It’s fine if you have to pay a fee for a portfolio review. However, their feedback will tell you exactly what you’re missing in your portfolio and will increase your chances of success.
Have A Portfolio Website
If you don’t have a website showcasing your portfolio, then I highly suggest you look into getting one.
You can certainly use Artstation or Behance to display your work, however they do have a slight disadvantage. You can’t freely customize the viewing experience of the reader.
And with potential employers viewing it, having a personalized touch will certainly give you the upper hand.
By having a portfolio website, you’ll dictate exactly which order they should view your artwork in. You can customize the whole viewing experience including but not limited to adjusting the artwork resolution.
Also, a personal website is much more professional and may give you an advantage in that regard.
You can use Wix, Squarespace, or even Bluehost for your website hosting. Opting for your own website will cost you a fee of 2.95 USD per month (using Bluehost), but you will own your site. Which comes with its own set of advantages.
If you want a quick and customizable site, then opting for Wix or Squarespace will be a good option.
Going Pro
Once you’ve finally entered the industry, you’ll realize that you’ll have to promote yourself as well as your artwork quite frequently.
If you’re opting to learn art by yourself, then things might be doubly hard for you. This is mainly because you wouldn’t have a lot of industry connections.
Going to art school would give you that foot in the door and would present much more opportunities.
However, it’s still definitely possible to live as a professional artist even if you learn by yourself. The only thing is that you’ll have to put more effort into putting yourself out there.
Promoting Your Work
Since you would have learned art completely by yourself, you wouldn’t have any job opportunities straight out the door.
Art schools offer some placements that get you directly into the industry. Also, the alumni may come in handy in these cases.
Thus, you would need to really make a name for yourself. The only way to do this is to really interact with the community and start promoting yourself.
Building Connections
For starters, you would really need to interact with fellow artists regularly.
You can use Discord art community groups to find artists on a similar career path. You can DM them and ask them if they would be interested in joining a personal discord group.
This way you can form your own art community and interact with artists all over the world.
Another method is by going to art conventions more frequently.
At these conventions, you should really try to approach artists and talk to them. Don’t just thrust your portfolio at them and ask for a review or something. That’s super rude.
Try to approach them without ulterior motives and have a genuine conversation. The goal is to build friends, not get job offers out of anyone.
If you’re shy and introverted (which most artists generally are), then you’ll need to shed that immediately.
You need to interact and actually talk to other artists. There’s no way around it.
Dealing With Rejection
I also wanted to inform you that rejection is a part of life.
It comes with the job, to be honest. Even if you’re AMAZING at art and are just killing it, you will 100% face rejection. It’s inevitable.
For average artists, rejection is really frequent. In fact, Feng Zhu, the founder of FZD says that it’s important to apply to at least 30 studios. Most of which you will get rejected from.
So don’t be disappointed as most artists are going to encounter failure no matter what.
The best way to get over this is to learn how to deal with rejection well.
Take it as a blessing in disguise and a message to work harder. You should be motivated to improve yourself after facing rejection rather than accept it as proof of your inadequacy.
Because it’s really not. It takes time, a LOT of time to start building up your resume and gaining experience. You’re not going to be awesome at everything right away.
So accept that and move on.
The Business Side Of Things
Right now, you may be unaware of the fact that you’re going to have to handle a lot of stuff by yourself. And by that, I mean accounting, taxes, marketing, etc.
This is mainly because most artists eventually tend to leave the industry after a few years. Instead, they start freelancing.
Freelancing will give you a ton of advantages:
- You’ll be able to choose which projects you want to work on
- You can set the cost per hour and get work accordingly
- Your work hours can get much more flexible as you can decide when you want to work
- You won’t be forced to work on a project that you have no say in
So, for many reasons, artists tend to opt for freelancing.
However, if you intend to freelance, you need to be aware that it will be a business. And you need to treat it like a business.
Thus, you’ll have to know how to deal with clients AND will have to learn to market yourself extensively.
So, there will be a huge learning curve that you’ll have to be prepared to take.
Social Media
A great way to build your audience and really engage with the art community is to utilize social media.
This will achieve three things:
- You can gain a lot of artist friends and can connect with the community very effectively
- Building an audience for your work will help you when you want to freelance and start Patreon as well
- You can often gain job opportunities or commissions by having a large enough following
INFO: Patreon is a website for creators to share their behind-the-scenes work as well as WIPs. You can earn money by becoming a creator and sharing your artwork with your following.
Art is a bit of an unstable career. Many artists switch jobs often and are sometimes laid off as well. You may not get a job immediately as well.
Thus, it’s a great idea to start building an audience on social media when you’re new. Over the years, this audience will really come in handy as a backup option.
YouTube, Instagram, and even TikTok are some brilliant social media platforms to consider when sharing your art.
NOW You’re Ready To Start!
We’ve finally reached the end of this article!
If you’ve read all the way till here then I must applaud you for taking this first step on your art journey.
Your art journey is going to be a long, arduous path.
Somedays you’ll feel on top of the world and the other days you’ll feel like you’ve regressed rather than actually improved.
However tough it may get, just keep swimming, just keep swimming…. (get it?).
Every time you face tough days, just remember this. After a period of constant lows, you will improve.
Why? This is because you’re learning something new. And you tend to get worse before you get better.
SO, don’t give up no matter what. You’re definitely going to make it as long as you’re consistent and passionate enough about art.
If you have any questions about learning art, please leave me a comment or shoot me an email. I’ll be more than happy to respond to you!
I reply to EVERY single email. (However, it could take a while so be patient 🙂 ).
If you know someone that wants to become an artist and don’t know how to, and you have enjoyed this post, I would be SUPER grateful if you can share this guide with them!
Now, don’t dilly-dally any longer. Find which resource you need to learn from and start immediately.
I hope you’ve enjoyed reading this article and I hope you’ve learned something new as well.
Good luck and happy drawing!
