5 Game-Changing Tips To Master The Basics of Character Design
Disclosure: This article may contain affiliate links. That means if you buy something we get a small commission at no extra cost to you.
Picture this: With coffee in hand, you quietly sit in the corner of a cafe, designing a mountain goblin with an obnoxiously large nose and a wicked grin.
Sounds amazing right? Except that it’s only a fantasy. Mostly because you don’t know how to design cool characters yet.
But what if I tell you, that it’s MUCH easier than you think? That you could design some epic characters only a month from now?
Does it sound too good to be true? Well, it’s not and I’ll show you how.
For now, get comfortable and I’ll explain the entire step-by-step approach to designing a character. If you’re ready, let’s get started!
5 Game-Changing Tips To Master The Basics of Character Design
What Is Character Design?
Before we get into all the fun stuff, let’s take a step back and discuss what character design really is.
To put it simply, character design is a visual representation of an idea for a character that can be used in movies, video games, posters, etc.
But, character design is a little more than that boring definition.
Character design is about subtly conveying the personality, the mood, the behavior, and even the back story of the character.
TIP: The shape, the structure, the color scheme, the costume design, every single thing you see on a character is thoroughly planned by the artist.
This is planned to convey a ton of information about the character at the first impression.
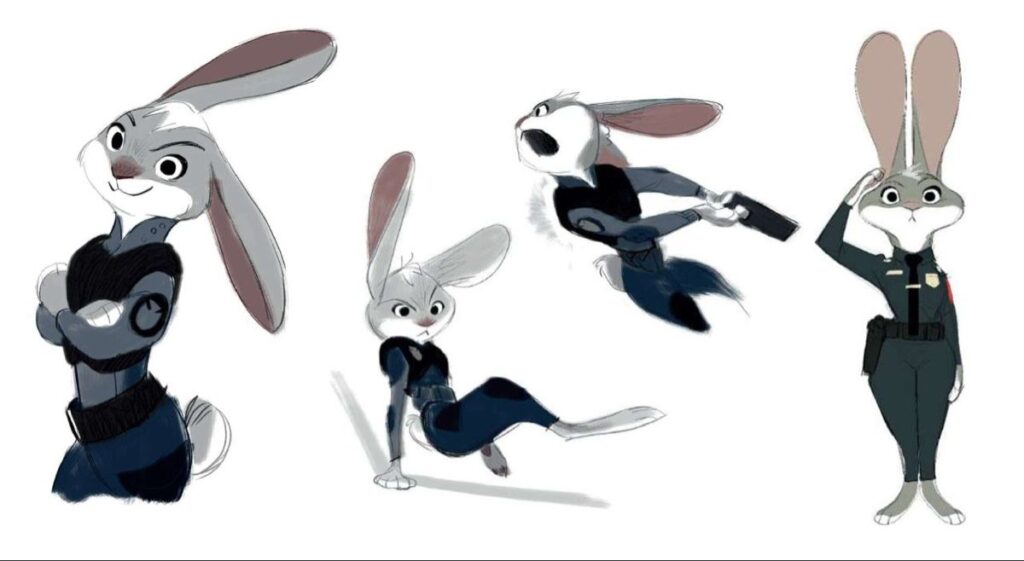
Take Judy Hopps from ‘Zootopia’ for instance. As soon as you see her, you just know that she’s a bubbly, warm, and empathetic character.
But, how do you know this? How can you tell at first glance that she’s a kind and positive character?
You’ll find out REALLY soon. But before that, let’s discuss what character designers actually do every day.
What Do Character Designers Do?
Unlike common misconceptions, character designers don’t digitally paint all day long and they certainly don’t make splash art (unless they are also illustrators).
They also do NOT get to choose which project to work on. If they’re assigned to design a background character (that plays just a tiny role in the movie or game) then they’ll have to follow through.
Character designers normally spend a LOT of time in the conceptualization phase or the ideation phase.
It takes almost 100 sketches to come up with one good idea that can actually be used. In reality, most of the rough sketches of the characters are brutally rejected.
But, before I get ahead of myself, let me describe the process properly.
The Designing Process
A character designer begins his work once he receives the outline or the description of the character, usually provided by the art director in charge.
The designer would then start researching more about the personality, the back story, the culture, the fashion trends, the anatomy, etc.
After making a good mood board, the designer will then finally get started on the ideation phase. This means churning out a TON of sketches before the director finally approves one.
Then, the designer will have to design and develop the character by thinking about its silhouette, shapes and color palette.
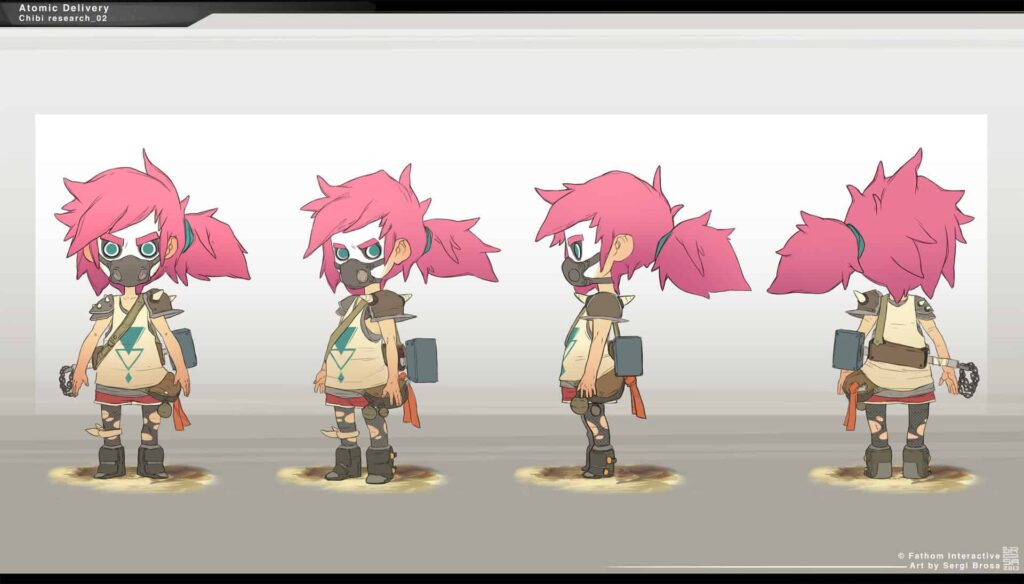
Character turnarounds, the most tedious part of the job, is essential for the modelers or animators. This means that the designer will have to make quite a lot of character sheets as well.
At the very end, the character artist may create some beautiful rendered artwork. But that is just 15% of the job.
So, if you have any false beliefs, then be sure to squash them right now. After all, character design is all about DESIGNING and not about making pretty pictures.
Average Salary Of A Character Designer
I’m sure you must be wondering: ‘Does character designing compensate well?’
Well, the answer is yes, it definitely does. According to Glassdoor, the average salary is around 80,000 USD.
While environment design, concept design, and 3d modeling have higher salaries in comparison, the job satisfaction is quite high for character design.
TIP: However, do keep in mind that character design is a VERY popular field. Thus, the competition for character design jobs is intense.
This makes it really hard to gain entry into the character-designing world. However, once you’ve made it and if your work is exemplary, there won’t be any issues with getting more work.
So hustle hard and once you make it, things will definitely get easier.
How to Become A character Designer?
Now that you’re ready to get involved in character design, let’s talk about how you can actually make your dream a success.
Do You Need To Go To Art School?
Yes and no.
Honestly, it depends on a lot of factors like:
- Can you afford art school?
- Does your country give you scholarships?
- Do you find it hard to finish tasks by yourself?
- Do you require the discipline that the school provides?
- Would you like a structured approach to art?
If your answer is ‘yes’ then maybe it’s important to consider going to an art school.
Some of their MANY advantages include good faculty that can give direct feedback, healthy competition among peers, and great alumni that can help you when you graduate and need a job.
But, it is NOT the only way to learn art.
If going to art school is not a possibility for you (for any reason whatsoever), then you can definitely learn art by yourself.
It’ll take determination, passion, and a lot of discipline. But it’s definitely possible and MANY artists that I look up to never actually went to art school.
Therefore, you can definitely become a character designer without any formal education. To know more about how to make this a reality, you can read this in-depth article.
What You NEED To Learn
While I HIGHLY recommend reading this post, which covers every single thing you’ll need to do on your art journey, I’ll briefly mention how you can become a character designer.
First of all, you HAVE to learn the art fundamentals.
There’s no going around it. It’s the single most important part of your art education so don’t think you can skip it.
By art fundamentals, I mean anatomy, perspective, form, composition, color, and light.
All of these topics are necessary for whichever art profession you may do. Although some may be more important (like anatomy is SUPER important for character design), all of them going to come in use.
Like, you can’t design a character using only your anatomy knowledge.
You need to understand form to know how it moves in 3d space. Color and light come into play when you want to render your character (digitally or traditionally).
You’ll obviously need perspective knowledge and composition basics to frame your final image or illustration.
So, learn ALL of them.
If you want to know exactly how to master the art fundamentals, then read this ultimate guide to becoming an artist.
Tools Required For Designing
Before we get started with the character design workflow, let’s briefly discuss which tools you’ll need to make a successful design.
While traditional art materials may still be used for character design by few artists, digital art is clearly the future and MOST character artists paint digitally.
For digital art, you’re going to need:
- A great painting software
- A tablet to draw on
Painting Software
For the painting software, I HIGHLY recommend going with Photoshop.
It’s still clearly the industry standard and most art studios insist on artists working on Photoshop. So, It’s better to learn it from the get-go (especially if you want to be a professional artist).
However, Photoshop has a few limitations. It is first and foremost, a photo-editing software. Which may be amazing for photographers, but not so great for us.
The tools are quite limited and the brush engine is sub-par when compared to other painting software like Procreate and Clip Studio.
Procreate has the BEST brush engine I have ever come across. The modifications you can do are shocking and I just love playing around with it.
If you already have an iPad, then you should definitely go with Procreate. It is amazing and quite popular among illustrators and some character designers as well.
Lastly, Clip Studio is the perfect software for painting. It was specifically designed with painting in mind and you can adjust literally everything.
For example, if you’ve drawn a stroke, you can actually change its width, color, and fluidity WITHOUT redrawing it.
Isn’t that amazing?
It’s also great for animations and illustration, although it may not be as popular as Photoshop and Procreate.
TIP: Click here to find out more about the best painting software for you.
Drawing Tablet
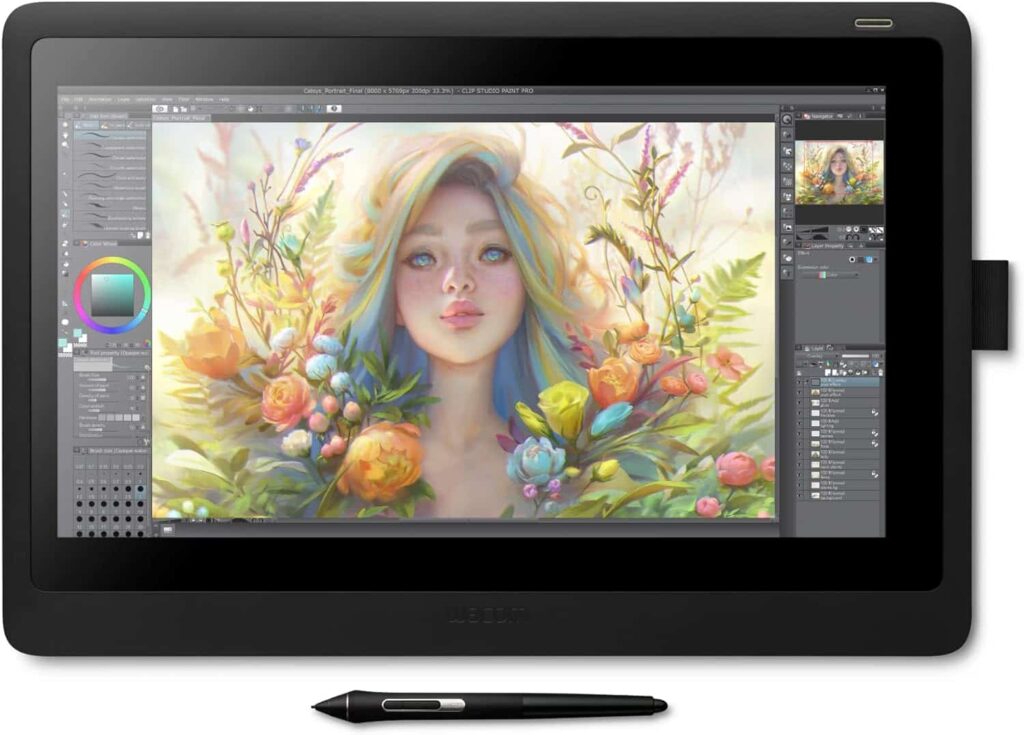
Now that we’ve covered the different types of digital software, let’s move on to the main device you’ll be working on all the time.
The drawing tablet.
There are two types of tablets: a pen tablet and a display tablet.
A pen tablet basically functions as a writing pad, where you can draw and look at the screen to see the image.
It has markings to indicate the drawing area, which corresponds to the computer’s screen. So when you move the pen on the tablet, the cursor will also move on the computer.
I HIGHLY suggest beginners buy a pen tablet, simply because it’s extremely easy to use and SUPER affordable.
A display tablet is very different from a pen tablet. It has a screen through which you can view your drawing and you can directly paint on it.
Thus, it can get quite pricey, which is why I recommend you go for a pen tablet when you’re just starting out.
To learn more about the best types of tablets, you can check out this post here.
TIP: If you already have an iPad, then I recommend you draw on it and use Procreate. All you would need to do is buy an Apple pencil.
Basics of Character Design
We’ve finally reached the part you’ve been waiting for. It’s time to learn the basics of character design in depth.
I’m going to break down the workflow of designing a character, step-by-step, to make sure you understand.
However, keep in mind that artists have their unique own way of designing their characters. This is not a hard and fast rule you must follow, but rather a basic framework that you can refer to.
TIP: You can use this process as a base and tweak the parts you don’t like and modify them according to your will.
Now without further ado, let’s get started.
Step 1: Initial Concept
This is the very first step you’re going to begin with for any character you may design.
Conceptualization.
It’s a summary or rather a rough sketch of how you want the character to turn out.
So, you’re going to have to sit down and write everything you can about the character. This may include several important features of the character.
A good way to start off would be by answering these fundamental questions:
- What type of character it is? A human, a creature, an animal, or an object?
- What is his age and gender?
- What is the form and anatomy of the character?
- Where is the character from?
- What is the character’s personality like? Is he friendly, cunning, or brave?
- What type of clothes does he wear?
- What is his dream? His aspiration?
- Does he wear any accessories, or carry a weapon?
- Does he have a power?
These are the basic questions you need to think about to understand how your character is going to turn out.
By formulating these points, you can start to visualize your character, and you’ll be better informed about which shapes and colors the character might have.
All of this takes only a short period to decide, but doing this will make your character MUCH better designed.
So, remember. The very first you need to do is make a complete character sketch.
Step 2: Gather References
The next step is to gather a TON of references for your character.
Unless you’re a complete prodigy, it’s SUPER hard to come up with ideas out of thin air. It’s also quite difficult to draw accurately without referring to references.
Of course, there are a lot of artists that can design relying solely on their imagination. But, that’s simply because they have a humungous visual library and have practiced it a million times before.
But, there’s nothing wrong with gathering references and you shouldn’t feel ashamed to do so either.
It’s also HIGHLY encouraged at all art studios because research is such a vital aspect of character design.
If you don’t research properly, then people are instantly going to find faults in your design. And you don’t really want to create a poorly designed character, do you?
Therefore, take the time to gather a ton of references and research thoroughly about your character. It will definitely pay off.
Creativity in Design
Now you may be wondering: ‘If I base my entire design on research and references then where is the creativity in it?’
That’s a fair point. How can you make some extraordinary if you’re comparing it to something already existing?
I’ll answer that question in a minute, but before that, let’s take a small example.
Suppose you want to design an alien. Sounds simple right?
What would you do? Would you make an unknown blob or something completely weird with 5 eyes, no nose, and only one foot?
Probably, right?
If you’ve noticed, eyes, nose, and feet are something already pre-existing in nature. It’s something we all know and understand very well. Even the blob form is quite common in a lot of sci-fi movies.
All the aliens or creatures in sci-fi movies are literally an amalgamation of several animals we already know about.
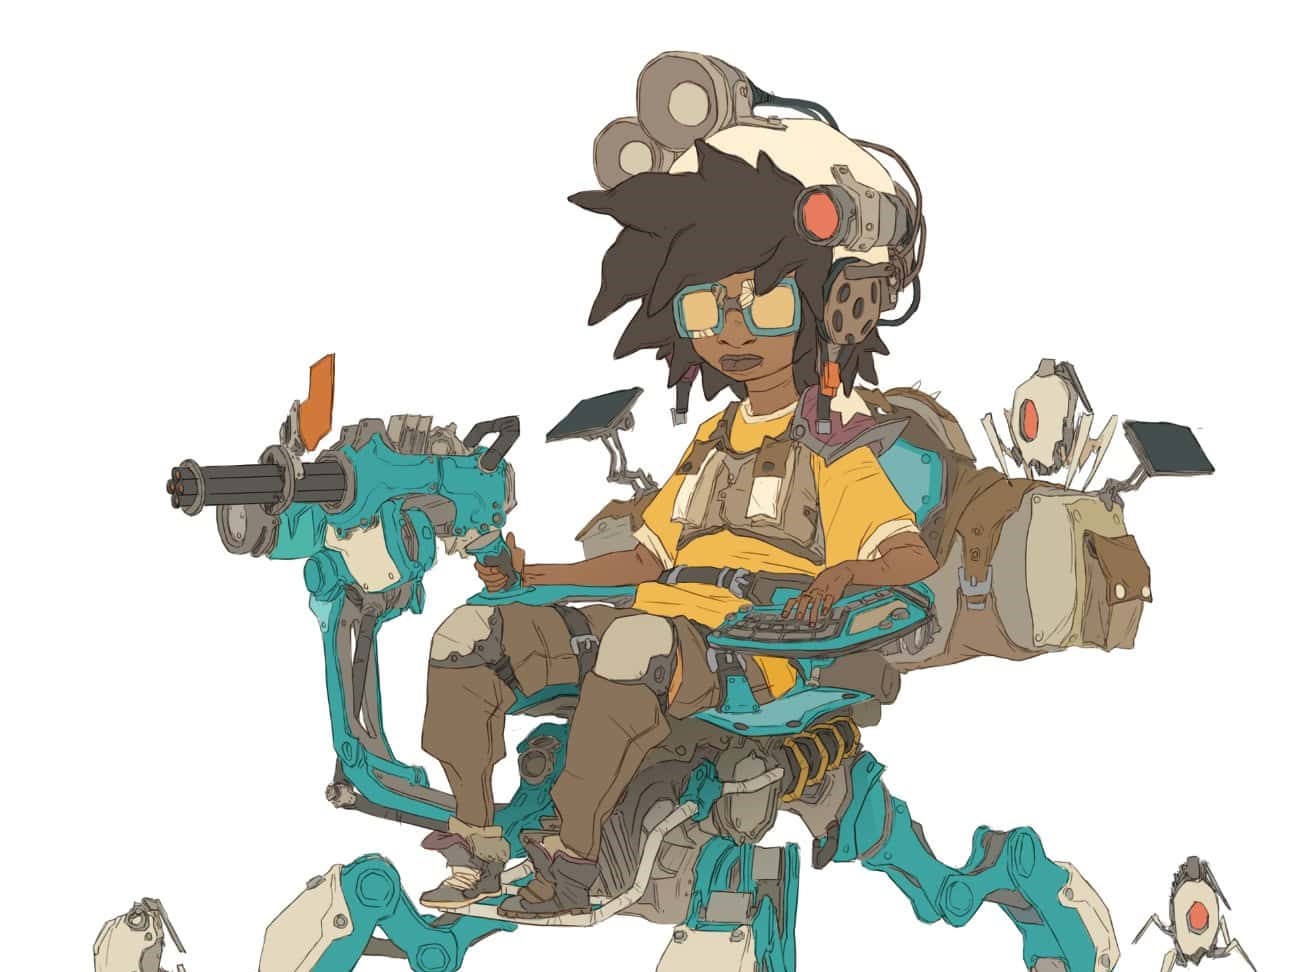
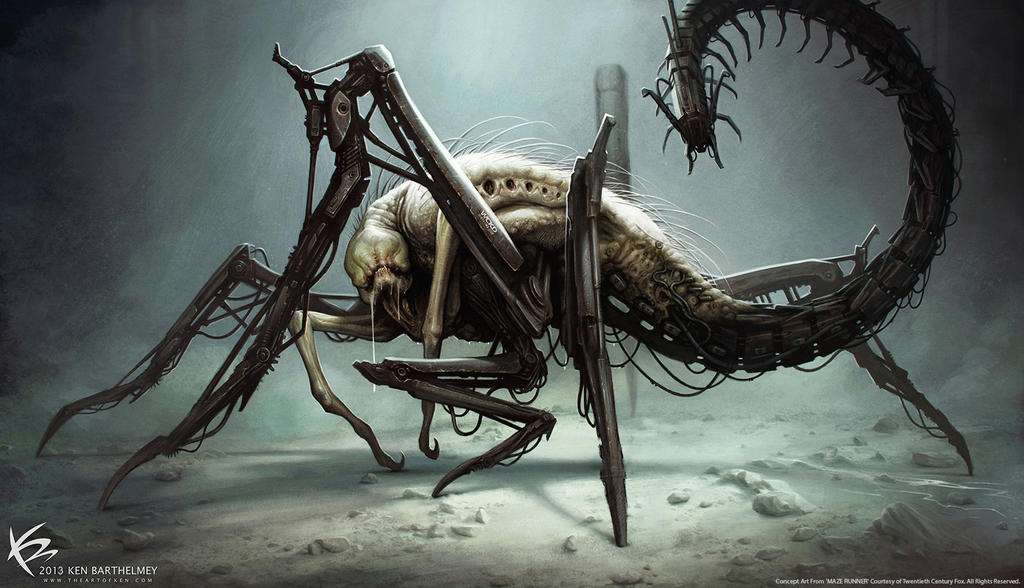
Maze Runner has a perfect example of this. The Griever is a horrid mixture of a scorpion, a spider, and a slug (with massive teeth). A truly terrifying but brilliant design.
And it still looks super unique. How?
This is the answer to the question. We can design something insanely creative by having a mixture of fiction and reality.
The reason you need to base it on reality is that the audience won’t know what to make out of a completely random character.
To make the audience relate and understand your character, while giving it that extra creative spark, is to have a mixture of both. This is the BEST way to creatively design a new character.
TIP: The best rule to follow is to have your design 85% reality-based and 15% fiction (or something completely out of your imagination).
How to Gather References?
Okay, now back to the references. It’s really important to collect them in a proper and organized way.
These are some of the most essential references you’ll need for your project:
- Structure and body of the character (if it is an amalgamation of animals)
- Features, details, etc.
- Environment (if it’s a creature)
- Fashion styles
- Accessories (shoes, bags, jewelry, weapons, tattoos)
- Culture
There are many more factors to consider but these are the basic ones that you should collect to have clarity when you’re designing your character.
TIP: Try to collect at least 5 references for each category but don’t go overboard. You shouldn’t depend too much on references, as they are merely meant to guide your imagination, not dictate it.
Step 3: Ideation
After the initial prep work, it’s finally time to start drawing.
The way to go about designing a good character is to do a bunch of thumbnails.
Thumbnails is the MOST important step of the whole character design process. It frees you up and allows you to channel your creativity.
Also, you can make tons of designs in a relatively short period, since you would be making them on a really small scale. This will allow you to sort out the best ideas which will result in an amazing design.
How To Thumbnail?
The main idea is to make tens (if not hundreds) of rough copies of different designs for the character.
But you don’t really have the time or need to focus on details.
Therefore, it’s vital to make a lot of ROUGH sketches of the character. This way you won’t tire yourself out stressing about the details. It will also free yourself up to look at the bigger picture.
TIP: So remember that thumbnails are meant to look bad. Don’t worry too much about it and just concentrate on pouring your ideas onto the paper.
Now there are obviously different ways of thumbnailing that artists use, but I’ll share my favorite one.
The way to go about this is to use a highlighter. That’s right, a highlighter.
Take any highlighter and start thumbnailing with it. You need to focus on the bigger shapes and block those in.
Try to make interesting silhouettes with them, so that people will instantly be able to recall the character.
TIP: It’s important to forget about filling in the details and freely ideate as much as you can.
Once you’re done with around 20-40 of them, choose the 10 best thumbnails from them.
Take a pen (or pencil) and start drawing over the highlighted work. Again, make sure you draw it quite rough, just enough to understand what the end result might look like.
And that’s it.
Once you’re done with this, choose 2-3 best designs and move on to the next section.
Step 4: Design And Style
This is the refinement process and involves a lot of stages like silhouette design, shape design, and color design.
Here, you need to focus on making your vision clear, and involves a ton of decision-making.
But don’t get stressed. I’ll walk you through the entire process.
TIP: Try designing all 3 of your selected designs with different combinations for each.
Silhouette Design
I had previously mentioned silhouette design during the ideation stage, but what does it really mean?
The silhouette is the outline of a character.
So, basically, silhouette design means shaping the best silhouette for the character that can result in an instant-read.
Why do we need an instant-read for a character though?
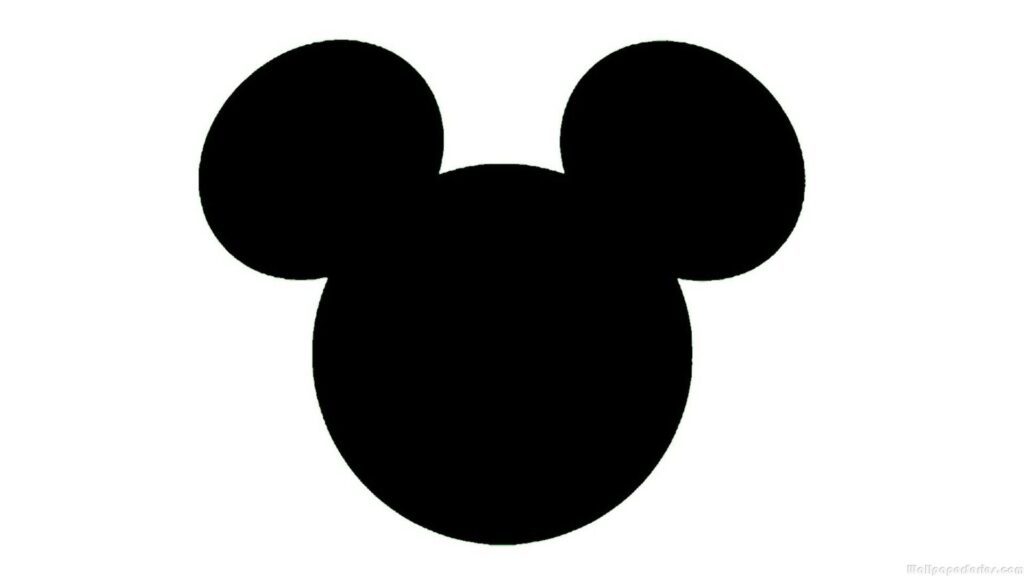
Do you know this character?
I’m sure you do. He’s known literally everywhere and you can instantly recognize the character without even being shown the image.
That’s an example of an amazing silhouette design.
It’s exactly what you should aim to achieve as well.
It’s an extremely powerful way of making the character much more memorable and appealing to a large audience.
Shape Design

After considering the silhouette of the character, you’ll want to think about the shape design.
As you’ve probably heard before, there are three basic shapes:
- Circle
- Square
- Triangle
All of these indicate certain properties and characteristics of the character.
To explain this better, let’s use the example of Mickey Mouse again. What do you see when you look at him?
Circles, right? It’s pretty blatantly obvious.
In fact, you can even see it prominently displayed in the silhouette itself.
Now, just considering the appearance of the character, what conclusion would you make about his personality? Is he cunning, evil, strong, brave, funny or kind?
Even if I had never seen him before, I could have instantly told you that he is a kind and lovable character. But how?
Simply because the shape design conveys a LOT about his personality. It already subconsciously informs the audience about his character traits.
Therefore, shape design is another powerful tool that you NEED to keep in mind while designing your own personal character.
Here are the basic traits associated with each shape:
- Circle= Kind, Friendly, Sweet, Innocent, Bubbly, Empathetic
- Square= Strong, Stable, Reliable, Intelligent, Powerful, Capable
- Triangle= Evil, Mischievous, Cunning, Energetic, Fast, Active
TIP: If you’ve seen literally any animated movies, you would know that the villains normally have triangular and harsh shapes (Jafar, Megamind, Captain Hook, etc.)
But, you’re not restricted to only using one shape for your characters. In fact, it’s crucial to have a combination of the shapes to get more diverse and interesting characters.
For example, combining a triangle with a square will give you a really powerful villain that’s also quite cunning.
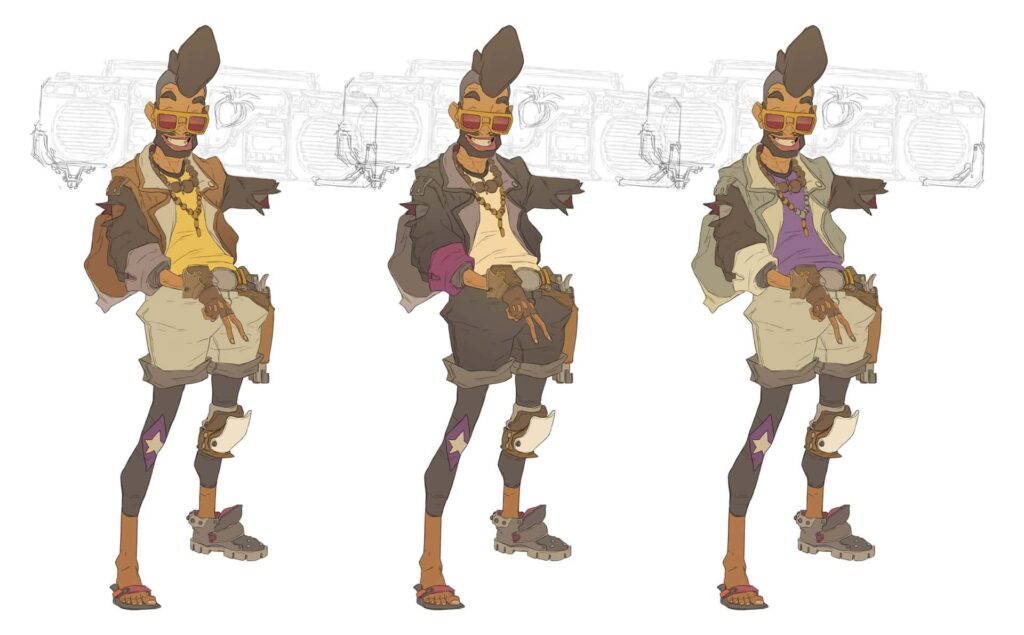
Color Palette
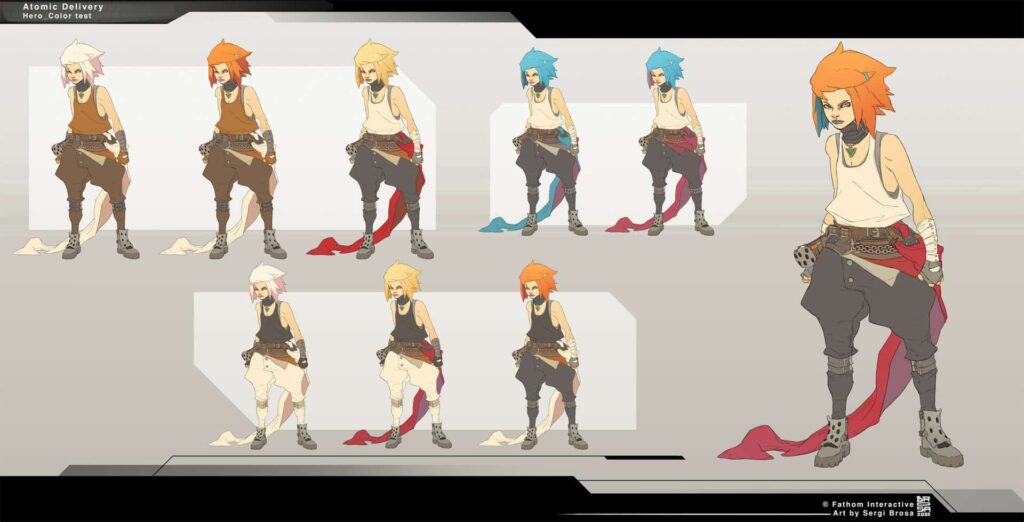
After you’ve finally finished with the structure of the character, it’s finally time to have some fun with colors!
This is my favorite part of the whole process, mostly because I just love finding different combinations of color palettes to use!
Now, the most common mistake beginners make is that they tend to just add in any colors and call it a day. But that’s TOTALLY wrong.
You need to make really informed color decisions.
Beginners tend to overcomplicate the design too much by adding way too many colors. Which makes it super messy and crowded.
The best way is to have a maximum of five colors on a character. That’s it. There is literally NO need for more than that.
TIP: A very good combination to follow is to have a main color in 60% of the design, a complementary color in 30% of the design, and an accent color in just 10% of the design.
Also, I recommend using the accent color (one that pops) in strategic places.
Let’s say the character is a strong man who uses his massive fists to knock out opponents in one blow.
I would purposely add a wristband or some glowing tattoos on his arm and keep those in the accent color.
This will naturally attract the viewer’s eyes to the arms, and they will subconsciously understand that the character uses his fists to fight.
This is exactly how you need to make your design pop out from the rest.
Step 5: Final Details

Once you’re finally done with the design process, and have chosen your favorite design, you can get on with the beautification part.
This is the step where you clean up your lines, modify any mistakes, and just make it good enough to even put it in your art portfolio.
First of all, you need to choose a really good pose for the character.
This pose needs to depict the emotions, the personality, and the general demeanor of the character.
Everything is crucial, from the slant of the character’s shoulders to his posture, his expressions, literally everything.
So, think it through and come up with a pose that conveys all the main aspects of the character at a single glance.
After sketching in the final pose, you’ll need to clean up the lines and do what we call line art. This basically means finalizing your lines and making them ready for the rendering process.
If you don’t know what line art means, then here is a great video to learn much more about the subject.
Lastly, you’ll need to render the character (or you can just leave it as is. It’s completely up to you!).
While I won’t go into the specifics of how to paint a character digitally, here’s a good video you can refer to.
TIP: Also, if you’re completely new to digital painting, click here to learn the exact method to learn digital painting fast!
Other Resources
If you’ve used my process to design your very first character, then congratulations! You’ve taken a few steps towards becoming a great artist, which takes a lot of courage.
Also, just to clarify, if you haven’t found the process to your liking, then there is absolutely NO compulsion to follow it step-by-step.
You can modify it and change the arrangement if that’s what helps you more (however, please don’t change the first two steps. You must follow them in that order).
I HIGHLY recommend to learn the art fundamentals before you go a bit too advanced. After all, how can you do figure 8s without learning how to drive?
So, learn the basics first. I promise you it’s going to have a direct impact on your art.
Here are some more great articles to learn more about art: