How to Learn Figure Drawing in 2024: For Beginner Artists
Disclosure: This article may contain affiliate links. That means if you buy something we get a small commission at no extra cost to you.
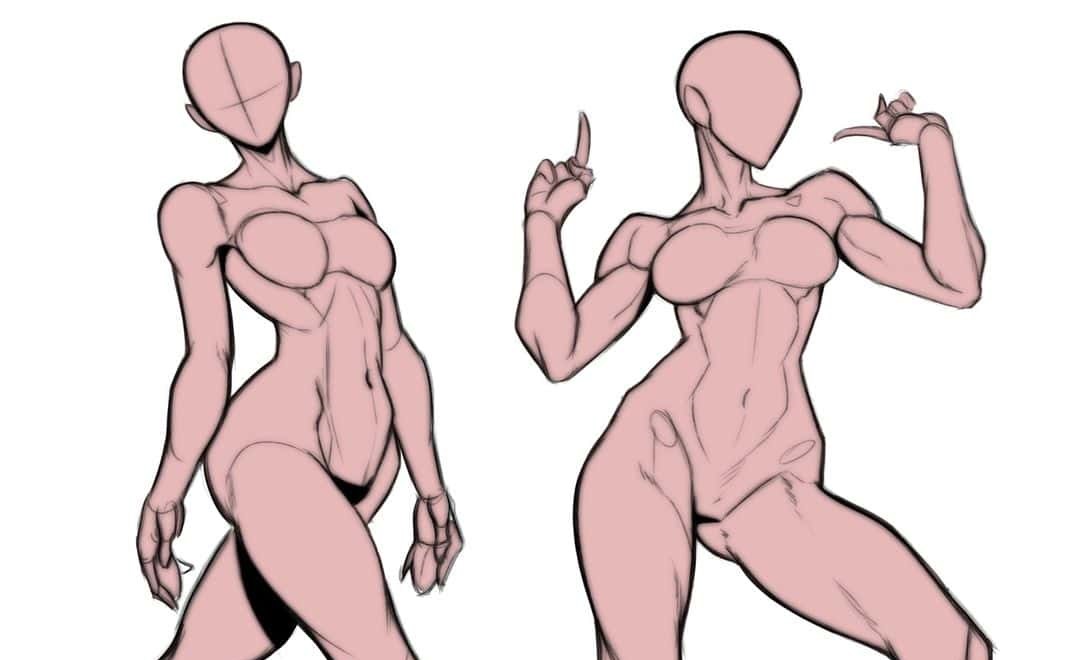
Are you struggling to draw a human? Does it resemble a stick figure more than anything else?
If you’re eager to design your own character, draw epic poses, or even design a fantasy character from Lord of the Rings, then you might want to learn figure drawing.
But, what is figure drawing?
How to Learn Figure Drawing in 2024: For Beginner Artists
What is Figure Drawing?
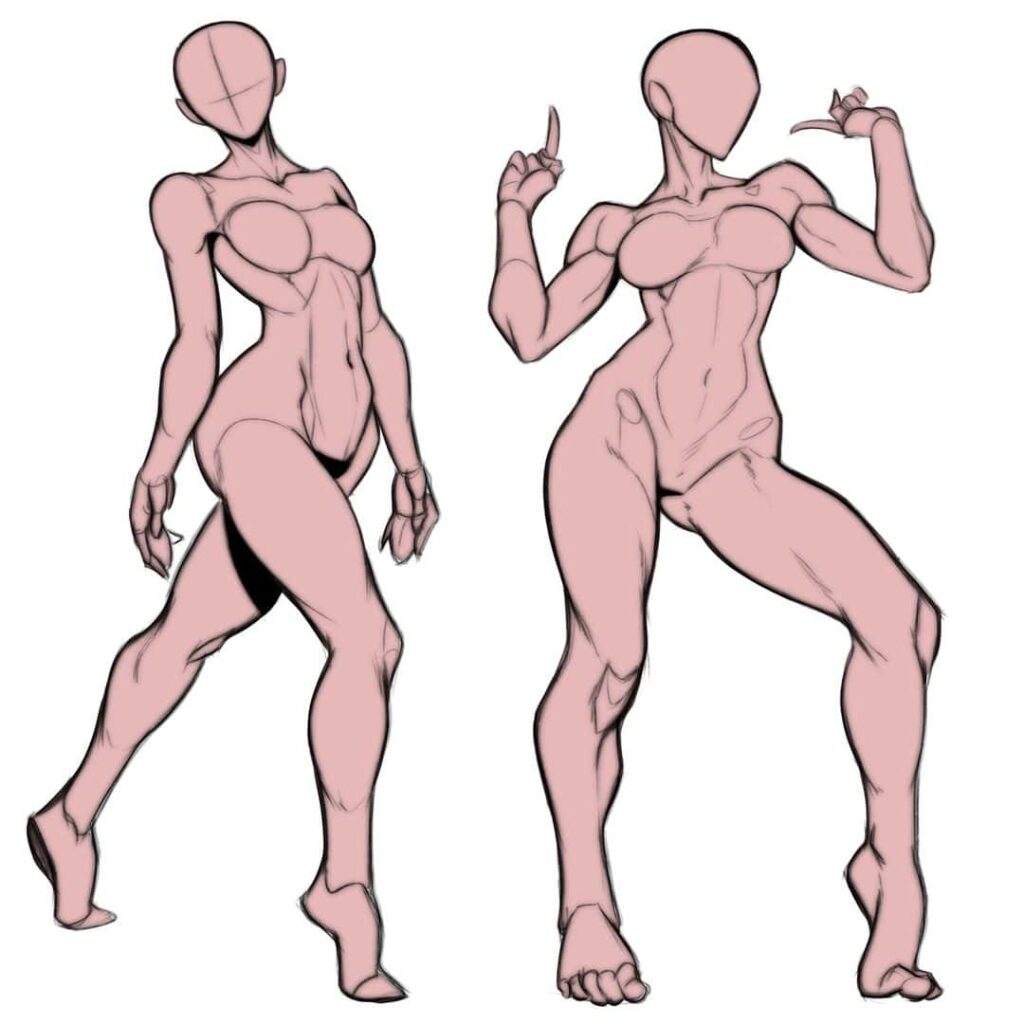
Figure drawing is basically a representation of a human on paper. It means to capture the pose, movement, and posture of the body.
Artists study figure drawing intensively. The reason? It’s because everyone LOVES figures in art.
Isn’t it super fun to design characters, costumes, and even fantasy creatures?
However, learning to draw the human figure is generally regarded as the HARDEST thing to learn in art.
Why? It’s simply because we tend to see humans everywhere. Wherever we go, we see multiple faces, poses and features. We’re so attuned to observing humans, that we can instantly tell when something is a bit off.
That’s why, when you make a tiny mistake while drawing a human figure, it’s instantly noticeable.
Thus, it’s a struggle to get really good at drawing humans.
But, don’t worry. It’s NOT impossible. You can definitely learn this and I’ll show you exactly how.
Why Should I Learn Figure Drawing?
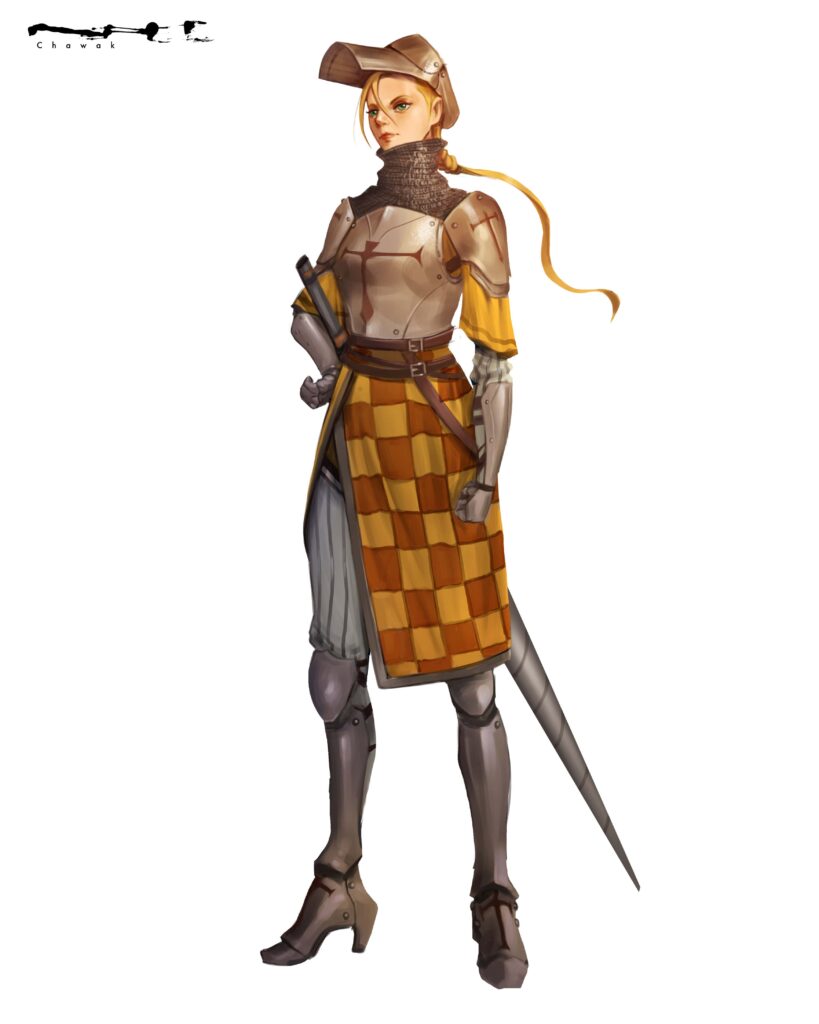
Want to draw orcs, elves, fairies, trolls, or goblins? Would you like to design your own characters? Or would you be interested in drawing your own comic book?
For any of the reasons above, you definitely NEED to learn figure drawing.
TIP: Although surprising, learning figure drawing before drawing orcs and elves is a MUST. This is because the anatomy is very similar and only needs few changes in proportions.
And honestly, if you want to become a professional artist, you have to learn figure drawing. It’s non-negotiable.
Even if you hope to be a 3d modeler or an environment artist you need to at least learn the basics. (if you want to be a character modeler then this isn’t even an option. You have to know figure drawing!)
Also, figure drawing may seem incredibly hard (which it is, lol) but you will learn to love it soon enough.
How to Start Figure Drawing?
Now that you’re ready to start learning to draw the human body, I’ll take you through the step-by-step process of mastering the subject.
While you can definitely learn everything by going to an institute, or a life drawing class, many people don’t have that option.
This is why, I’ve recommended tons of free resources on the internet that are sufficient enough to help you draw the figure.
TIP: If you’d like to purchase any premium resources, I’ve listed them at the end of this post.
So, without further ado, let’s get started with the most fundamental step.
Learning the landmarks and proportions of the body.
1. Landmarks and Proportions
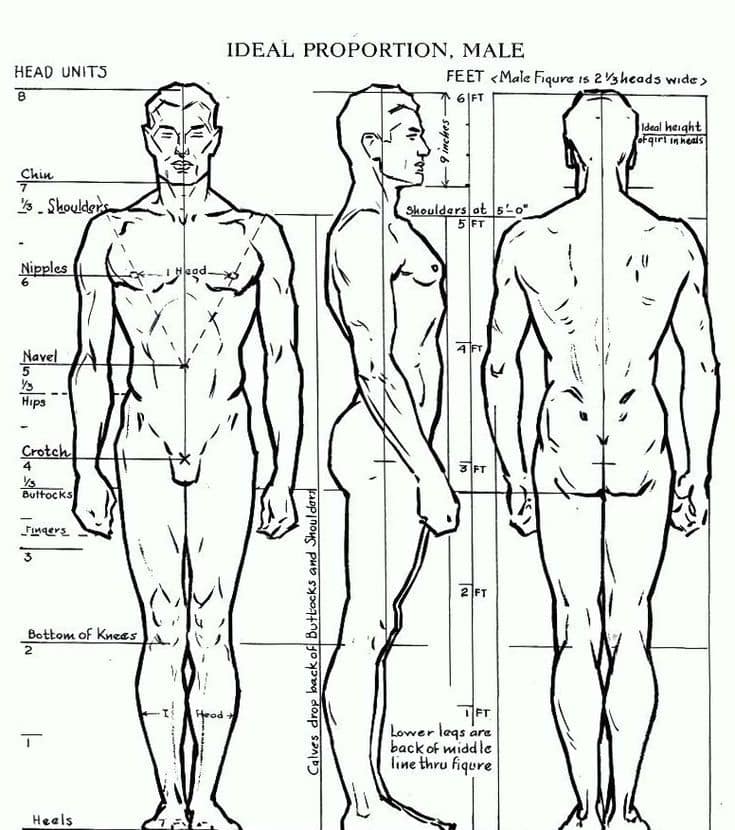
If you’re a complete beginner to figure drawing, then you need to start right here.
Learning the proportions of the body is the very first step. After all, you don’t want to practice drawing extremely wonky proportions, only to be told to learn it all the correct way again.
So, take the time and learn the proportions well. Since you’re going to be drawing the human body in various poses later on, you NEED to be accurate with the proportions so that it doesn’t end up weird.
Landmarks are also a vital step you need to master.
I suggest you learn landmarks along with proportions as they really go hand-in-hand.
While learning the proportions of the body, you’re going to be measuring the height of the body using heads.
TIP: An average male is 7-8 heads tall while an average female is 6.5 heads tall.
Along with this, you need to be marking exactly where the landmarks are located, based on the heads. For example, the belly button of a male is exactly at the 3-head mark on the human body.
Knowing this will help you greatly as you’ll know the exact placement of all the landmarks in different poses.
And later on, you’ll be able to use these instinctive measurements to place muscles on the body as well.
Here is a great video to learn about the landmarks and proportions of the body.
2. Gesture Drawing
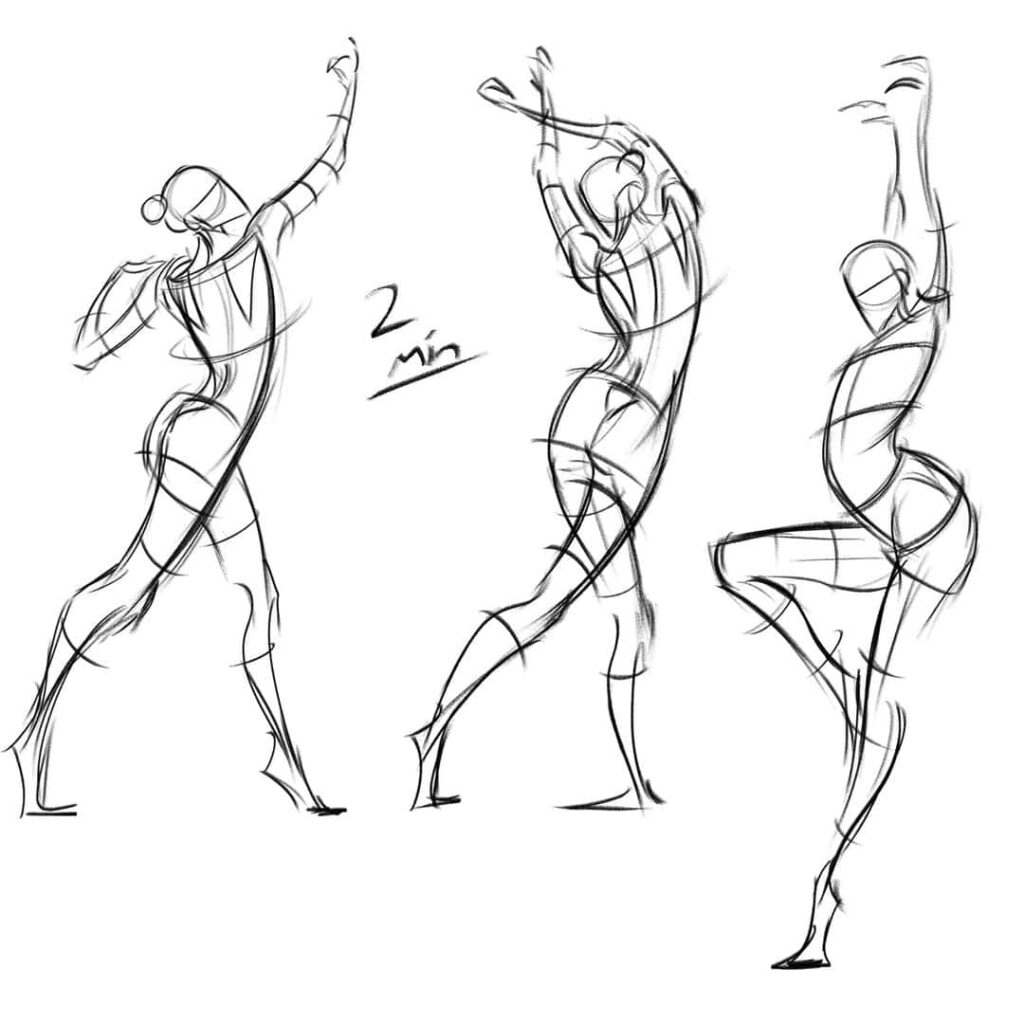
After mastering those basic proportions, the next thing you’ll want to learn is gesture drawing.
What is gesture drawing?
Well, gesture drawing is a bit different from figure drawing. Gesture drawings are studies that you do to capture the rhythm and flow of the body.
Now, while figure drawing also includes capturing the movement of the body, its primary purpose is to make you think about the form and structure of the body.
Gesture drawing, on the other hand, is only intended to make you learn about the flow of the body. You DON’T need to consider all the tiny details of the body.
You just need to capture the essence of the pose.
Also, gesture drawings are meant to force you to draw only a few lines to capture the whole body. The only lines you can use are C, S and I.
Basically, this is a great exercise for you to really think about the dynamism of the body and you needn’t be bogged down by unnecessary lines.
TIP: While gesture drawing may look like the easiest thing ever, it’s actually the reverse. You need to think VERY carefully about the marks you’re putting down on paper. So, don’t be fooled. This is extremely hard to pull off.
Check out this video for a full tutorial on gesture drawing.
Practice, Practice, and Practice
While I HIGHLY recommend going to a life drawing class to practice gesture drawing, you may not have that option available to you depending on where you live.
Thus, I recommend you draw people around you at home, at college, at work, or even on the bus, train, etc.
In case you don’t like drawing people who constantly move, I suggest you try a gesture drawing site.
They basically mimic life drawing classes and all you need is a phone/laptop with an internet connection and you’re good to go!
You can sit in the comfort of your house and do tons of gesture studies with these sites.
Check out my post on the BEST gesture drawing sites.
3. Understand Forms
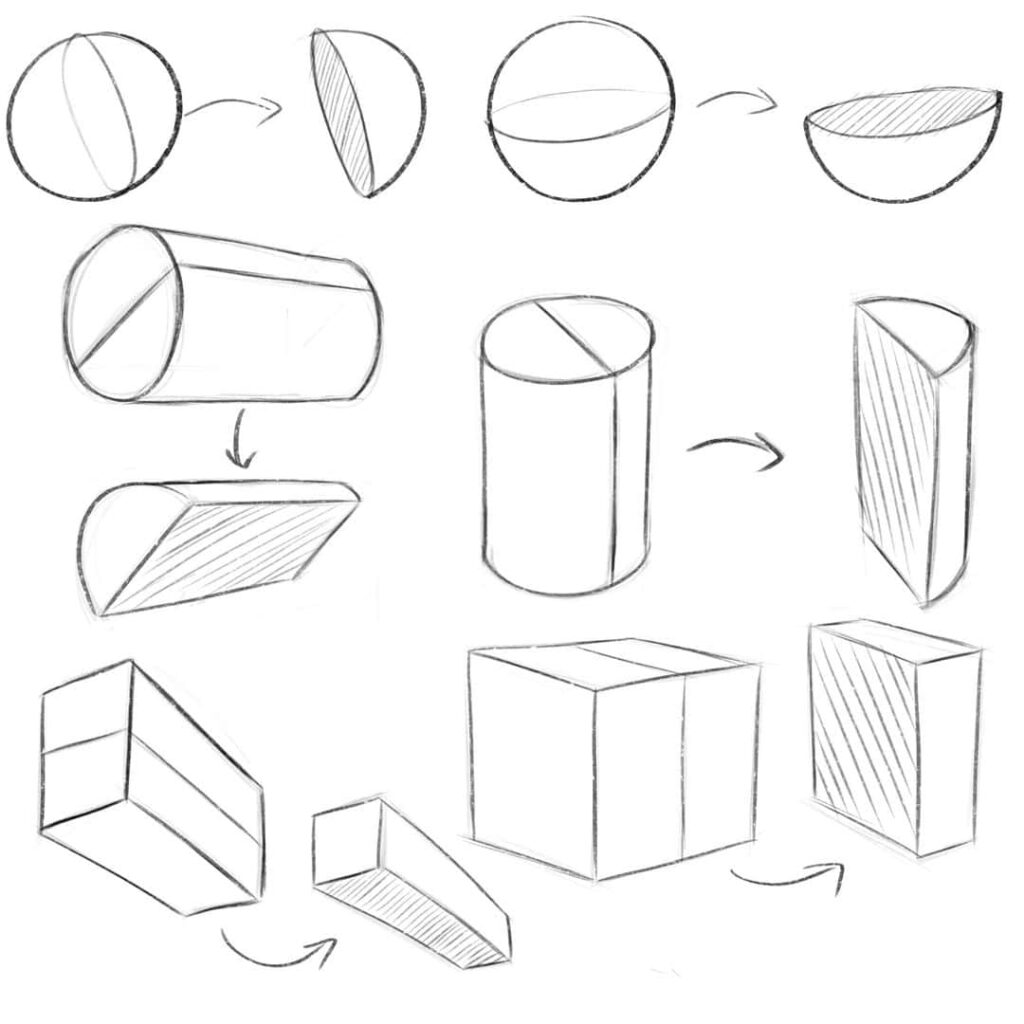
Once you’ve sufficiently practiced gesture drawing as well as thoroughly understood the landmarks and proportions of the body, you need to start learning about forms.
Although this may seem like a completely unrelated section of figure drawing, it’s SUPER important.
Learning about form and structure basically means learning about basic 3d forms like cubes and cylinders.
Now, you may be thinking, ‘Why do I have to learn this?’
Think about it.
Isn’t the head of the body basically like a box? Can’t we simplify the torso and the pelvis of the body to a box? Aren’t the arms and legs basically large cylinders?
But why simplify them?
The answer is simple. Isn’t learning to draw the different angles of a box easier than doing the same with something complex like the head?
If you want to draw literally ANY pose with ease, then you would have to learn how the body appears in different angles.
The best way to do this is to first SIMPLIFY, then add details. Blocking out the shapes with basic boxes is a vital step.
So, I HIGHLY suggest you learn the basic forms of the body. It will help you IMMENSELY in the future and your drawings will improve drastically.
Here are some fantastic videos on this subject:
4. Learn Basic Anatomy
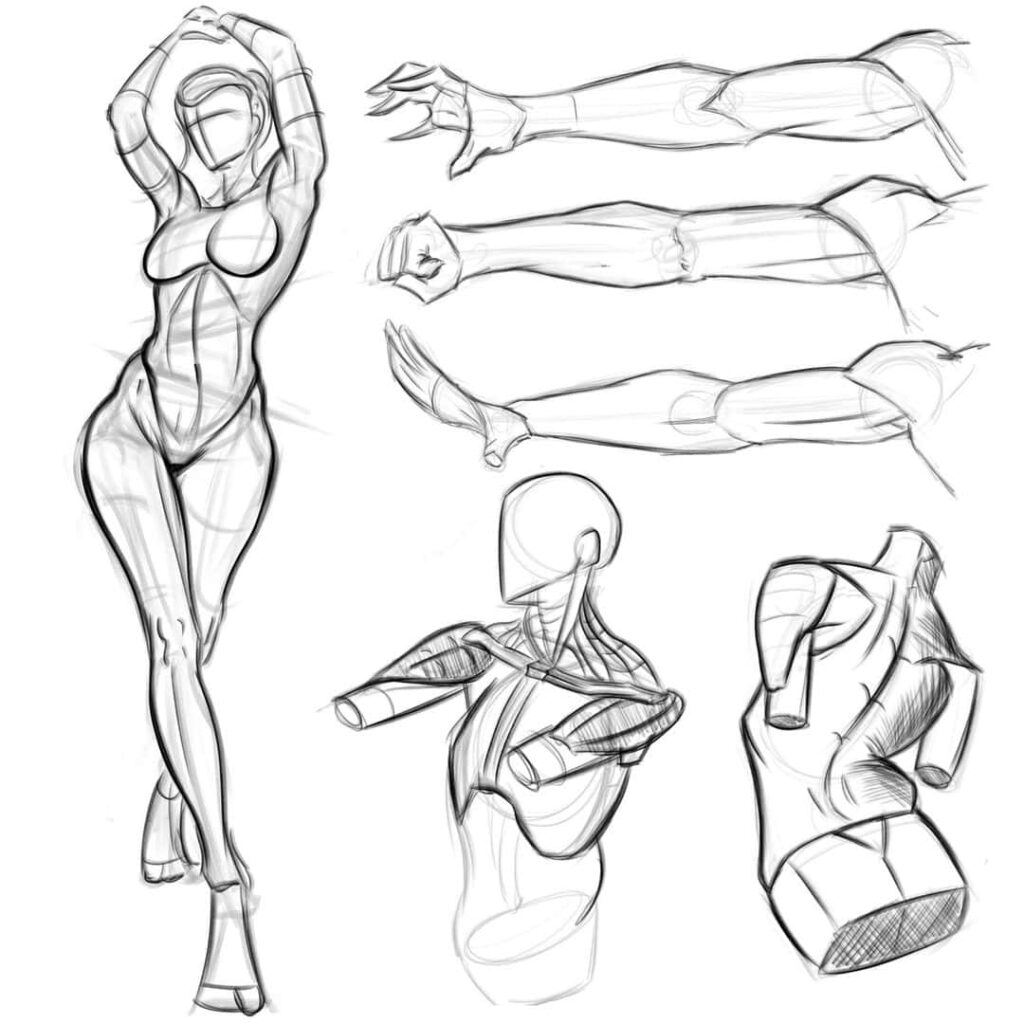
Although this is a post on figure drawing, you’ll still need to know the basics of anatomy to draw a believable character.
Now, you don’t need to know tons of fancy nomenclature like extensor digitorum minimi and thenar eminence.
All you need to know are the major muscles and bones of the body. Basically, all the ones that are subcutaneous (which means the muscles that affect the appearance of the body).
These videos will teach you all the anatomy you need to know.
Remember to first simplify the main structures of the body into simple forms and only THEN add in the anatomy details.
5. Master Foreshortening
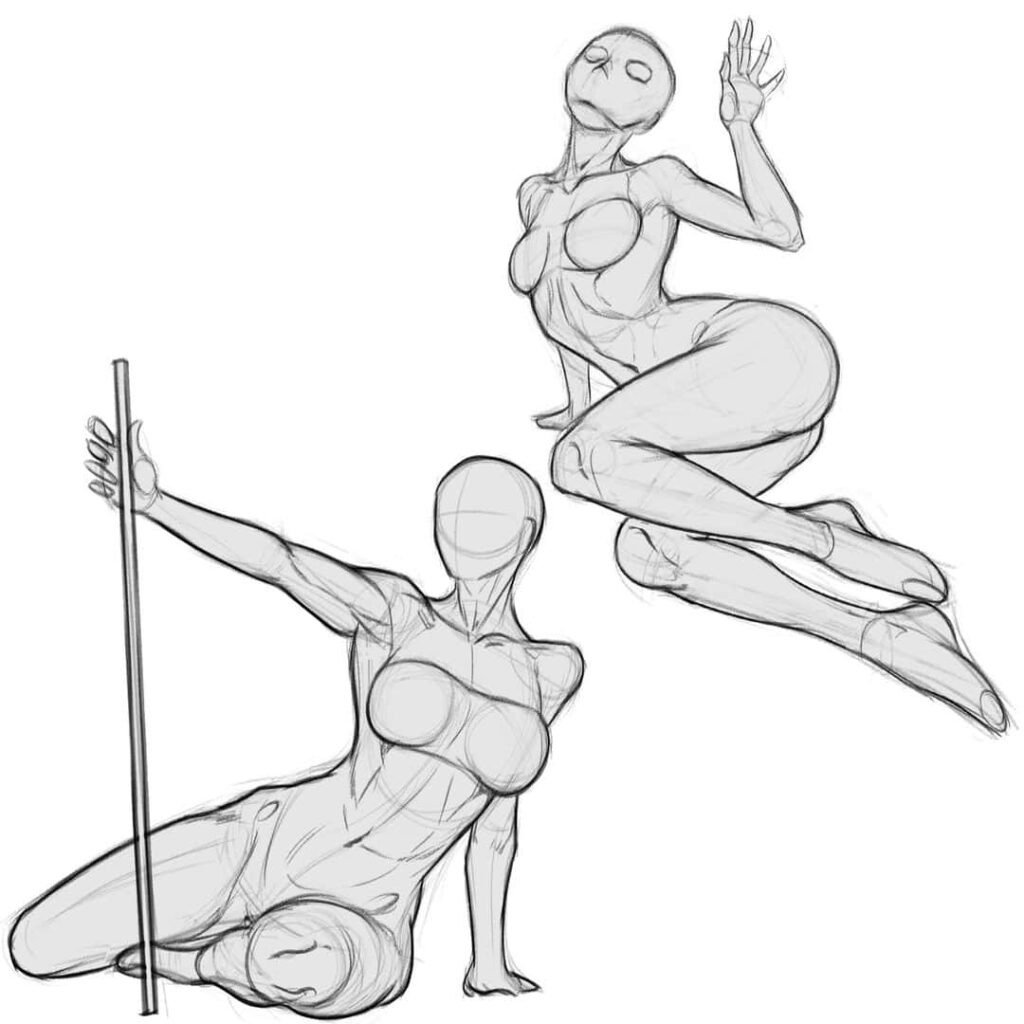
Foreshortening is a heavy topic and one that takes quite a bit of practice to get right.
To understand foreshortening, you’ll need to do a simple exercise.
Hold out both your hands in front of you. Place one hand further away from you than the other hand. Which hand looks bigger?
Yep, you’re right. It’s the one closest to you. This is VERY important while drawing figures.
For example, if you’re drawing a Spiderman pose, with one leg sticking out towards you, you need to make that leg bigger in size than the one further away from you.
Doing this will make your drawings more grounded and based on reality as this is actually how we view people and objects around us.
Therefore, learn foreshortening and you’ll be able to draw epic scenes with ease.
TIP: Have you ever seen any of Kim Jung Gi’s artwork. He never fails to utilize foreshortening in his illustrations.
Some videos on this subject are:
6. Drawing The Head
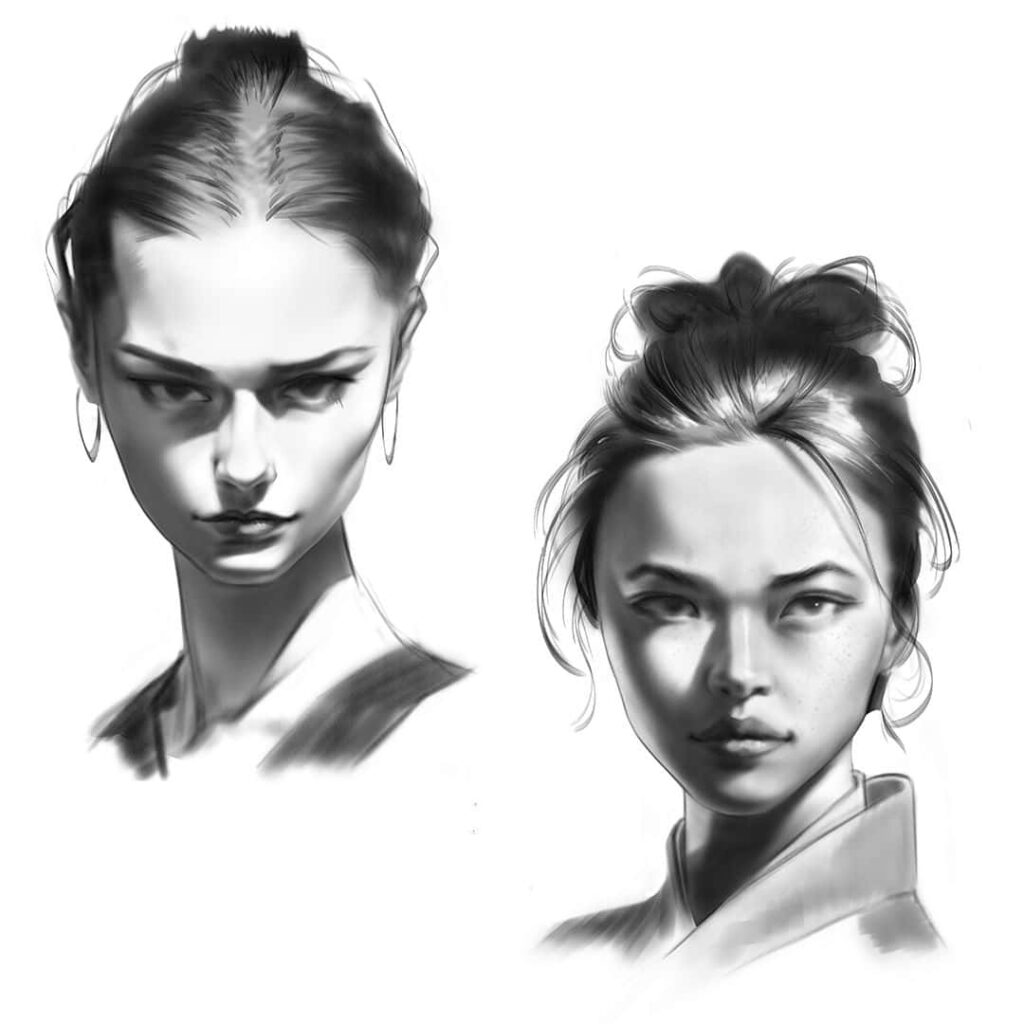
First of all, I want to clarify that drawing the human head is not as easy as simply copying what you see.
The reason is we’ve seen peoples’ faces since the minute we were born. We are surrounded by humans ALL the time and we tend to look at the face the longest.
Thus drawing the head is actually MUCH more difficult than drawing the human body.
Also, it’s NOT as easy as just drawing two eyes, a nose, and a mouth on a face. No, you have to know the planes of the head too.
The face is not a flat sheet and has multiple planes to it. Therefore, learning the head is complicated and is another vast subject unto itself.
So, I recommend you draw a basic Loomis head while studying figure drawing. You don’t need to detail the features as the focus is only on the body.
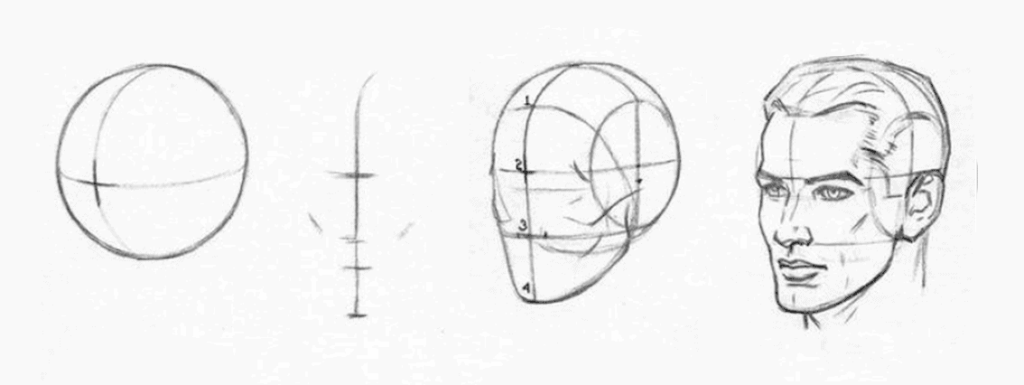
TIP: A Loomis head is a basic sphere cut on two sides and extended from the front. It is easy and convenient to indicate the head.
However, if you really wish to draw the head accurately, then here are some videos to get you started.
Remember to be patient if you can’t draw the head well straight off the bat. It is THE most difficult subject in the field of art.
Practicing Regularly
Although learning is important, practicing what you’ve learned is even more crucial. You need to constantly make mistakes to understand how to improve further.
To do that, you just need tons of practice.
The 6 steps I’ve mentioned are perfect for you to learn figure drawing in the best way. However, you need to start practicing from the very first step too.
Thus, remember that you have to practice on your own alongside your studies.
TIP: A good thumb of rule is to follow the 1:1 ratio. If you spend 2 hours learning something new, then spend another 2 hours experimenting with what you’ve learned by yourself.
But how to practice?
There are several different ways and I’ll explain them right now.
Draw From Life
The first (and the BEST) way to practice is by drawing straight from life.
Basically, just draw everyone you see around you. Doesn’t matter if you’re chilling at home, commuting to work, or even sipping coffee at a cafe.
TIP: Try to keep a small and portable sketchbook with you that you can use to capture quick gestures of other people.
The issue most beginners face is that people tend to move frequently and the pose you may have started drawing is long gone.
But, don’t stress over it. Just draw the gestures and then add the form and mass to it later on. Or you can choose to draw people sitting or working. They tend to maintain the same position for quite a while.
Also, you can attend life drawing classes. Here you wouldn’t have to worry about your model moving and can peacefully focus on figure drawing.
Gesture Drawing Sites

If you’re not ready to draw from life yet, then you can try using gesture drawing sites.
These are literally AWESOME as you can set your own preferences for the models. You can also modify a ton of settings, including the timing options.
These are some of the best gesture drawing sites:
To read more about gesture drawing sites and its various cool features, you can click here.
Master Studies
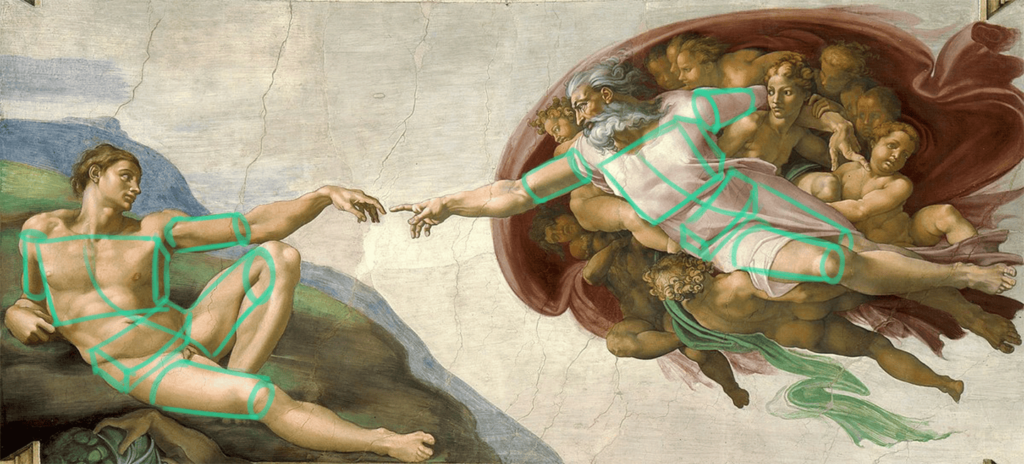
One brilliant way to learn more about figure drawing is by doing various master studies.
You would basically be studying the old master’s work and tracing them to understand how they drew human figures.
TIP: Tracing here is ALLOWED as you’re trying to study their method of drawing the figure and understanding how to do the same.
All you have to do is take a printout of an artwork and draw over it (or draw over the image layer in Photoshop).
I want you to break down the figures in the references into simple forms that you can replicate. Then try drawing the entire figure by understanding the angle of the observer and studying the pose carefully.
Doing these studies is going to make you understand other experienced artists’ methods and tricks.
Additional Resources For Figure Drawing
Although I’ve recommended a ton of brilliant free resources that will totally be enough for a beginner, it’s always super helpful to learn using a bit more premium resources.
Figure drawing books can help you out a lot. With extremely experienced professional artists teaching you the entire subject matter, I can’t see how you would go wrong there.
Some awesome figure drawing books you NEED to check out are:
But, if you absolutely detest the idea of learning from books then you need to check out Proko. They have a free playlist on YouTube that will teach you a TON of fundamental concepts.
Their premium content is also worth taking a look at. The quality is simply amazing as Stan Prokopenko (the founder), will teach you about the entire figure with lots of cliche jokes that will leave you thoroughly entertained.
Also, if you’d like to learn more about anatomy, you can read Human Anatomy for Artists by Eliot Goldfinger.
Conclusion
By now I hope you’ve understood exactly how to learn figure drawing.
Remember to spend time learning proportions and gesture drawing before diving into form, anatomy, and foreshortening.
Although figure drawing may leave you SUPER frustrated at times, just shake it off and keep going. I promise that your drawing is 100% going to improve if you just keep at it.
Now good luck and have fun exploring your art journey!
